
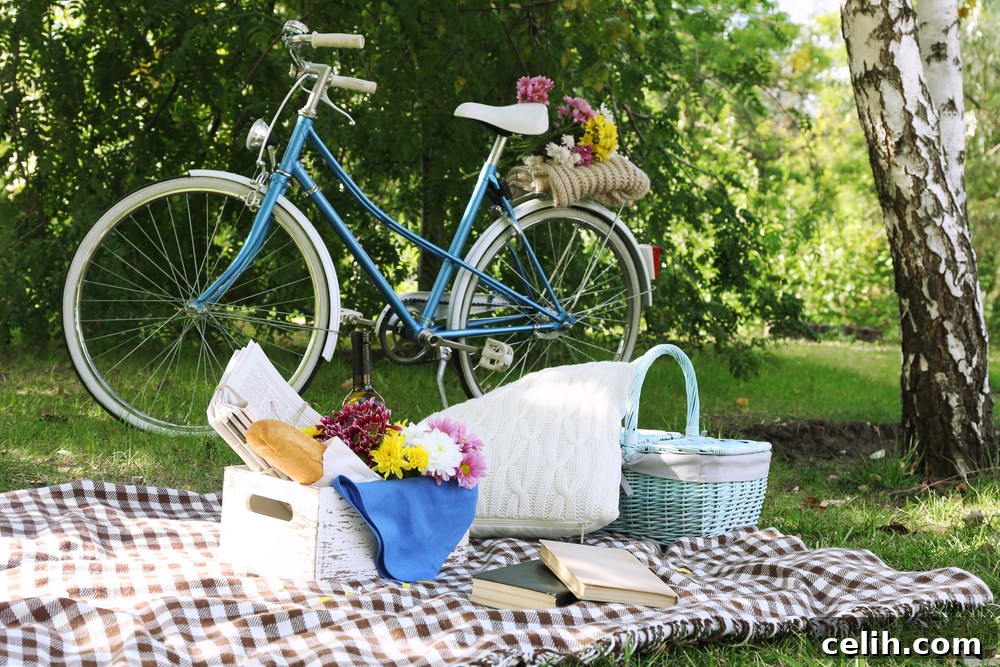
Summer traditionally conjures images of sun-drenched picnics and delightful alfresco dining. Yet, for many, especially those residing in regions like the British Isles, the weather can be notoriously unpredictable. A planned outdoor feast can quickly turn into a chilly affair, even in the height of summer. But don’t let a dip in temperature dampen your spirits or your picnic plans! With a little foresight and the right warm food options, you can transform any outdoor gathering into a cozy and memorable experience, regardless of what the skies decide.
Embracing the charm of year-round picnicking means being prepared for all eventualities. If you’re an avid outdoor diner who refuses to be deterred by a bit of a breeze or a sudden shower, then incorporating hot food into your picnic spread is a game-changer. Not only do these comforting dishes provide a welcome warmth for your guests, but they also elevate the entire picnic experience, making it feel extra special and luxurious. Here, we unveil our top suggestions for delicious, easy-to-prepare, and most importantly, warming picnic foods that are perfect for those cooler days.
Comforting Hot Chicken Pasties: A Picnic Essential
There’s an undeniable charm and satisfaction that comes with biting into a homemade pasty. These handheld pockets of deliciousness are not only incredibly satisfying but also exceptionally practical for picnics. Their self-contained nature makes them easy to transport and eat without needing extra cutlery, while their rich, savory filling holds warmth for an impressive amount of time. Here’s how to create your own batch of warming chicken pasties that will be the star of your next outdoor adventure.
Ingredients for Four Savory Pasties:
- 1 sheet of ready-rolled shortcrust pastry (look for a good quality all-butter variety for the best flavor)
- 60g unsalted butter
- 60g all-purpose flour
- 300ml whole milk
- 100g Stilton or another strong blue cheese, crumbled (or a mature cheddar for a milder flavor)
- 1 medium onion, finely chopped
- 60g fresh mushrooms, thinly sliced
- 100g cooked chicken or turkey, shredded or diced (leftover roast chicken works wonderfully)
- Salt and freshly ground black pepper to taste
- 1 egg, beaten (for an egg wash, optional, but gives a beautiful golden sheen)
Preparation Method:
- Preheat and Prepare: Begin by preheating your oven to a comfortable 200°C (180°C fan/Gas Mark 6). This ensures your pasties bake evenly and achieve that coveted golden crust.
- Sauté the Aromatics: In a medium-sized pan over a moderate heat, melt a small knob of butter or a splash of olive oil. Add the finely chopped onion and sauté gently until it turns soft and translucent, acquiring a beautiful golden hue. This step brings out the natural sweetness of the onion, forming a flavorful base.
- Add the Mushrooms: Wash and thinly slice your mushrooms. Introduce them to the pan with the onions and cook for another two to three minutes until they soften slightly and release their moisture. Remove the cooked onion and mushroom mixture from the pan and set it aside in a bowl.
- Craft the Sauce (Roux): Using the same pan, melt the remaining 60g of butter over a low heat. Once melted, stir in the 60g of flour. Cook this butter-flour paste, known as a roux, for one to two minutes, stirring continuously. This cooks out the raw flour taste, which is crucial for a smooth sauce.
- Create the Velvety Filling: Gradually pour in the 300ml of milk, whisking constantly to prevent lumps from forming. Continue to stir over a low heat until the sauce thickens to a smooth, creamy consistency. Season generously with salt and pepper.
- Combine the Filling Ingredients: Now, reintroduce the sautéed onions and mushrooms into the creamy sauce. Add the crumbled Stilton (or your chosen cheese) and the shredded cooked chicken or turkey. Stir all the ingredients together thoroughly until the cheese has completely melted, creating a rich, cohesive, and incredibly flavorful filling. Remove from heat and allow to cool slightly.
- Form the Pasties: Unroll your sheet of ready-rolled shortcrust pastry. Using a saucer or a 15-18cm round cutter as a guide, cut out four large circles from the pastry.
- Fill and Seal: Spoon a generous amount of the cooled filling onto one half of each pastry circle, ensuring you leave a clear border around the edge. Be mindful not to overfill, as this can lead to oozing during baking – a common pitfall! Fold the other half of the pastry over the filling to create a semi-circle. Firmly crimp the edges together with your fingers or the tines of a fork to create a secure seal.
- Vent for Steam: Using a sharp knife, make a small slit (or two) in the top of each pasty. This allows steam to escape during baking, preventing the pasties from bursting and ensuring a beautifully flaky crust.
- Bake to Golden Perfection: Place the pasties on a baking tray lined with parchment paper. If desired, brush the tops with a beaten egg for a beautiful golden-brown finish. Bake for approximately twenty to twenty-five minutes, or until the pastry is puffed up and gorgeously golden.
- Transporting for Warmth: As soon as they come out of the oven, while still hot, carefully wrap each pasty individually in aluminium foil. Then, wrap these foil-covered pasties together in a couple of clean, thick tea towels. Place them immediately into a thermal cool bag or an insulated picnic basket. This multi-layered insulation will help them retain their heat for an hour or more, ensuring a perfectly warm and comforting bite at your picnic spot.
Hearty Baked Potatoes: The Ultimate Picnic Companion
Baked potatoes are a wonderfully versatile and incredibly warming picnic standby. Not only are they substantial and satisfying on their own, but they also serve a dual purpose: their retained heat helps to keep other items in your picnic basket warm. Simple to prepare and infinitely customizable, they are a must-have for any cool-weather outdoor meal. For basic baked potatoes, simply bake them until fluffy inside and crispy outside, then wrap them individually in aluminium foil and pack them as described for the pasties. This will keep them wonderfully hot for an extended period.
Elevating Your Baked Potatoes: Twice-Baked Delights
To transform your baked potatoes into a truly show-stopping main meal, consider making them “twice-baked” – a method that elevates a simple potato to a gourmet experience. This involves scooping out the fluffy interior and mixing it with a range of delicious fillings, then re-baking them for an extra layer of flavor and texture.
Method for Twice-Baked Potatoes:
- Prepare the Potatoes: Start by baking large potatoes (Russets or King Edwards work best for their fluffy texture) until they are completely soft and cooked through. A common method is to prick them all over with a fork, rub with a little oil and salt, then bake at 200°C (180°C fan/Gas Mark 6) for 60-90 minutes, depending on size.
- Scoop and Mix: Once baked, carefully slice each potato in half lengthwise. Using a spoon, gently scoop out the soft potato flesh into a bowl, being careful not to break the skin, as this will be your “boat.”
- Add Your Filling: Now for the fun part – mixing your filling! Combine the scooped-out potato flesh with generous amounts of cooked, chopped bacon for a smoky crunch. Other fantastic additions include:
- Shredded cheese (cheddar, mozzarella, or a blend)
- Chopped chives or spring onions for a fresh, oniony bite
- A dollop of sour cream or crème fraîche for creaminess
- Sautéed mushrooms and onions for an earthy flavor
- A spoonful of homemade chili con carne for a hearty meal
- Sweetcorn and peppers for a vibrant, fresh twist
Mash everything together until well combined and seasoned to your liking.
- Refill and Top: Spoon the flavorful potato mixture back into the hollowed-out potato skins, mounding it slightly. Top with an extra sprinkling of cheese for a golden, bubbly crust.
- Second Bake: Return the filled potato halves to the oven for approximately 15-20 minutes, or until the cheese is melted and golden, and the filling is thoroughly heated through.
- Pack for Warmth: Once they emerge from the oven, immediately wrap each twice-baked potato securely in aluminium foil. Then, stack them together and wrap in several layers of thick tea towels or an insulated blanket. Place them in a thermal bag or a well-insulated picnic basket. They will act as natural heat packs for other foods while staying perfectly warm themselves, ready to be enjoyed when you reach your destination.
Aromatic Garlic Bread: The Perfect Warming Side
Garlic bread is a universal crowd-pleaser and a fantastic addition to any picnic, especially when the weather is less than glorious. Its warm, aromatic scent and crispy, buttery texture can instantly uplift a simple salad or complement a hearty main course. Making your own garlic bread for a picnic is surprisingly simple and ensures a superior, fresh flavor compared to pre-packaged options. Here’s how to create perfectly portable and warm garlic bread that will be devoured quickly.
Ingredients for Irresistible Garlic Bread:
- 50g unsalted butter, softened to room temperature
- 1 tablespoon of fresh chives, finely chopped
- 1 tablespoon of fresh parsley, finely chopped (flat-leaf or curly works well)
- 2-3 cloves of garlic, peeled and very finely minced or crushed (adjust to your garlic preference!)
- 1 fresh baguette (shop-bought is perfectly fine, or homemade if you’re feeling ambitious)
- A pinch of salt and freshly ground black pepper (optional)
Preparation Method:
- Prepare the Garlic Butter: In a small bowl, combine the softened butter with the finely chopped chives, parsley, and minced garlic. Use a fork to mash everything together thoroughly until all ingredients are evenly distributed and the butter is fragrant. This ensures every bite is packed with herby garlic goodness. If you like, a tiny pinch of salt can be added to enhance the flavors.
- Slice the Baguette: Take your baguette and, using a serrated knife, cut it into thick, generous slices. Be careful not to cut all the way through the bottom crust; you want the slices to remain attached at the base, keeping the loaf intact. This ‘accordion’ style makes it easy to butter and then reassemble.
- Butter Each Slice: Generously spread a good dollop of your homemade garlic butter onto one side of each baguette slice. Ensure every nook and cranny is coated for maximum flavor and moisture.
- Reassemble and Wrap: Once all slices are buttered, gently push the baguette back together into its original shape. This helps to lock in the moisture and flavor. Carefully wrap the entire buttered loaf tightly in aluminium foil.
- Bake and Insulate: Preheat your oven to 180°C (160°C fan/Gas Mark 4). Place the foil-wrapped baguette directly on the oven rack and bake for approximately five to seven minutes. The goal is to warm the bread through and melt the butter, infusing it with flavor without letting it become overly crispy (which can happen later if exposed to air too long).
- Transporting for Warmth: As soon as the garlic bread comes out of the oven, do not unwrap it. Instead, carefully remove it and immediately wrap the foil-covered loaf in several layers of clean, thick tea towels or an insulated blanket. Place it into your thermal picnic bag or basket. The multiple layers of insulation will keep the garlic bread warm, soft, and fragrant for a considerable time, ready to be unwrapped and shared at your picnic spot, bringing a smile to everyone’s face.
Sweet Endings: Warm Puddings for a Chilly Picnic
No picnic is truly complete without a sweet treat to finish, and on a cooler day, a warm dessert can be an absolute revelation. While cakes and brownies are picnic staples, taking along a hot sauce to accompany them truly elevates the experience, transforming a simple dessert into a comforting indulgence. Imagine a slice of homemade apple cake drizzled with rich, warm butterscotch sauce, or a gooey chocolate brownie made even more decadent with a pour of velvety hot chocolate sauce. The secret to keeping these sauces perfectly warm until dessert time is a reliable Thermos flask.
Homemade Butterscotch Sauce:
This rich, golden sauce is incredibly simple to make and pairs beautifully with apple cake, pear and almond tart, or even just spooned over fresh fruit.
Ingredients:
- 50g unsalted butter
- 175g light brown sugar (muscovado or demerara also work well for deeper flavor)
- 248ml carton of double cream (heavy cream)
- A pinch of sea salt (optional, but enhances the flavor)
Method:
- In a small saucepan, melt the butter over a medium-low heat.
- Once melted, add the light brown sugar. Stir constantly until the sugar has completely dissolved into the butter, creating a shimmering, caramel-like mixture. Let this simmer gently for about 30 seconds.
- Bring the pan to a gentle boil, then carefully stir in the double cream. Continue to stir as the sauce returns to a boil, and let it simmer for another 2-3 minutes, stirring occasionally, until it thickens slightly and becomes beautifully smooth and glossy. A pinch of sea salt can be added at this stage to balance the sweetness.
- Remove from heat. While still hot, carefully pour the butterscotch sauce into a pre-warmed Thermos flask. Seal tightly.
Decadent Hot Chocolate Sauce:
This luscious chocolate sauce is perfect for chocolate brownies, vanilla ice cream (if you have a way to keep it chilled!), or even dipping fruit skewers.
Ingredients:
- 50g unsalted butter
- 50g golden syrup (or light corn syrup)
- 50g good quality cocoa powder, sieved (this prevents lumps)
- 50ml milk or cream (optional, for a thinner sauce)
Method:
- In a small saucepan, combine the butter, golden syrup, and sieved cocoa powder.
- Place the pan over a very low heat. Stir continuously until the butter has melted and all the ingredients are thoroughly combined into a smooth, thick, and glossy chocolate sauce. Be careful not to let it burn. If you prefer a slightly thinner sauce, stir in 50ml of milk or cream and continue heating gently until combined.
- Once ready, carefully transfer the hot chocolate sauce into a pre-warmed Thermos flask. Seal it tightly to preserve its warmth until it’s time for dessert.
With these warm sauces, your picnic puddings will offer a delightful contrast to the cool outdoor air, providing that extra layer of comfort and indulgence.
Top Tips for a Delightful Cool-Weather Picnic
Planning a picnic when the weather isn’t guaranteed sunshine requires a few extra considerations to ensure everyone stays warm, comfortable, and happy. Here are some essential tips to master the art of the cool-weather picnic:
- Layer Up the Blankets: Don’t just bring one picnic blanket to sit on. Pack at least two or three. Extra blankets can be invaluable for draping over laps, shoulders, or backs to ward off chilly draughts. A waterproof-backed blanket is also a wise choice to protect against damp ground.
- Portable Heat Sources: A small portable or disposable barbecue isn’t just for grilling; it can be incredibly useful for quickly reheating certain items or even toasting marshmallows for a treat. Just remember to check if barbecues are permitted in your chosen picnic spot and always prioritize safety.
- Hot Drinks are Essential: Pack plenty of Thermos flasks filled with piping hot beverages. Hot tea, coffee, or even mulled apple juice are excellent choices, but hot chocolate is the undisputed champion for cheering up any chilly situation. The warmth from the flask itself can also help keep other items in your basket slightly warmer.
- Mind Your Seating: Grass can be damp and cold, even if it looks dry. Always take along something insulating to sit on. This could be individual foldable picnic chairs, waterproof ground sheets, or even thick camping mats. A raised seat can make a significant difference to comfort levels.
- Pack Smart for Warmth: Beyond just wrapping individual hot food items in foil and tea towels, consider using a dedicated insulated picnic basket or bag. Placing a hot water bottle (wrapped in a cloth) at the bottom of the basket can also act as a long-lasting heat source for all your food.
- Wear Appropriate Attire: Advise your picnic companions to dress in layers. Hats, gloves, and scarves might sound excessive for summer, but they can be lifesavers on a breezy day. Waterproof jackets are also a sensible precaution.
- Wind Shelter: If possible, choose a picnic spot that offers some natural shelter from the wind, such as near a hedgerow, a wall, or a cluster of trees. A small pop-up windbreak can also be a fantastic investment for creating a cozier microclimate.
- Entertainment Options: On a colder day, people might be less inclined to run around. Bring along some games, cards, or a good book to keep everyone entertained and engaged.
- Rubbish Bags: Always remember to leave no trace. Pack plenty of rubbish bags to take all your waste home, including any barbecue ashes or food scraps.
By keeping these tips in mind and embracing the joy of warm, comforting food, your cool-weather picnic will be an unforgettable and thoroughly enjoyable occasion, proving that outdoor dining isn’t just for sunny days.
Pin it for Later!
Featured image credit: Shutterstock