
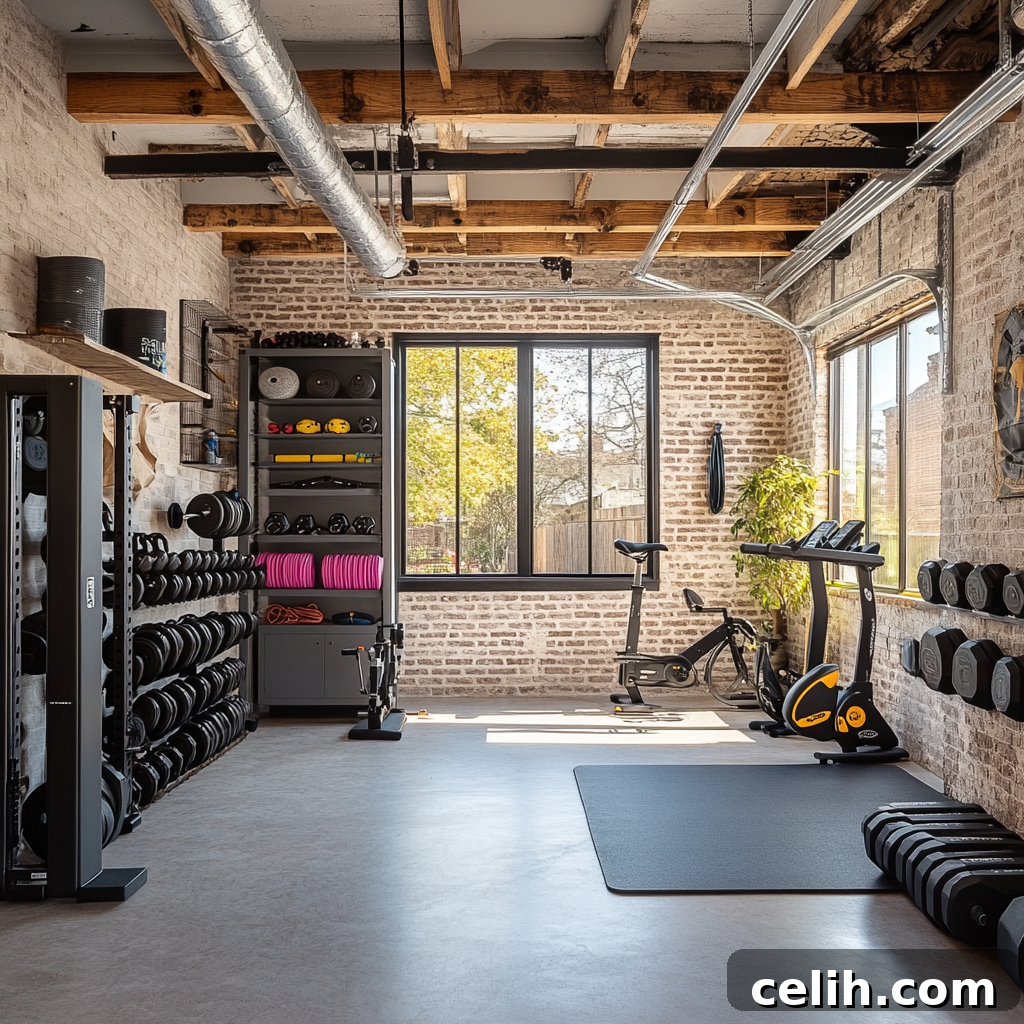
Are you tired of navigating crowded gyms, waiting for equipment, or being restricted by rigid opening hours? Imagine stepping into your own private fitness oasis, a place where every workout is on your terms, perfectly tailored to your goals. Say goodbye to gym memberships and hello to your ultimate fitness sanctuary: a garage gym! Transforming your often-overlooked garage into a dedicated home gym is not just a dream; it’s an achievable and surprisingly affordable reality that doesn’t demand expert construction skills or a bottomless budget.
This comprehensive guide is designed to empower you through every stage of building your ideal home workout space. From the initial planning and selecting essential gym equipment to implementing clever garage storage solutions like heavy-duty shelving and innovative racking systems, we’ll cover it all. Whether you’re a seasoned fitness enthusiast, a weekend warrior looking for convenience, or a DIY aficionado eager for a new project, this step-by-step roadmap will equip you with the knowledge to create a functional, inspiring, and highly personalized workout environment right at home.
Why Invest in a Garage Gym? Unlocking Unparalleled Fitness Freedom
Before diving into the practical “how-to,” let’s explore the compelling reasons “why” converting your garage into a gym is a game-changer for your fitness journey. The benefits extend far beyond simply having equipment at hand; they redefine your entire workout experience.
- Unmatched Convenience: Picture this: no commute, no traffic, no searching for parking. Your workout begins the moment you step into your garage. This eliminates excuses and makes consistency easier than ever, allowing you to fit sessions into even the busiest schedules.
- Tailored Customisation: This is your space, meaning you dictate every detail. Whether your passion lies in high-intensity interval training (HIIT), serene yoga flows, heavy powerlifting, or a dynamic mix of disciplines, you can curate a fitness sanctuary that perfectly aligns with your specific goals and preferences. Every piece of equipment, every layout decision, is made with your training in mind.
- Significant Time Savings: The minutes you typically spend driving to and from a commercial gym, changing, waiting for machines, and showering can easily add up to an entire extra workout session. Reclaim that valuable time and reinvest it directly into your fitness or other aspects of your life.
- Long-Term Financial Savings: While there’s an initial investment in equipment, think about the cumulative cost of monthly gym memberships over years. Your garage gym pays for itself over time, becoming a smart financial decision that empowers your health without ongoing fees.
- Enhanced Privacy and Comfort: Work out in your pajamas if you want! Enjoy complete privacy without feeling self-conscious or having to interact with strangers. Control your music, your temperature, and your environment for an optimal, uninterrupted experience.
- Improved Hygiene and Health: In an age where health is paramount, having your own equipment means no shared sweat, no worrying about sanitation, and a cleaner workout environment tailored to your standards.
- Always Accessible: Your gym is open 24/7. Early bird or night owl, sick day or holiday, your fitness routine never has to be disrupted by external factors.
Still convinced? We thought so. Now, let’s grab that measuring tape and transform your garage into a vibrant hub of health and strength.
Step 1: Strategically Assess Your Space and Design the Layout
The journey to your perfect garage gym begins with a thorough assessment of your current garage. Is it a chaotic repository of forgotten treasures, seasonal decorations, and sundry tools? No judgment here, but it’s time to envision it as a sleek, efficient workout zone. This means a good, honest look at what’s currently occupying the space and how it needs to change.
Measure Like a Seasoned Pro
Take out your measuring tape and meticulously record the dimensions of your garage. Don’t just focus on length and width; critical details will shape your gym’s potential:
- Ceiling Height: Absolutely essential if you plan on installing a pull-up bar, a power rack, or performing exercises with overhead movements like presses, box jumps, or rope slams. Ensure adequate clearance to avoid head bumps or equipment damage.
- Floor Space for Movement: Beyond just fitting equipment, consider the dynamic space needed for actual workouts. Will you have enough room for burpees, lunges, deadlifts, or even a full stretch? Mark out equipment footprints and then add buffer zones for safe and effective movement.
- Room for Integrated Storage: From the outset, plan for where shelving and racking systems will go. This ensures your workout area remains clutter-free and maximizes your training efficiency.
Consider drawing a simple floor plan. Sketch out where larger items like a squat rack or cardio machine might go, then add smaller items and storage. This visual aid will be invaluable for optimizing your space.
Designate Your Fitness Zone
Decide strategically where the core of your gym area will be located. Even a single-car garage can comfortably house a comprehensive setup along one dedicated wall, leaving room for car parking or other storage. If you’re fortunate enough to have ample space, consider dividing your garage into distinct zones: a cardio corner, a dedicated free weights area, and a stretching/mobility section. This compartmentalization can enhance your focus and streamline your workouts.
Plan for Power Requirements
Many modern fitness machines, such as treadmills, ellipticals, or rowing machines, require electrical outlets. Map out where your must-have powered equipment will go and ensure you have easy, safe access to power sources. Avoid running long, hazardous extension cords across your workout area. If your planned setup requires more outlets or a higher amperage circuit, consult with a qualified electrician to install dedicated power lines, prioritizing safety above all else.
Consider Ventilation and Insulation
Garages can get uncomfortably hot in summer and frigid in winter. Planning for proper ventilation (fans, open windows/doors, or even an exhaust fan) and considering insulation (for walls and garage doors) will dramatically improve your comfort and extend the usability of your gym throughout the year. A comfortable environment makes consistency much easier.
Step 2: Declutter and Methodically Prepare the Space
With your layout envisioned, it’s time for the critical decluttering phase. This step is about more than just moving things; it’s about creating mental and physical space. Be ruthless in your decisions – does that broken garden tool or dusty box of old magazines truly deserve a spot in your new fitness sanctuary?
Practical Decluttering Strategies
To make this process manageable, adopt a systematic approach:
- The “Keep, Donate, Sell, or Toss” Method: Go through every item. Is it essential for your household or garage functions? Does it bring value? If not, assign it to one of these categories. Unused tools, sports equipment no longer in use, old paint cans, and random knick-knacks are prime candidates for removal.
- Integrate Smart Storage for Garage Items: For items you decide to keep but aren’t part of your gym, plan for dedicated storage. We’ll delve into effective shelving and racking systems below, but the key is to get these items off the floor and out of your workout zone. Think overhead storage, wall-mounted cabinets, or specialized tool chests.
- Monetize Unused Gym Gear: If you have old workout equipment from previous fitness endeavors, don’t let it gather dust. Websites and local services specializing in buying used gym equipment can help you recoup some costs and provide a clear conscience.
Deep Clean and Prepare Your Foundation
A clean garage is the absolute bedrock of a great home gym. This isn’t just about aesthetics; it’s about hygiene and setting a positive tone for your new workout space. Sweep away all debris, dust off surfaces, and mop the floor thoroughly. Consider pressure washing the entire space if your garage floor is particularly grimy. For a truly professional finish, you might consider sealing or painting your concrete floor before laying down any permanent mats. This protects the concrete, makes cleaning easier, and creates a more appealing base.
Step 3: Curate the Essentials – Your Core Gym Equipment
This is where the excitement truly builds—selecting the gear that will power your workouts! The key here is to prioritize versatility, quality, and your specific fitness objectives over simply accumulating a large quantity of items. Remember, a garage gym is a journey, not a destination; you can always expand your collection as your needs evolve.
Non-Negotiable Must-Haves for Every Garage Gym
Start with a strong foundation of equipment that offers maximum utility and supports a wide range of exercises:
For Strength & Weightlifting:
- Adjustable Dumbbells: These are absolute space-savers and incredibly cost-effective. Instead of needing an entire rack of fixed-weight dumbbells, a single pair can offer the equivalent of multiple sets, perfect for progressive overload and various exercises.
- A Sturdy Barbell with Quality Weight Plates: A standard Olympic barbell is a cornerstone for compound movements like squats, deadlifts, bench presses, and overhead presses. Invest in good quality, durable plates – bumper plates are excellent for garage gyms as they absorb impact and reduce noise.
- Squat Rack or Power Rack: If space permits and heavy lifting is your goal, a rack provides safety for solo lifting with spotter arms and expands your exercise repertoire significantly. Many models also integrate a pull-up bar, adding further value.
- Adjustable Weight Bench: A versatile bench allows for flat, incline, and decline pressing movements, as well as various dumbbell exercises, making it an indispensable piece of equipment.
For Cardiovascular Fitness:
- Skipping Rope: The ultimate classic cardio tool. It’s compact, incredibly effective for conditioning, agility, and calorie burning, and requires minimal space.
- Compact Exercise Bike or Rowing Machine: For those longer, steady-state cardio sessions or intense intervals, a space-efficient cardio machine like a foldable exercise bike, a spin bike, or a quality rowing machine can be an excellent addition. Consider an air bike for a full-body, high-intensity workout.
For Bodyweight & Versatility:
- Pull-up Bar: Whether wall-mounted, ceiling-mounted, or integrated into a squat rack, a pull-up bar is fundamental for back and arm strength, offering numerous variations.
- Resistance Bands: These are incredibly versatile for warm-ups, stretching, strength training assistance (like assisted pull-ups), and adding resistance to bodyweight exercises. They come in various strengths and take up almost no space.
- Gymnastic Rings: If you’re looking for an advanced challenge and wanting to build incredible upper body and core strength, gymnastic rings hung from a sturdy beam or power rack offer a vast array of exercises for adventurous fitness enthusiasts.
- Yoga Mat or Exercise Mat: Essential for floor exercises, stretching, and providing a comfortable, non-slip surface.
Thoughtful Optional Extras
Once your core is established, and if your space and budget allow, consider these additions to further enhance your garage gym:
- Plyometric Box: Perfect for jump training, step-ups, and box squats, improving explosive power and agility.
- Kettlebells: Excellent for dynamic, full-body movements, building functional strength, power, and cardiovascular endurance through swings, cleans, and snatches.
- Cable Machine or Pulley System: A more significant investment, but offers an almost endless number of isolation and compound exercises for all muscle groups, replicating many commercial gym machines.
- Battle Ropes: For intense full-body conditioning, improving strength and endurance with dynamic wave and slam exercises.
- Medicine Balls or Slam Balls: Great for core work, explosive power exercises, and dynamic throws.
When purchasing, research reputable brands, read reviews, and consider warranties. Buying used equipment can also be a fantastic way to save money, just ensure it’s in good, safe working condition.
Step 4: Smart Storage Solutions – Maximize Every Inch
You’ve invested time and effort into building a fantastic gym; don’t let clutter undermine it! Efficient and clever storage is absolutely paramount to maintaining a functional, safe, and motivating workout space. A tidy gym means more room to move, less chance of tripping, and a more pleasant training experience.
Robust Garage Shelving: Your Organizational Ally
Durable, heavy-duty industrial shelving units are ideal for storing a variety of gym and garage essentials. These robust units are perfect for keeping weight plates organized, housing smaller equipment like resistance bands, jump ropes, and ab wheels, or even stashing your gym towels and cleaning supplies. Look for shelving with adjustable heights so you can customize the layout as your equipment collection grows and evolves. Freestanding units are versatile, while wall-mounted options can save valuable floor space.
Game-Changing Garage Racking Systems
A well-planned wall-mounted garage racking system can transform your space, getting items off the floor and making them easily accessible. These systems are invaluable for:
- Hanging Lightweight Gear: Resistance bands, skipping ropes, gymnastic rings, even foam rollers can be neatly hung on hooks or specialized racks, preventing tangles and damage.
- Barbell Storage: Vertical barbell storage racks keep your barbells upright and out of the way, preventing them from becoming a tripping hazard.
- Plate Storage: Wall-mounted plate holders or horizontal plate trees keep your weight plates organized and easily reachable without cluttering your floor.
- Dumbbell Racks: A dedicated dumbbell rack, whether freestanding or integrated into a wall system, keeps your dumbbells off the floor and in order.
Clever Bonus Storage Hacks
- Rolling Carts: A small, multi-tier rolling cart can be a game-changer for keeping essentials like water bottles, towels, chalk, disinfectant wipes, and a timer handy and mobile.
- Magnetic Strips or Tool Organizers: These are excellent for securing small, easily lost items such as barbell collars, resistance band handles, measuring tapes, or even your gym key.
- Pegboards: Revisit the idea of a pegboard for hanging lighter accessories like resistance band loops, jump ropes, or even a small whiteboard for tracking workouts.
- Overhead Storage: If your ceiling allows, consider overhead storage racks for seasonal items or bulkier gym gear that isn’t used daily.
- Under-Rack Storage: Utilize the space under your squat or power rack for storing weight plates, kettlebells, or a plyo box.
Step 5: Essential Foundations – Flooring and Walls
Do not underestimate the importance of your flooring and wall treatments. These elements provide safety, comfort, and significantly impact the overall feel and longevity of your garage gym. Trust us, your joints, equipment, and future self will thank you for investing here.
Optimal Flooring Options for Durability and Comfort
Working out on cold, hard concrete is neither comfortable nor safe. Proper gym flooring protects your body, your equipment, and your garage floor. Consider these popular options:
- Rubber Mats/Tiles: This is the gold standard for garage gyms. Rubber flooring is incredibly durable, offers excellent shock absorption (crucial for dropping weights), reduces noise, and provides a good grip. It comes in interlocking tiles (easier DIY install) or large rolls (more seamless, harder install). While a higher upfront cost, its longevity and protective qualities make it a worthwhile investment.
- High-Density Foam Tiles: A more budget-friendly and lightweight option, foam tiles are easy to install and provide a decent cushion for bodyweight exercises, yoga, and light cardio. However, they are less durable than rubber and not suitable for heavy weightlifting where equipment might be dropped. They can be a great starter option or for designated non-weight zones.
- Artificial Turf: For functional fitness, sled pushes, or agility drills, a section of artificial turf can add a dynamic and visually appealing element to your gym.
Before laying down any flooring, ensure your concrete is clean, dry, and free of cracks. A concrete sealant can add an extra layer of protection.
Enhance Your Walls for Function and Motivation
Your walls are more than just boundaries; they’re an opportunity to improve your training and inspire your efforts:
- Strategic Mirror Placement: Installing a large mirror (or several) is invaluable. It allows you to monitor your form, ensuring proper technique and preventing injuries. Beyond function, mirrors can also make your gym feel larger, brighter, and more professional.
- Functional Pegboards: Utilize pegboards to hang lighter gym gear like resistance bands, jump ropes, small hand weights, or even a timer. They keep items visible and organized.
- Motivational Decor: Personalize your space with motivational posters, workout charts, or even a whiteboard to track your personal bests, set goals, and plan your weekly workouts. This psychological boost can be a powerful driver for consistency.
- Soundproofing (Optional): If noise is a concern for neighbors or household members, consider adding acoustic panels to your walls.
Step 6: Infuse Personality – Make It Truly YOUR Space
The final touch in building your ultimate garage gym is to imbue it with your personal style and preferences. This isn’t just a functional space; it’s a place where you’ll spend significant time pushing your limits, so it should feel inviting, energizing, and uniquely yours.
- Superior Sound System: Music is a powerful motivator. Invest in high-quality Bluetooth speakers or a robust sound system to power through your workouts with your favorite high-energy playlists. The right beats can make all the difference in pushing that extra rep.
- Convenient Refreshment Station: A mini-fridge stocked with cold water, sports drinks, or post-workout shakes ensures you stay hydrated and recover efficiently without having to leave your workout zone.
- Optimal Lighting: Garages are often poorly lit. Upgrade to bright LED strips or high-bay lights to create an inviting, well-lit environment. Good lighting not only improves visibility for safety and form but also boosts energy levels and makes the space more enjoyable. Consider task lighting for specific areas if needed.
- Temperature Control: Install powerful fans for hot days and a portable heater for colder months. Even a window-mounted air conditioning unit can dramatically improve comfort and extend the usability of your gym throughout the year.
- Personal Touches: Add elements that reflect your personality. This could be a small plant (if light allows), framed photos of athletic achievements, a flag, or a comfortable chair for rest periods between sets.
- Safety First: Beyond equipment, consider a small first-aid kit for minor scrapes, and ensure a fire extinguisher is accessible, especially if you have electrical equipment.
Embrace Your Garage Gym (and Unleash Your Inner Athlete)
Congratulations! You are now fully equipped with the knowledge and inspiration to transform your ordinary garage into an extraordinary fitness hub. From meticulous planning and smart equipment choices to ingenious storage solutions and personal touches, every step taken brings you closer to unparalleled fitness freedom.
Whether your aspiration is to train for a marathon, build incredible strength, master new skills, or simply maintain an active and healthy lifestyle, your new garage gym is a dynamic space designed to perfectly fit your goals, on your terms, every single day. The days of compromises and inconveniences are over.
There’s no better time than the present to get started. Begin by decluttering that unused space, carefully select the equipment that truly serves your needs, and methodically bring your dream home gym to life. Step into your ultimate workout environment and experience the incredible empowerment of consistent, convenient, and truly personalized fitness. Now go forth and sweat it out!