
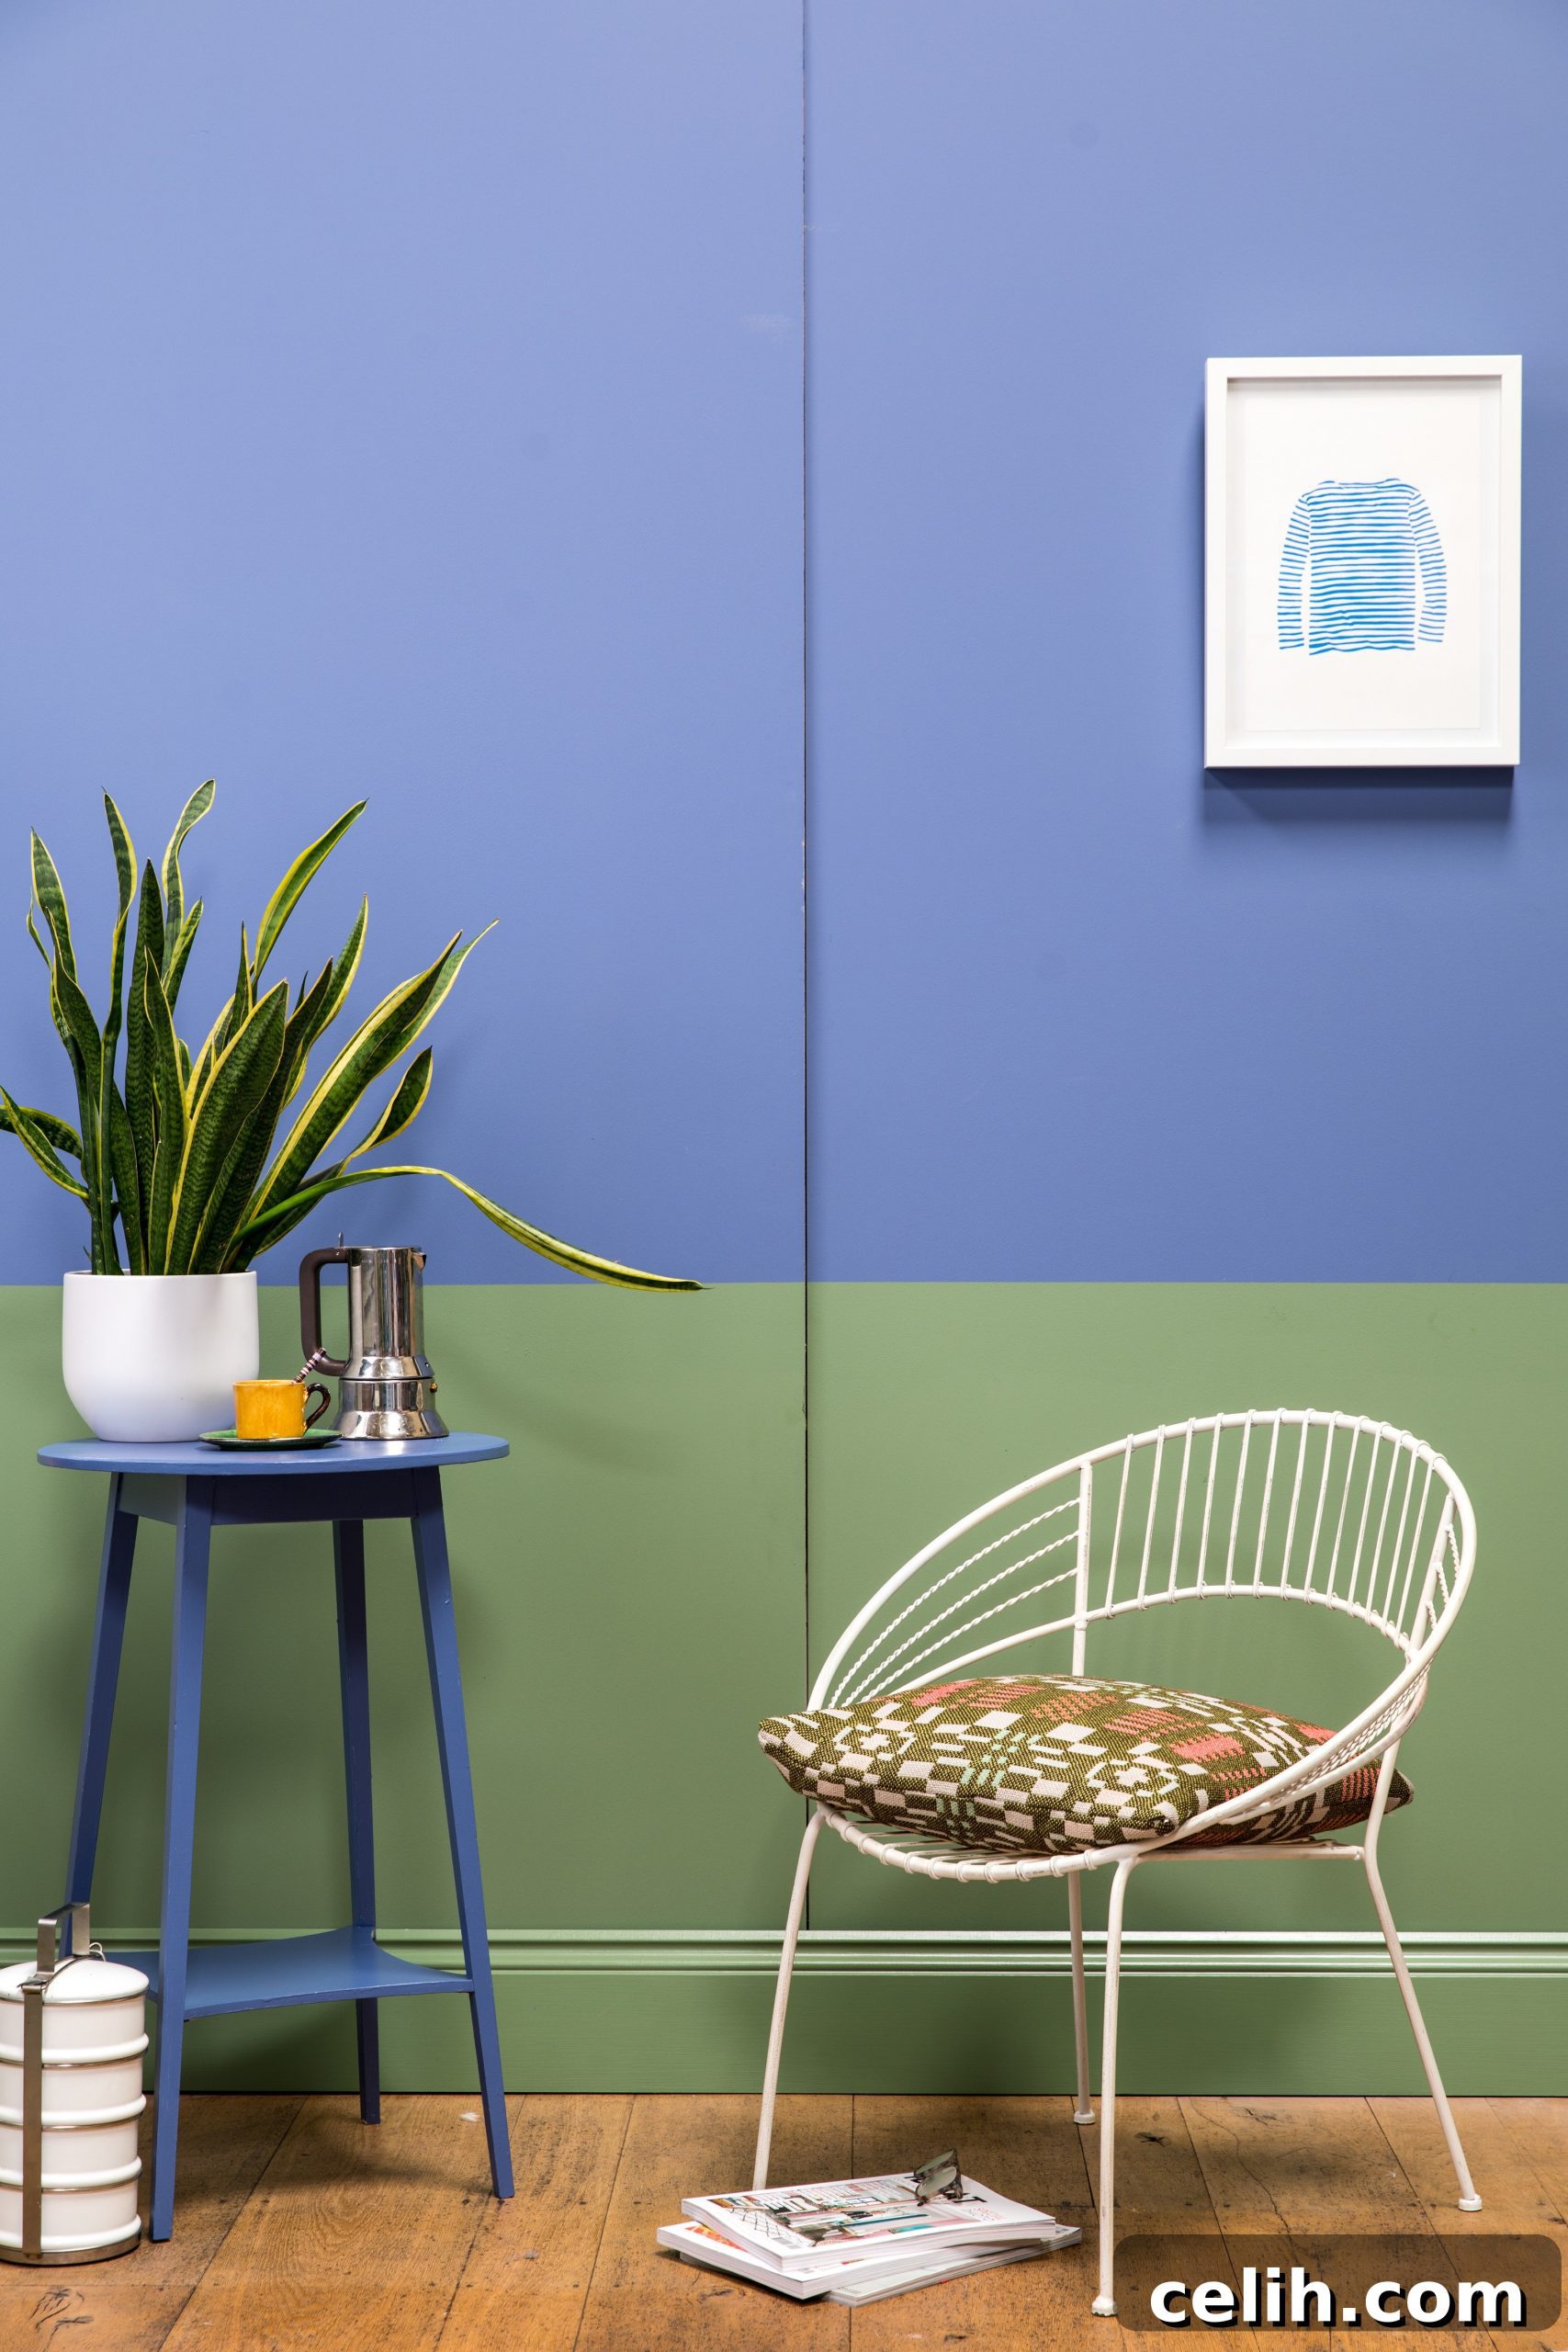
Transform Your Home: Creative Skirting Board Painting Ideas for a Stylish Interior
When envisioning a home makeover, many homeowners instinctively focus on wall colors, furniture, or elaborate decor pieces. Yet, one often-overlooked element, the skirting board, holds surprising potential to elevate your interior design. Far from being a mere functional trim, the way you paint your skirting boards can dramatically impact the aesthetic and overall feel of any room. This guide explores innovative skirting board painting ideas, offering expert tips and decorating tricks to help you achieve a truly professional and inspired finish.
The Unsung Hero: Why Skirting Boards Deserve Your Attention
Traditionally, skirting boards were painted with a thick layer of white gloss paint. This common practice stemmed from the belief that gloss offered maximum durability against everyday knocks and scuffs at floor level. While practicality is important, modern interior design has embraced a more creative approach, recognizing skirting boards as a vital component in a room’s visual narrative. Beyond their protective role, skirting boards define the boundary between your walls and floor, influencing perceptions of space, height, and overall cohesion. Choosing the right color and finish for your skirting boards is a powerful tool to either blend seamlessly or create striking contrasts, ultimately enhancing your home’s unique style.
Captivating Color Schemes: Innovative Skirting Board Painting Ideas
Gone are the days when white gloss was the only option. Today’s design trends celebrate individuality and bold choices. Discover how different painting techniques can breathe new life into your living spaces.
Using Contrasting Color on Your Skirting Boards: A Bold Statement
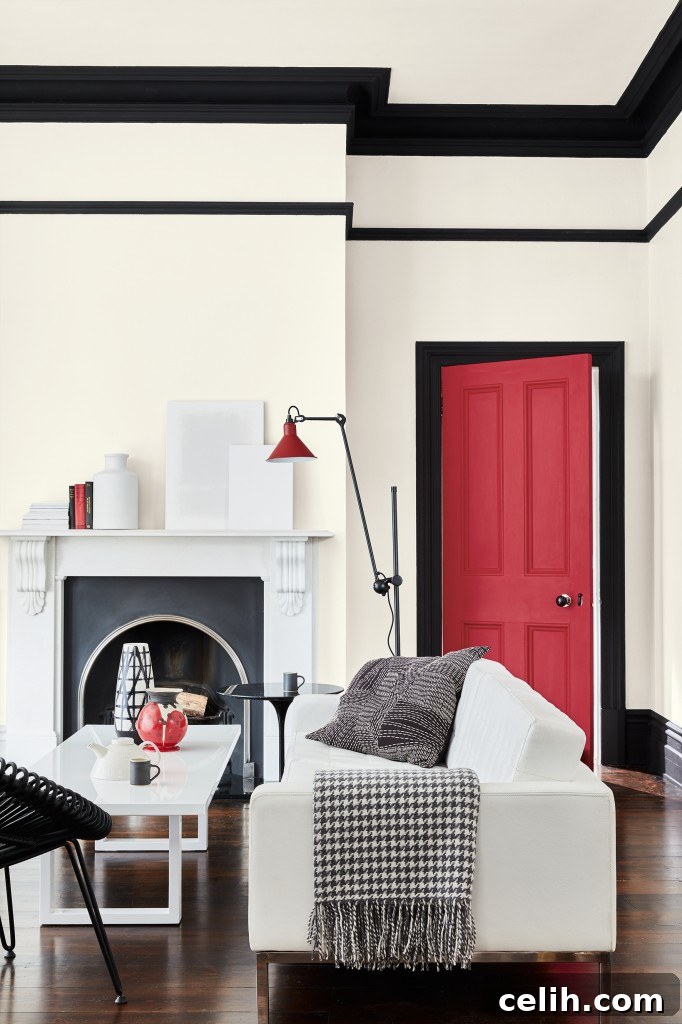
Painting your mdf skirting boards in a contrasting color to your walls is a dramatic yet effective way to add depth and architectural interest to any room. This technique instantly draws the eye downwards, grounding the space and highlighting the base of your walls. Consider the example shown above: with walls painted in a soft French grey, the striking addition of black skirting boards creates a powerful visual contrast. This effect is further amplified when paired with matching black doorframes and other dark accents throughout the room, creating a cohesive and sophisticated design scheme. Contrasting colors can define boundaries, add a touch of drama, or serve to integrate other bold decorative elements within your interior. Don’t be afraid to experiment with rich jewel tones against neutral walls, or vibrant hues to inject personality and an unexpected pop of color.
Using Tonal Color on Your Skirting Boards: Subtle Sophistication
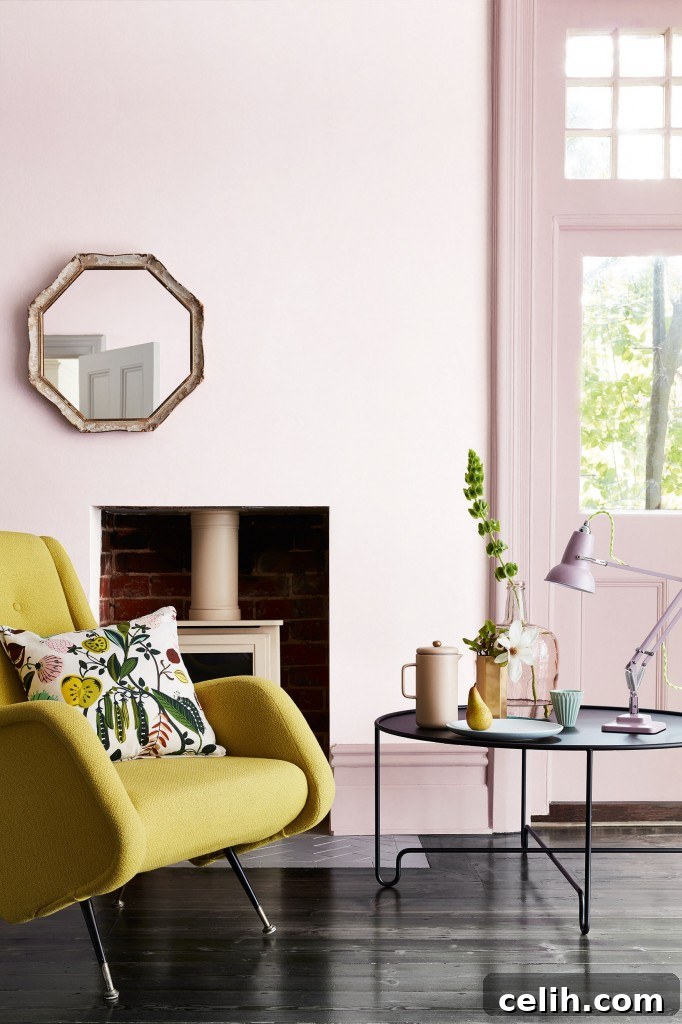
For those who prefer a softer, more harmonious aesthetic, a tonal color palette offers an elegant solution. This approach involves combining different shades and tones of the same base color, such as a delicate gradient of pinks or varying depths of blue. By using the lightest paint color on your walls and a slightly darker tone on your skirting boards, you can subtly enhance the sense of light and space in a room. This method minimizes harsh visual breaks, allowing the eye to flow smoothly around the room while adding a sophisticated layer of depth. The subtle difference in tone provides definition without being overly bold, creating a calming and contemporary atmosphere. This technique is particularly effective in smaller rooms where a strong contrast might feel overwhelming, or in spaces where you want to evoke a serene and polished ambiance.
Painting a Single Color Throughout Your Room: The Seamless Effect
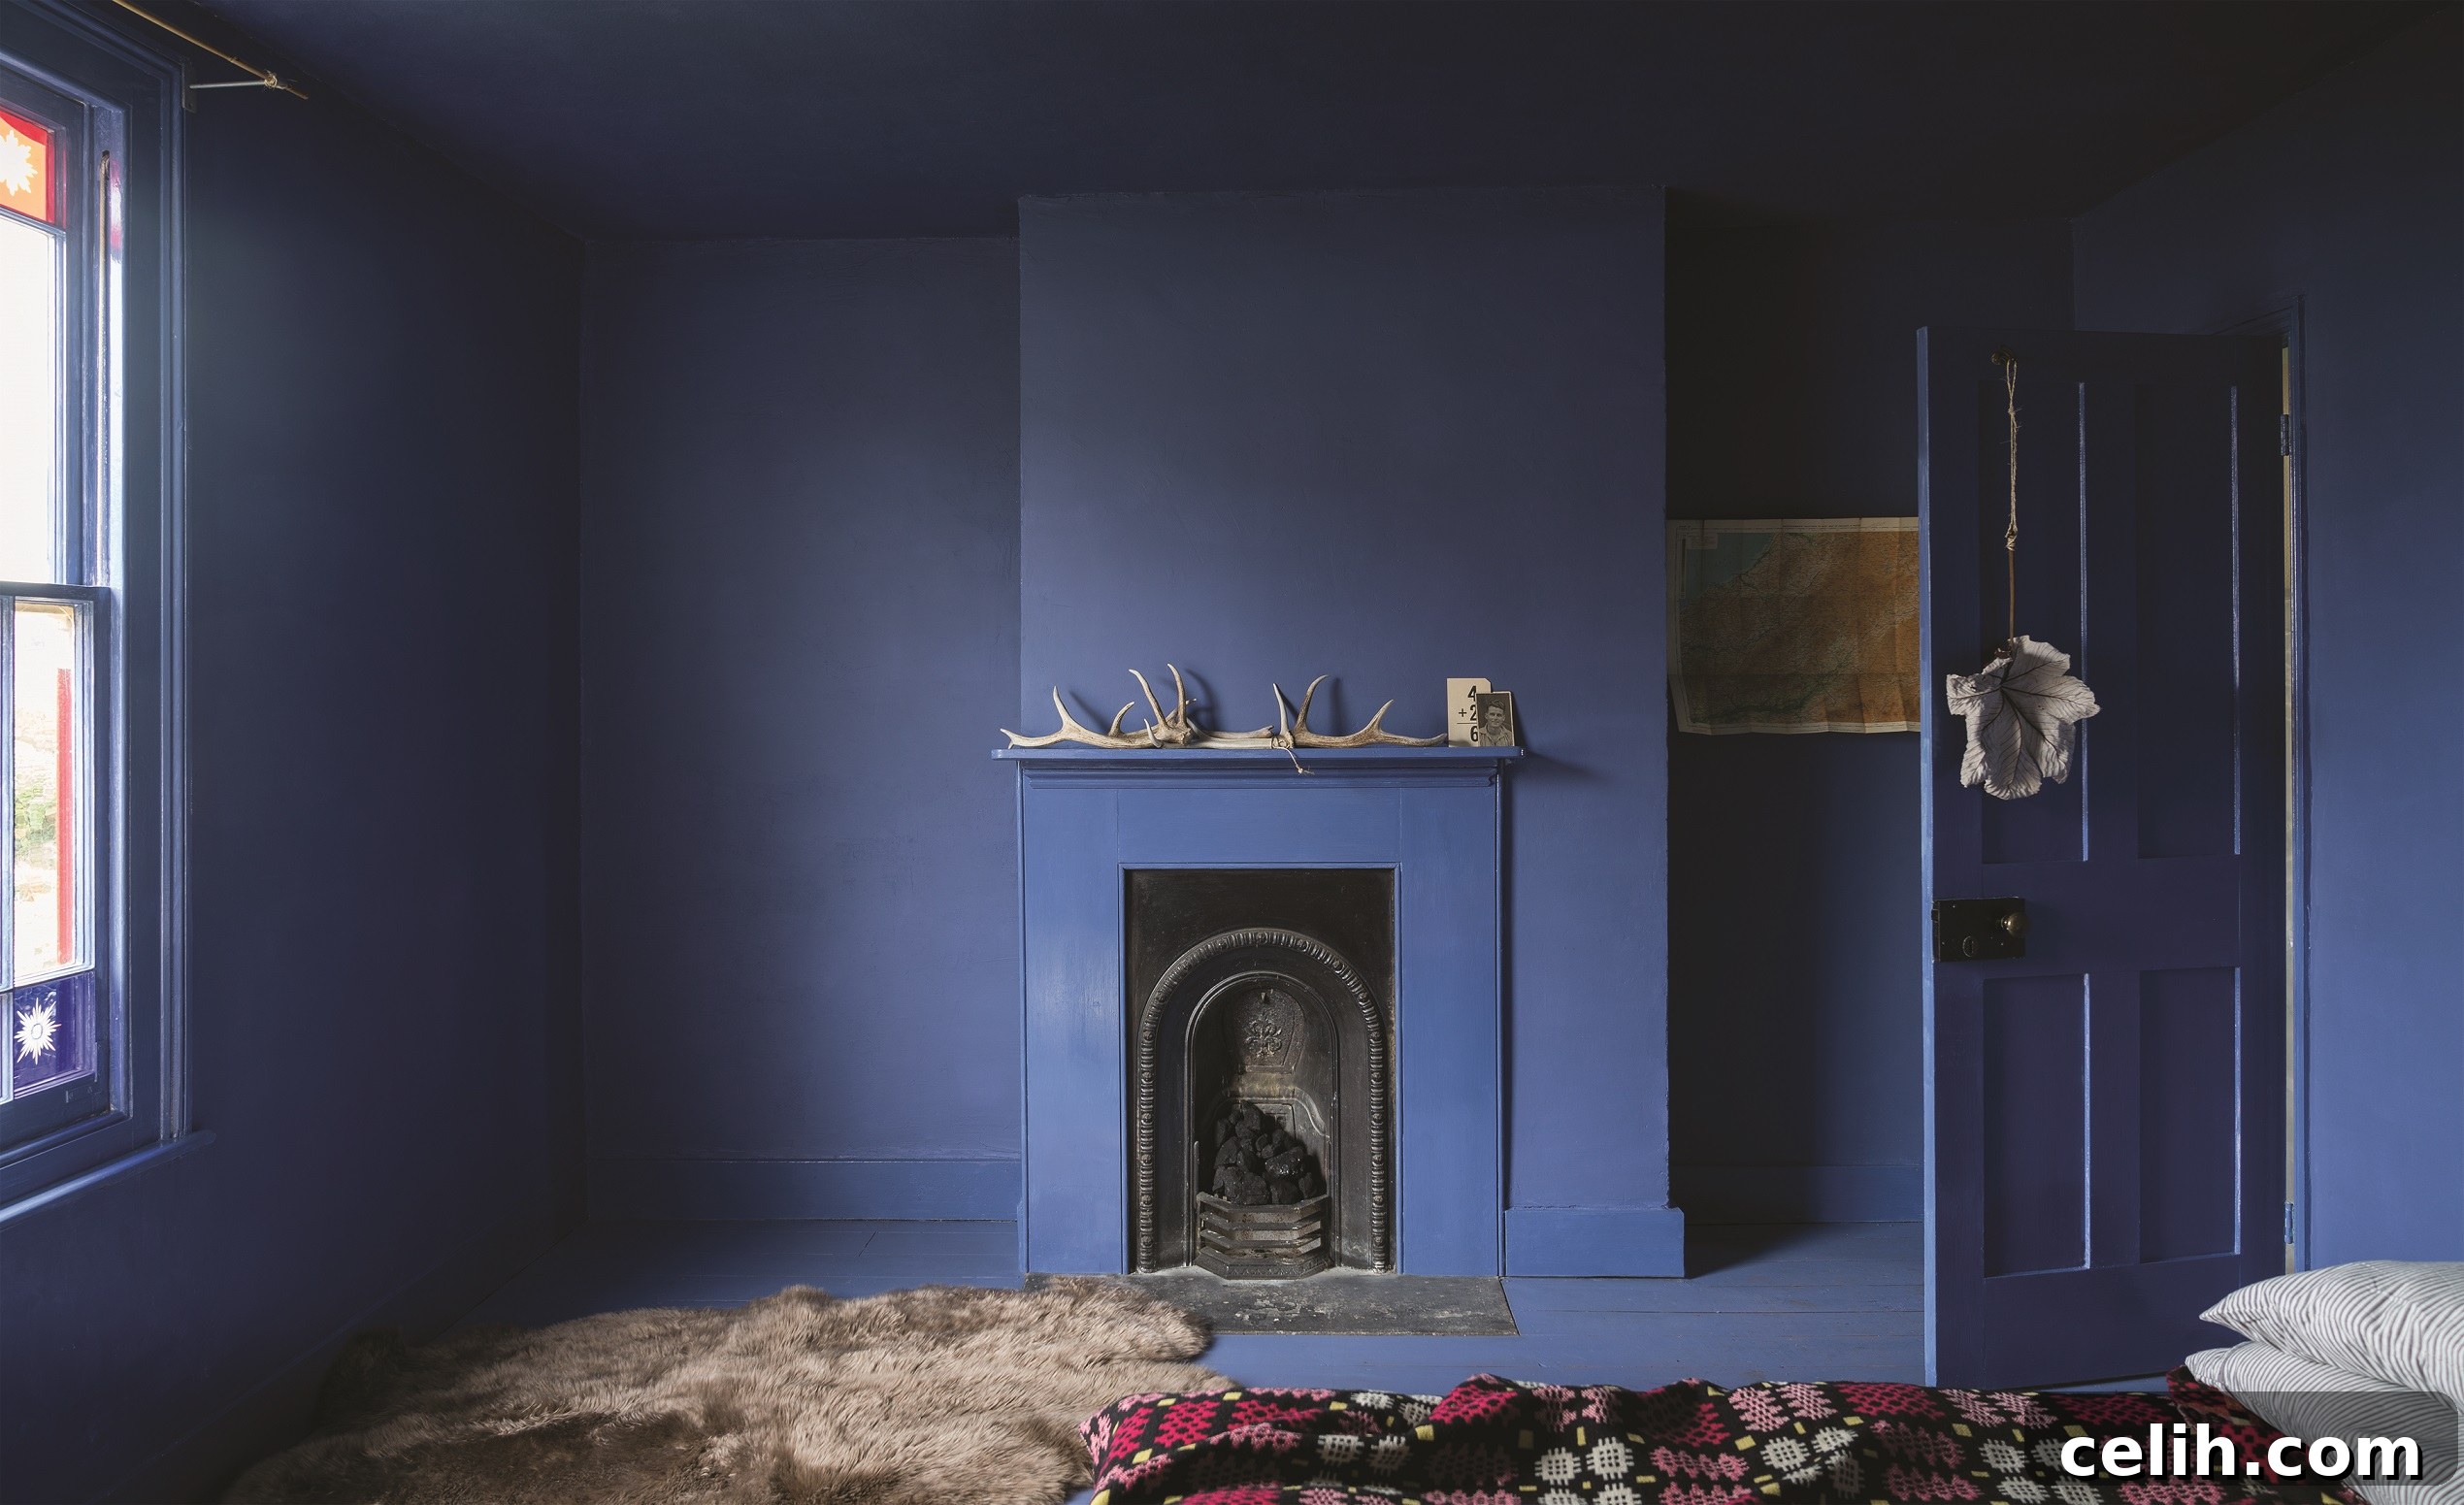
Embracing a monochromatic scheme by painting your skirting boards the exact same color as your walls creates a dramatically seamless and expansive effect. From a visual perspective, this technique significantly reduces the number of dividing lines in a room, making small spaces feel larger and more open. Without the interruption of a contrasting border, the walls appear to stretch further, drawing the eye upwards and around the entire room. This contemporary approach works exceptionally well with both light and dark colors. Imagine a soft, airy pastel extending effortlessly from floor to ceiling, or a deep, rich indigo blue enveloping the room in a sophisticated embrace. The unified color scheme offers a clean, minimalist aesthetic that is both modern and incredibly chic. It’s an excellent choice for achieving an understated elegance that allows other design elements, like artwork or furniture, to truly stand out.
Using Skirting Boards to Complement Your Wallpaper: Framing Your Art
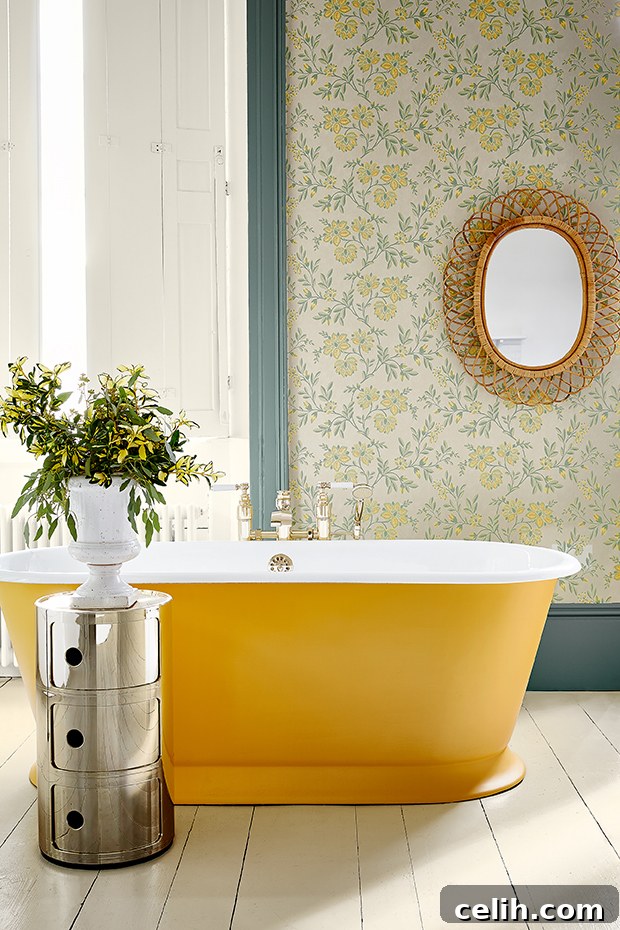
If you’ve adorned your walls with a beautiful wallpaper design, your skirting boards can play a crucial role in enhancing its appeal and making it truly pop. Rather than competing, the right paint color on your bare wood skirting boards can act as a natural frame, drawing attention to the intricate patterns and textures of your chosen wallpaper. As perfectly demonstrated in this image from Little Greene, selecting a fresh, complementary shade of paint allows the skirting board to seamlessly integrate with the wallpaper design, creating a polished and thoughtful finish. You can pick an accent color from the wallpaper’s pattern, or choose a hue that harmonizes with its overall tone. This method ensures that your wallpaper remains the star of the show while the skirting boards provide a subtle yet powerful supporting role, bringing the entire decorative scheme together with elegance.
Create Dark Skirting Boards to Lead the Eye: Guiding the Gaze
In long, narrow spaces like hallways or landing areas, strategic color placement can create remarkable visual effects. One clever interior design trick is to paint your skirting boards in a darker shade than the wall color and ceiling. This creates a distinct visual band of color at the base of the room, naturally drawing the eye along its path. This guiding effect subtly directs focus towards the rest of the space, making the area feel more expansive and purposeful. Darker skirting boards also add a sense of grounding and sophistication, providing a strong foundation for the room’s design. This technique can transform an otherwise unremarkable corridor into an inviting transition zone, adding character and depth to often neglected areas of your home. It’s a smart way to make a big impact with a seemingly small detail.
Choosing the Right Paint and Finish for Your Skirting Boards
Selecting the correct type of paint and finish is just as crucial as choosing the color. Skirting boards endure more wear and tear than walls, so durability is key. Understanding your options will help you achieve a beautiful and long-lasting result.
- Water-Based vs. Solvent-Based Paint:
- Water-Based (Acrylic/Latex): Dries quickly, low odor, easy cleanup with water, less prone to yellowing over time, more environmentally friendly. Modern water-based paints offer excellent durability and flexibility, making them a popular choice for skirting boards.
- Solvent-Based (Oil-Based): Traditionally known for superior hardness and durability, excellent flow for a smooth finish. However, they have strong odors, longer drying times, require mineral spirits for cleanup, and can yellow over time.
- Paint Finishes: The sheen level affects both the appearance and the practicality.
- Matt: A non-reflective finish that hides imperfections well, offering a sophisticated, contemporary look. It’s less durable and harder to clean than higher sheens.
- Eggshell: A low-sheen finish, slightly more durable and washable than matt. It has a subtle, soft glow that’s perfect for a modern, understated aesthetic.
- Satin: A medium-sheen finish, more reflective than eggshell but less than gloss. It offers good durability and is relatively easy to clean, making it a popular choice for trim.
- Gloss: A high-sheen, highly reflective finish. It’s very durable, easy to clean, and traditionally used for skirting boards due to its hard-wearing properties. It can highlight surface imperfections, so thorough preparation is essential.
- Primer and Undercoat: These are non-negotiable for a professional, durable finish.
- Primer: Seals the raw wood or previously painted surface, providing a consistent base for subsequent coats. It improves adhesion, preventing the topcoat from soaking unevenly into the material.
- Undercoat: Applied after the primer, the undercoat provides a smooth, opaque layer that helps achieve true color depth and enhances the durability of the topcoat. It’s especially important when changing from a dark color to a light one, or vice-versa.
Essential Tools for a Flawless Skirting Board Finish
Proper preparation and the right tools are half the battle won when undertaking any painting project. For your skirting boards, investing in quality supplies will ensure a neat, durable, and professional-looking result.
- Masking Tape or Painter’s Tape: This is indispensable for creating crisp, clean lines between your skirting boards and the walls or floor. Opt for a good quality tape that adheres well but removes cleanly without leaving residue or pulling off paint.
- Dust Sheets or Plastic Sheeting: Absolutely crucial for protecting your carpets, wooden flooring, or any other surfaces from paint drips and spills. Lay them down generously, especially tucking them under the back edge of carpets if possible, to catch any errant drops.
- Fine Sandpaper (120-220 grit): Essential for smoothing out rough areas, removing old paint flakes, or de-glossing existing finishes. Sanding creates a ‘key’ for the new paint to adhere to, significantly improving durability.
- A Damp Cloth and Cleaner: Handy for wiping up spills immediately and for thoroughly cleaning the skirting boards before sanding and painting. A mild sugar soap solution is excellent for removing dirt, grime, and grease.
- Paint: As discussed, carefully choose the right primer, undercoat, and topcoat based on the material of your skirting boards (e.g., MDF, bare wood), desired finish (matt, satin, gloss), and practicality (water-based for quick drying and easy cleanup, or solvent-based for traditional durability).
- Paint Brushes: A selection of high-quality brushes is vital. You’ll likely need a larger brush (2-3 inches) for the main flat surfaces and a smaller, angled brush (1-1.5 inches) for cutting in along edges and getting into tight internal corners. Consider a soft dry brush for dusting after sanding.
- Caulking Gun and Decorator’s Caulk: For filling any gaps between the top of the skirting board and the wall, or between sections of skirting board. This creates a seamless, professional look.
- Screwdriver/Hammer: To remove any existing skirting boards if they are too damaged, or to tighten any loose boards before painting.
- Vacuum Cleaner: After sanding, there will be dust. A vacuum cleaner allows for quick and efficient cleanup, ensuring a dust-free surface for painting – critical for good paint adhesion.
Beginner’s Guide: Step-by-Step Tips for Painting Skirting Boards
Even if you’re new to DIY, painting skirting boards is a manageable project with a big payoff. Follow this simple, step-by-step guide to achieve a smooth and durable finish.
- Step 1: Clear and Protect Your Space.
Before you even open a paint can, prepare your workspace. Move all furniture away from the walls; if space is limited, gather it in the center of the room. Lay down dust sheets or plastic sheeting to thoroughly protect your flooring, making sure they extend sufficiently to catch any drips. Use masking tape to secure the sheets if necessary, especially if working on carpet.
- Step 2: Prepare Your Skirting Boards.
This is arguably the most important step for a lasting finish. If your skirting boards are already painted, first clean them thoroughly with a damp cloth and a mild cleaner (like sugar soap) to remove all dust, dirt, and grease. Rinse with clean water and allow to dry completely. Then, lightly sand the entire surface with fine sandpaper (120-180 grit) to create a ‘key’ for the new paint. If there are any holes, dents, or gaps, fill them with wood filler or decorator’s caulk, allow to dry, and sand smooth. For bare wood skirting boards, sand them thoroughly until smooth, removing any splinters or rough patches. After sanding, vacuum all dust and wipe down the boards with a slightly damp cloth, ensuring they are perfectly clean and dry before proceeding.
- Step 3: Mask Off Adjacent Areas.
For ultra-sharp lines, apply high-quality painter’s tape along the top edge of your skirting boards (where they meet the wall) and along the bottom edge (where they meet the floor/carpet). Press the tape down firmly with a credit card or your finger to ensure a tight seal, preventing paint from bleeding underneath.
- Step 4: Prime and Undercoat the Surface.
Apply a thin, even layer of wood primer to the entire surface of your skirting boards. Primer helps to seal the wood, prevents stains from bleeding through, and provides a uniform base for your topcoat. If painting over an existing, darker color, consider a tinted primer. Allow the primer to dry completely according to the manufacturer’s instructions (typically 2-4 hours). Lightly sand with fine-grit sandpaper (220 grit) after the primer is dry for a smoother finish, then wipe clean. Next, apply one or two coats of undercoat paint, allowing each coat to dry thoroughly and performing a light sanding between coats if desired. Many modern primers combine primer and undercoat functions, which can speed up the process.
- Step 5: Paint the Top Coat.
Once your undercoated skirting boards are completely dry and smooth, it’s time for the final topcoat. Apply your chosen paint in thin, even layers. Avoid overloading your brush to prevent drips and brush marks. Work in manageable sections, painting along the length of the board. Depending on the color change and type of paint, you will likely need two coats for full coverage and durability. Ensure each coat dries thoroughly between applications. For the best finish, lightly sand with very fine sandpaper (e.g., 220-400 grit) between topcoats if desired, wiping away any dust before the next application.
- Step 6: Remove Masking Tape and Enjoy!
Once your final coat of paint is dry to the touch (but not necessarily fully cured), carefully and slowly peel off the masking tape at a 45-degree angle. Removing the tape when the paint is mostly dry prevents it from pulling off fresh paint but ensures a clean line. If you wait too long, the paint might fully cure to the tape, causing it to tear. Step back and admire your beautifully painted skirting boards and the fresh new look they bring to your home!
Common Mistakes to Avoid When Painting Skirting Boards
To ensure your project goes smoothly and yields professional results, be mindful of these common pitfalls:
- Skipping Preparation: Rushing or neglecting cleaning, sanding, and filling imperfections will result in a poor finish that won’t last.
- Ignoring Primer and Undercoat: These layers are crucial for adhesion, color depth, and durability. Skipping them often leads to patchy coverage and paint that chips easily.
- Applying Too Much Paint: Overloading your brush and applying thick coats leads to drips, runs, and uneven surfaces. Thin, even coats are always better.
- Not Allowing Adequate Drying Time: Rushing between coats or removing tape too soon can lead to smudges, messy lines, or even peeling paint. Always follow manufacturer’s drying recommendations.
- Using Low-Quality Tools: Cheap brushes can shed bristles and leave streaks. Invest in good quality brushes and tape for a superior finish.
- Painting Directly Over Dirty Surfaces: Paint will not adhere properly to dusty, greasy, or dirty surfaces, leading to peeling and a short-lived finish.
Conclusion: Elevate Your Home with Smart Skirting Board Choices
Painting and decorating your skirting boards, whether they are bare wood or previously painted, undoubtedly requires time and patience – particularly for achieving perfectly straight lines and allowing for multiple coats. However, the transformative power of a fresh coat of paint, or a deliberate change in skirting color, cannot be overstated. Whether you opt for a lighter shade to enhance spaciousness, a dark color to add drama, or a hue that perfectly complements your walls or wallpaper, the impact on your home’s interior can be profound. We hope this comprehensive guide has provided you with valuable tips, creative ideas, and the confidence to embark on your own skirting board painting project, highlighting feature walls and making even small spaces feel grander. Pay attention to this often-overlooked detail, and watch as your home’s aesthetic reaches new heights of style and sophistication.
Have you painted your skirting boards in any interesting ways? Do let us know in the comments below.
Pin it!
(Collaborative post)