
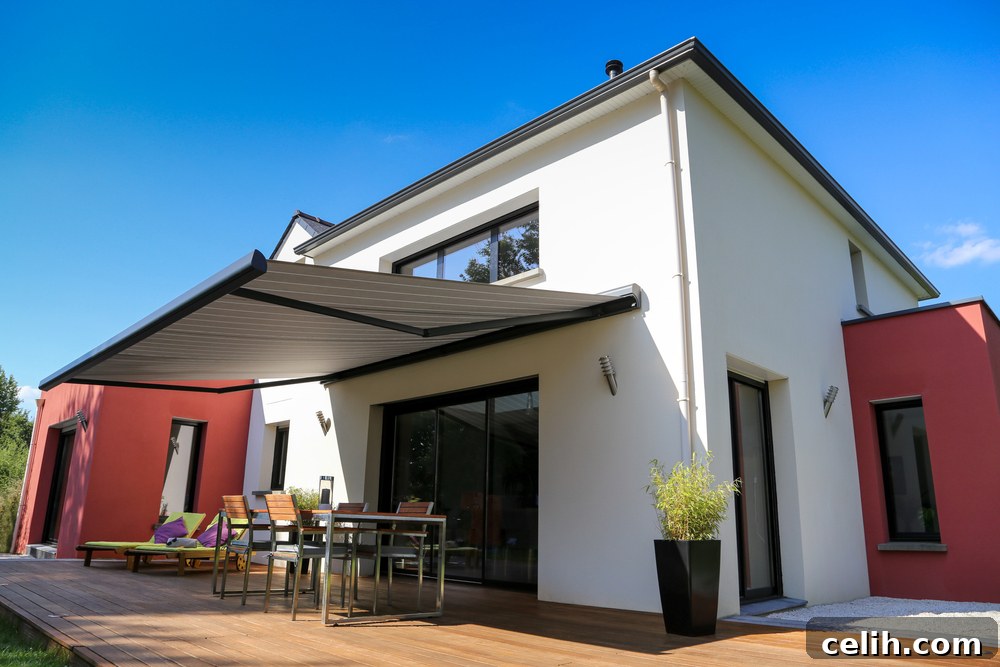
Comprehensive Guide to Cleaning Your Patio Awning: Extend Its Life and Beauty
Patio awnings are a fantastic investment for any homeowner looking to enhance their outdoor living space. They offer much-needed shade, protecting you and your family from harsh UV rays and significantly lowering the temperature on your patio. Beyond personal comfort, awnings also shield your outdoor furniture and decking from sun damage, helping to preserve their appearance and longevity. However, as with any outdoor fixture exposed to the elements, your awning requires regular maintenance, particularly cleaning, to keep it looking its best and functioning effectively for years to come. If you’re unsure how to properly clean your patio awning, this detailed guide will walk you through everything you need to know, ensuring a sparkling clean result.
Understanding Your Awning: Types and Their Cleaning Nuances
Before diving into the cleaning process, it’s crucial to understand that not all awnings are created equal. Different materials and designs require specific cleaning approaches to ensure effectiveness without causing damage. Knowing your awning type is the first step toward successful maintenance.
Fabric Awnings: Canvas, Acrylic, and Polyester
Fabric awnings are among the most popular choices due to their versatility in color and pattern, offering a soft aesthetic appeal. They are primarily made from materials like canvas (a heavy-duty cotton), acrylic, or polyester. Each has slightly different properties:
- Canvas Awnings: Traditionally durable, canvas is breathable but can be prone to mildew if not dried properly. They require gentle cleaning solutions to prevent material degradation.
- Acrylic Awnings: Often solution-dyed, acrylic fabrics are highly resistant to fading, UV rays, and mildew. They are generally easier to clean and maintain their vibrant colors over time.
- Polyester Awnings: Polyester fabrics are strong and resistant to stretching and shrinking. When coated, they offer excellent water resistance. They usually handle general cleaning well.
The key for all fabric awnings is to use mild cleaning agents to protect the fabric’s integrity and color, avoiding harsh chemicals that can strip protective coatings or cause fading.
Vinyl Awnings: Durability Meets Easy Maintenance
Vinyl awnings are renowned for their exceptional durability and water resistance. They are typically made from PVC-coated polyester or solid vinyl, making them incredibly robust against tearing and stretching. Vinyl’s non-porous surface makes it highly resistant to mold, mildew, and stains, which often simplifies the cleaning process. However, their sensitivity to abrasive cleaners means you need to be cautious about what products and tools you use to avoid scratching or damaging the surface.
Metal Awnings: Aluminum and Beyond
While less common in residential patio settings today compared to fabric or vinyl, metal awnings, particularly aluminum, are still found on many homes. Aluminum awnings offer extreme durability, resistance to rot and insects, and often require less frequent cleaning than fabric types. However, they can accumulate dirt, grime, and oxidation over time. Cleaning metal awnings involves using specialized metal-friendly solvents to restore their luster without causing corrosion or discoloration.
Fixed vs. Retractable Awnings: What You Need to Know for Cleaning
Beyond material, awnings also come in two primary operational types: fixed and retractable.
- Fixed Awnings: These awnings are permanently installed and offer continuous shade. Their fixed nature means they are constantly exposed to the elements, making regular cleaning even more critical. They can be an excellent option for homes with specific space constraints or design needs and are often more budget-friendly upfront. Their constant exposure means they are more prone to dirt accumulation and will likely require more frequent cleaning.
- Retractable Awnings: Also known as electric or motorized patio awnings, these are designed for versatility. They can be extended or retracted at will, allowing homeowners to enjoy sun or shade as desired. This flexibility means they can be protected from harsh weather when not in use, potentially reducing cleaning frequency. However, their motorized components require careful handling during cleaning, and it’s paramount that they are completely dry before being retracted to prevent mold and mildew growth. When investing in a retractable awning, buying from an established company like Marygrove is recommended for long-term performance and reliability.
Essential Tools and Preparations for Effective Awning Cleaning
Proper preparation is key to an efficient and safe cleaning process. Gathering the right tools and taking necessary safety precautions will make the task much smoother.
Gathering Your Cleaning Arsenal
To thoroughly clean your awning, you’ll need a few common household items and some specialized cleaning solutions:
- Garden Hose with a Spray Nozzle: For rinsing and initial debris removal. A pressure washer on a very low setting (fan spray) can be used for vinyl or metal, but use extreme caution with fabric.
- Soft-Bristled Brush or Broom: Ideal for sweeping away loose debris without damaging the fabric.
- Long-Handled Soft Brush or Sponge: For scrubbing the awning surface gently. Avoid stiff brushes, especially on fabric.
- Cleaning Solutions:
- For fabric (canvas, acrylic, polyester): Mild laundry soap (non-detergent) or a specialized fabric awning cleaner.
- For vinyl: A commercial cleaner formulated for vinyl or a mix of mild dish soap and water. Avoid abrasive cleaners.
- For metal (aluminum): An aluminum or metal-specific cleaning solvent.
- Buckets: For mixing cleaning solutions and rinsing tools.
- Ladder: A sturdy ladder is essential for reaching high areas safely. Ensure it’s stable on level ground.
- Safety Gear: Gloves and eye protection are recommended, especially when working with cleaning chemicals.
Safety First: Preparing for the Task
Before you begin, prioritize safety:
- Choose the Right Day: Opt for a cloudy, calm day, not too hot or windy. This prevents cleaning solutions from drying too quickly and makes working outdoors more comfortable. Avoid cleaning immediately after rain, as it can make debris removal more challenging.
- Ladder Safety: Always set your ladder on a firm, level surface. Have someone spot you if possible. Never overreach; reposition the ladder as needed.
- Clear the Area: Move any patio furniture, grills, or potted plants from beneath the awning to prevent them from getting wet or covered in cleaning solution.
- Protect Surroundings: If there are delicate plants or wooden decks nearby, you might want to cover them with tarps to protect them from runoff cleaning solutions.
- Retractables: For retractable awnings, ensure it is fully extended and secured if possible, and that power is disconnected if it’s motorized to prevent accidental retraction during cleaning.
The Importance of Debris Removal Before Washing
This is a critical first step often overlooked. Applying water directly to an awning covered in leaves, dirt, or bird droppings can create a muddy mess and make cleaning significantly harder. You should never proceed with wetting the awning until all loose debris has been removed.
Once your ladder is safely set up, gently use a soft-bristled broom or brush to sweep off loose dirt, cobwebs, leaves, twigs, and other accumulated debris from both the top and underside of the awning. Pay special attention to corners and seams where debris tends to collect. For tougher grime, a handheld vacuum with a brush attachment can be useful. After manually removing as much as possible, use your garden hose to lightly spray the awning, rinsing away any remaining loose particles. This initial rinse also helps to gently pre-wet some fabric types, preparing them for the cleaning solution. Performing this debris removal monthly can greatly reduce the build-up and simplify your deeper cleaning sessions.
Step-by-Step Guide: How to Clean Your Awning Effectively
Crafting the Right Cleaning Solution for Your Awning Material
The type of cleaning solution you use is paramount and must be tailored to your awning’s material to avoid damage.
- For Canvas, Acrylic, and Polyester Awnings: Mix a quarter cup of mild liquid laundry soap (ensure it’s detergent-free and bleach-free) per gallon of warm water. Alternatively, use a commercial cleaning solution specifically designed for outdoor fabric awnings, carefully following the manufacturer’s instructions. Avoid using harsh detergents, as they can strip the fabric’s protective coatings and shorten its lifespan.
- For Vinyl Awnings: A gentle approach is best. You can use a solution of warm water mixed with a few drops of mild dish soap. For tougher grime or mildew, consider a commercial vinyl cleaner. Never use abrasive cleaners, as they can scratch the vinyl surface and compromise its integrity.
- For Aluminum Awnings: A specialized aluminum or metal cleaning solvent is recommended. These products are formulated to remove oxidation and grime without corroding the metal. Always follow the product’s instructions for dilution and application.
Cleaning the Awning Itself
With your tools ready and solution prepared, it’s time for the main cleaning.
Cleaning Canvas, Acrylic, and Polyester Awnings
First, wet the entire awning thoroughly with your garden hose. Then, dip your long-handled soft brush into your prepared mild cleaning solution. Apply the solution to the fabric and gently scrub in circular motions, working on small sections at a time. The goal is to lift the dirt, not to aggressively scour the fabric. For larger awnings, it’s best to apply the soap, scrub, and rinse one section before moving to the next. This prevents the cleaning solution from drying on the fabric, which can leave unsightly streaks or residues.
Cleaning Vinyl Awnings
Unlike fabric awnings, it’s often more effective to apply the cleaning solution to a dry vinyl awning first. This allows the solution to penetrate and break down grime more efficiently. Dip a soft brush or sponge into your vinyl cleaning solution and apply it evenly across the awning surface. Work methodically from one end to the other, ensuring complete coverage. Vinyl is less prone to the solution drying too quickly, so you can generally cover a larger area before rinsing. Use a soft touch, as vinyl is sensitive to abrasive materials and can scratch easily.
Cleaning Aluminum Awnings
For aluminum awnings, start by wetting the surface with your garden hose. Then, apply your metal-specific cleaning solvent using a soft brush or sponge. Scrub gently but firmly, focusing on any areas with visible grime or oxidation. The solvent should help lift the dirt and restore the metal’s appearance. Follow the product’s recommended dwelling time before rinsing. Ensure you cover the entire surface to achieve an even clean.
The Art of Thorough Rinsing
Once you’ve cleaned the entire awning surface, rinsing is the next crucial step. Use your garden hose to thoroughly rinse the awning, starting from the highest point and working your way down. This ensures all the cleaning solution, along with the dislodged dirt, is completely washed away. Pay close attention to seams, folds, and the underside of the awning, as cleaning solution can linger in these areas. Any leftover soap or cleaning residue will not only attract new dirt more quickly but can also degrade the awning material over time, shortening its lifespan and requiring more frequent cleaning. Continue rinsing until you see no more suds or murky water.
Ensuring Proper Drying: A Critical Step
For fixed awnings, simply allow them to air dry completely. For retractable awnings, however, ensuring complete dryness before retraction is absolutely critical. Rolling up a wet or damp awning creates an ideal environment for mold and mildew to grow, leading to unsightly stains, unpleasant odors, and potential damage to the fabric. Extend the awning fully and let it air dry in the sun (if it’s out) or in a breezy spot for several hours. You can even use a leaf blower on a low setting to help speed up the drying process. Once you are absolutely certain it’s dry to the touch, you can retract it.
Advanced Awning Care: Tackling Stains, Mold, and Mildew
Sometimes, general cleaning isn’t enough for tougher issues. Here’s how to address common problems.
Dealing with Stubborn Stains
For localized stubborn stains like bird droppings or tree sap, it’s best to treat them as soon as possible. Gently scrape off any solid material with a blunt tool (like a plastic spatula) before applying a spot cleaner. For most fabric awnings, a paste made of baking soda and a little water can be effective. Apply, let sit for 15-20 minutes, then gently scrub and rinse. Always test any stain remover on an inconspicuous area first.
Eradicating Mold and Mildew Safely
Mold and mildew are common issues for outdoor fabrics, especially in humid climates. If you spot mildew or mold on your awning, a homemade solution can be highly effective. Mix one cup (approximately 250ml) of household bleach with four liters (one gallon) of warm water. Apply this solution to the affected areas using a soft brush or spray bottle, allowing it to soak for about 10-15 minutes. Then, scrub gently and rinse thoroughly with clean water. Remember, always test this solution on a small, hidden part of the awning first to ensure it doesn’t cause discoloration or damage. For non-bleachable fabrics or for a more eco-friendly option, a solution of distilled white vinegar and water (1:1 ratio) can also be effective against mildew, followed by thorough rinsing.
Always double-check that any solution and cleaning material you use are compatible with your specific awning material. Using overly harsh solutions or abrasive brushes can permanently damage the fabric or finish, voiding warranties and shortening the awning’s lifespan.
Maintaining Your Awning: Frequency and Best Practices
Consistency is key to keeping your awning in top condition. Generally, you should aim to clean your awning every three to four months, or at least twice a year, depending on your local climate and how much exposure it gets to dirt, pollen, and pollutants. Areas with heavy tree cover or high humidity might require more frequent attention.
Beyond deep cleaning, consider these best practices:
- Regular Debris Removal: A quick sweep or rinse once a month can prevent large accumulations of dirt and leaves.
- Prompt Spot Cleaning: Address bird droppings, tree sap, and other isolated stains immediately to prevent them from setting in.
- Weather Awareness: Retract your awning during heavy storms, high winds, or snowfall (if applicable) to prevent structural damage.
- Inspect for Damage: During your cleaning routine, take the opportunity to inspect the awning fabric, stitching, and frame for any signs of wear, tears, or structural issues. Early detection can prevent more costly repairs down the line.
When to Call the Professionals: DIY vs. Expert Awning Cleaning
While cleaning your awning is a manageable DIY task for most homeowners, there are instances when professional help might be warranted. Consider calling professionals if:
- Your Awning is Exceptionally Large or High: Reaching all areas safely might be challenging for a DIY approach.
- Severe Mold or Mildew Infestation: If mold has deeply penetrated the fabric or covers a vast area, professional cleaners have specialized equipment and stronger, yet safe, solutions to tackle it.
- Delicate or Unique Materials: Some specialized fabrics or vintage awnings may require expert handling.
- Lack of Time or Equipment: If you don’t have the time, the right tools, or simply prefer to avoid the hassle, professionals offer a convenient solution.
Professional cleaners can often restore awnings to near-new condition and may offer protective treatments to extend cleanliness. For most regular maintenance, however, following this guide will provide excellent results.
Conclusion: Enjoying a Spotless and Long-Lasting Awning
A well-maintained patio awning significantly enhances your outdoor living experience, offering comfort, protection, and aesthetic appeal. Regular cleaning is not just about keeping it looking good; it’s about preserving its material integrity, preventing costly damage, and extending its lifespan. Fortunately, the process of cleaning your awning is straightforward and doesn’t require specialized skills or extensive time. By understanding your awning’s material, gathering the right tools, and following these detailed steps, you can easily keep your outdoor space inviting and ensure your awning continues to provide shade and beauty for many seasons to come. Embrace the simple routine of awning maintenance and enjoy a beautiful, functional patio year-round.