
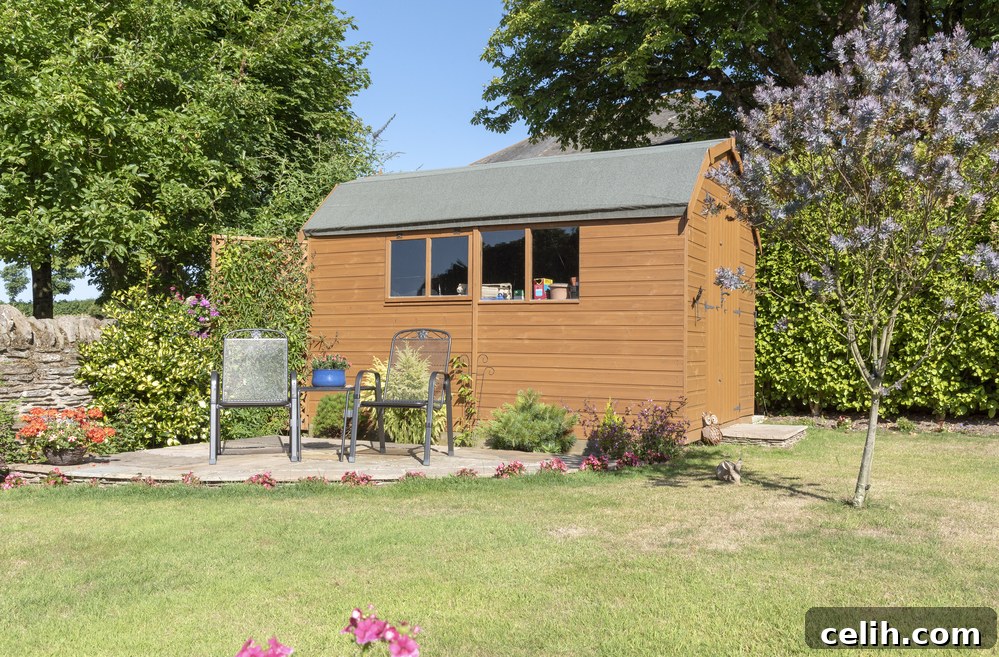
Are you dreaming of adding a functional and attractive structure to your backyard? Building your own shed is a highly rewarding project that transforms a simple idea into a tangible asset for your home. Whether your vision is a practical storage solution for garden equipment, a peaceful man cave for relaxation, a dedicated potting shed for nurturing plants, or a safe haven for garden furniture during the off-season, embarking on a DIY shed project offers immense satisfaction and adds significant value to your property. This comprehensive guide will walk you through every critical step: from conceiving an effective design and selecting robust materials to the intricacies of construction, essential maintenance tips, and those personal touches that make a shed truly yours. Let’s collaborate to turn your aspirations into reality – together, we’ll build your perfect, custom-made backyard shed!
Drafting an Effective Shed Design: Laying the Foundation for Success
The journey to building your ideal shed begins with meticulous planning and drafting an effective design. This crucial initial phase is not merely about sketching; it’s about strategic thinking that will safeguard your project against costly mistakes and ensure the final structure perfectly meets your needs. A well-thought-out plan is the cornerstone of a successful and enduring shed.
Understanding Your Needs and Site Selection
Before any lines are drawn, consider the primary purpose of your shed. Will it be a garden toolshed, a workshop, a creative studio, or a versatile storage unit? Your intended use will dictate its size, layout, and specific features. Equally important is site selection. Evaluate potential locations in your yard for factors such as:
- Drainage: Choose a spot that naturally drains well to prevent moisture issues.
- Sunlight Exposure: Consider how much sun or shade the site receives, especially if you plan to grow plants or use the shed as a workspace.
- Accessibility: Ensure easy access for bringing in materials during construction and for daily use afterward.
- Local Regulations: Check with your local municipality for any zoning laws, building codes, or permit requirements. Homeowners’ association (HOA) rules may also apply.
Leveraging Modern Design Tools
In today’s digital age, crafting an effective shed design is more accessible than ever. Consider using a shed design app or online planning software. These powerful tools allow you to:
- Visualize various designs in 3D, experimenting with different styles like gable, gambrel, lean-to, or barn-style sheds.
- Precisely adjust sizes and layouts to optimize internal space and external aesthetics.
- Simulate different lighting conditions to understand natural light penetration.
- Incorporate features like windows, doors, and interior shelving, providing a comprehensive blueprint.
With these digital aids, transforming your ideas into a detailed, buildable plan becomes a less daunting and far more enjoyable process, ensuring every detail of your shed design is meticulously considered.
Aesthetics and Color Scheme Selection
One of the most impactful design decisions is selecting the color scheme for your shed. This choice significantly influences how your new structure integrates with or stands out from your existing garden landscape and home. You can opt for earthy tones that blend seamlessly into your garden, creating a harmonious and natural look. Alternatively, bold hues can make a statement, adding a vibrant focal point to your outdoor space. It’s crucial to pick a palette that not only reflects your personal style but also complements the overall aesthetic of your property. For example, many manufacturers offer a wide range of options, such as over 22 colors to choose from, ensuring you’ll find the perfect match to fulfill your functional and decorative needs.
Choosing the Right Materials for Your Durable Shed
The longevity, functionality, and aesthetic appeal of your shed heavily depend on the quality and type of materials you select. This critical phase requires balancing durability, cost-effectiveness, and visual harmony. Investing wisely in materials now will save you time and money on repairs and replacements in the future.
Foundation Materials
The foundation is paramount. For a sturdy base, consider:
- Concrete Slab: Offers excellent durability and stability, ideal for heavy equipment or workshops. It’s robust but typically the most expensive option.
- Treated Wood Skids: A budget-friendly and versatile choice, allowing the shed to be moved if necessary. It requires careful leveling and gravel base preparation.
- Concrete Piers or Blocks: Provides good airflow underneath the shed, protecting against moisture. Suitable for smaller to medium-sized sheds.
Framing and Structural Elements
For the shed’s framework, durability and resistance to elements are key:
- Pressure-Treated Lumber: This is often the optimal choice for structural components due to its superior resistance against rot, insects, and moisture. It’s essential for any wood in contact with the ground or exposed to weather.
- Standard Lumber (e.g., Pine, Fir): Economical for interior framing not exposed to moisture, but should be protected with proper siding and paint.
- Steel Framing: Offers exceptional strength, fire resistance, and is impervious to pests, though it can be pricier and requires specialized tools for assembly.
Wall Sheathing and Siding
The exterior walls protect the interior and define the shed’s look:
- Plywood or OSB: Excellent for structural sheathing, providing rigidity and a base for exterior finishes. Plywood is generally more durable.
- T1-11 Siding: A popular, cost-effective option that acts as both sheathing and finished siding, offering a rustic look.
- Vinyl Siding: Low maintenance, durable, and available in various colors, blending well with modern homes.
- Wood Siding (Cedar, Pine): Offers a natural, attractive finish. Requires regular painting or staining for protection.
- Fiber Cement Siding: Extremely durable, resistant to rot, pests, and fire, but heavier and more challenging to install.
Roofing Materials: Long-Lasting Protection
Don’t skimp on the roof – choose asphalt shingles or metal roofing for long-lasting protection against the elements:
- Asphalt Shingles: Common, affordable, and easy to install. Available in various colors and styles.
- Metal Roofing: Offers superior longevity, energy efficiency (reflects heat), and is highly resistant to extreme weather. It can be more expensive initially but requires less maintenance.
- Wood Shakes/Shingles: Provide a classic, natural aesthetic but require more maintenance and can be more prone to moss or rot.
Insulation for Year-Round Use
If you plan to use your shed year-round for a workshop or office, insulation is a wise investment:
- Fiberglass Batts: Effective and affordable, commonly used for walls and ceilings.
- Rigid Foam Boards: Offer higher R-values for their thickness, excellent for walls, floors, and roofs.
- Spray Foam Insulation: Provides superior air sealing and R-value, but typically requires professional installation.
Flooring Options
The right flooring enhances usability and durability:
- Concrete: Extremely durable, easy to clean, and ideal for heavy loads or messy tasks, though it’s the pricier option.
- Treated Wood Flooring: A more budget-friendly choice, especially if built on skids or piers. Ensure it’s adequately supported and protected.
- Vinyl or Linoleum Tiles: Can be laid over a wooden subfloor for a clean, easy-to-maintain surface, good for workshops.
Finishing Touches: Paint, Stain, and Hardware
Lastly, think about paint or stain finishes that’ll enhance your shed’s look while adding another crucial layer of protection against weather damage, UV rays, and moisture. Choose exterior-grade products. For hardware (hinges, latches), select galvanized or stainless steel options to prevent rust and ensure long-term security. Remember: good materials aren’t just about initial appearance – they ensure longevity, structural integrity, and ease of maintenance too.
Step-by-Step Guide to Shed Construction: Building Your Backyard Oasis
Embarking on the construction phase of your shed is an exciting milestone. With a solid design and the right materials in hand, you’ll find that building your outdoor storage space can be a straightforward and rewarding process when broken down into manageable steps. Remember to prioritize safety throughout construction by wearing appropriate personal protective equipment, such as safety glasses, gloves, and sturdy footwear. Always double-check measurements and ensure components are level and square.
Here’s a practical step-by-step guide to bring your shed to life:
1. Prepare the Site and Lay the Foundation
The foundation is critical for the stability and longevity of your shed. A well-prepared site prevents future issues like settling or moisture damage.
- Clear and Level the Ground: Remove all vegetation, debris, and topsoil from the shed’s footprint. Use a rake, shovel, and level to create a perfectly flat and compact surface. For larger areas, consider renting a plate compactor.
- Install Your Chosen Foundation:
- For Concrete Blocks/Piers: Dig shallow trenches or holes, add gravel for drainage, and carefully position concrete blocks or pour piers, ensuring they are perfectly level and spaced according to your plan.
- For a Full Concrete Slab: Prepare a formwork, lay down a gravel base, install a vapor barrier, and reinforce with rebar or wire mesh before pouring concrete. This requires more effort but provides the most robust foundation.
- For Skid Foundations: Place pressure-treated skids on a well-drained, level gravel bed.
- Moisture Barrier: Regardless of the foundation type, installing a moisture barrier can prevent ground moisture from wicking into the shed structure.
2. Build Your Floor Frame and Walls
Once the foundation is secure, you’ll construct the floor and then the wall sections. Building wall sections horizontally on the floor is often easier and safer.
- Construct the Floor Frame: Assemble the floor joists and rim joists using pressure-treated lumber (if applicable), securing them with appropriate fasteners. Ensure it’s square and level.
- Attach Floor Sheathing: Nail or screw down exterior-grade plywood or OSB to the floor frame.
- Construct Wall Sections: Lay out the bottom plate, top plate, and wall studs for each wall on the completed floor. Frame any openings for doors and windows with headers and cripple studs.
- Raise and Secure Walls: Carefully raise each framed wall section into place on the floor, plumbing it (making it perfectly vertical), and temporarily bracing it. Secure the bottom plate to the floor and then connect adjacent wall sections at the corners, ensuring everything is square and plumb.
3. Erect Roof Trusses or Rafters & Apply Sheathing
The roof provides vital protection from the elements.
- Install Roof Framing: If using pre-fabricated trusses, place them evenly apart according to your plans, securing them to the wall’s top plates with hurricane ties or similar fasteners. If building rafters, cut and install them to create the desired roof pitch, along with a ridge board.
- Secure Roof Sheathing: Nail or screw down exterior-grade plywood or OSB panels to the trusses or rafters. Ensure tight seams and proper alignment.
- Install Felt Paper/Underlayment: Lay down roofing felt or synthetic underlayment over the sheathing, starting from the bottom and overlapping layers, to create an additional moisture barrier.
- Install Roofing Material: Apply your chosen roofing material (e.g., asphalt shingles, metal panels) following the manufacturer’s instructions, ensuring proper flashing around any vents or chimneys.
4. Install Exterior Finishes and Trim
The exterior finishes protect the structure and give your shed its character.
- Apply Siding Material: Install your chosen siding (e.g., T1-11, vinyl, wood planks) to the exterior walls, working from the bottom up. Ensure proper overlap and fastening.
- Install Trim: Add corner trim, fascia boards, and soffits (if applicable) to give the shed a finished look and further protect edges.
- Seal and Protect: Caulk all seams, gaps, and around window/door openings to prevent water intrusion.
- Paint or Stain: Apply exterior-grade paint or stain for enhanced protection against weather, UV rays, and moisture, matching your desired color scheme.
5. Add Doors, Windows, and Interior Elements
These final installations enhance the usability and aesthetics of your shed.
- Install Doors: Mount your shed door(s) securely, ensuring they swing freely and latch properly. Install sturdy hinges and a reliable lock for security.
- Install Windows: If your design includes windows, carefully install them into their framed openings, ensuring they are level, sealed, and flash properly to prevent leaks.
- Interior Finishing: Consider adding insulation, interior wall coverings (like plywood or drywall), and any basic electrical wiring if intended for a workshop or office.
- Shelving and Storage: Install any pre-planned shelving, workbenches, or tool hangers to maximize interior space and organization.
Adding the Final Touches to Your Shed: Personalization and Functionality
Once the basic construction is complete, it’s time to infuse your shed with personality and enhance its functionality. This stage transforms a simple structure into a truly personal space that meets your unique needs and style. You’re not just building a shed; you’re creating a haven that reflects your individuality and provides immense utility.
Maximizing Interior Space and Organization
Efficient organization is key, especially in a storage or workspace. Consider these options:
- Custom Shelving Systems: Investing in custom shelving is a game-changer for maximizing vertical space and keeping clutter at bay. Whether built-in wooden shelves, adjustable wire shelving, or sturdy pegboards, tailoring storage to your tools and supplies brings a powerful vibe of organization and efficiency.
- Workbenches and Cabinets: If your shed is a workshop, a dedicated workbench with integrated storage drawers or cabinets can significantly improve productivity.
- Overhead Storage and Hooks: Don’t forget the ceiling! Hooks for ladders, bikes, or garden tools can free up valuable floor space.
Enhancing Ambiance and Functionality with Lighting
Good lighting is crucial, whether for finding items or working on projects:
- Creative Lighting Fixtures: Beyond basic utility, thoughtful lighting adds both ambiance and crucial functionality. Consider solar-powered LED lights for an eco-friendly option, battery-operated puck lights for specific task areas, or even run electricity for overhead fluorescent fixtures and wall outlets if permitted and safe.
- Natural Light: Optimize natural light by ensuring windows are clean and considering translucent roof panels or skylights during the design phase.
Injecting Personality with Color and Hardware
Small details can make a big impact on the overall look and feel of your shed:
- A Pop of Color: Don’t be afraid to use color! Paint the door, window frames, or trim in a vibrant hue that contrasts or complements the main shed color. An unexpected burst of color can instantly boost mood and curb appeal. You could even paint an interior accent wall.
- Unique Hardware: Upgrade from standard hinges and latches to decorative, heavy-duty hardware. It’s a small detail that can profoundly impact the shed’s aesthetic, adding character and a touch of bespoke craftsmanship.
Personalized Decor and Landscaping
Make the space truly yours:
- Personalized Décor: Hang up art, vintage signs, old tools, or items that bring you joy and reflect the shed’s purpose. Whether it’s a potting shed adorned with gardening prints or a workshop with framed schematics, personal touches make the space inviting.
- Exterior Landscaping: Enhance the area around your shed with small flowerbeds, potted plants, or a paved pathway leading to the door. This integrates the shed seamlessly into your garden landscape and boosts its curb appeal.
- Comfort Elements: For a retreat shed, consider adding a comfortable chair, a small table, or even a mini-fridge.
These final touches transform your shed from a simple structure into an integral, cherished part of your home environment, perfectly tailored to your lifestyle.
Essential Tips for Shed Maintenance: Ensuring Lasting Durability
Building a shed is a significant investment of time and resources, and proper maintenance is crucial to protect that investment. Regularly maintaining your shed will not only preserve its appearance but also ensure its structural integrity and usability for many years to come, preventing minor issues from escalating into major, costly repairs.
Roof and Drainage System Inspection
The roof is your shed’s primary defense against the elements:
- Routine Roof Inspection: You’ll want to routinely inspect the shed’s roof for any signs of damage, such as missing or cracked shingles, loose metal panels, or punctures, especially after heavy rains, strong winds, or significant snowfall. Look for any tell-tale water stains on the interior ceiling that might indicate a leak.
- Clear Gutters and Drainage: Don’t forget to clear out gutters or drainage systems regularly. Accumulated leaves, debris, or blockages can cause water to back up, leading to fascia board rot, leaks, and foundation damage. Ensure downspouts direct water away from the shed’s base.
Foundation and Structural Integrity Checks
The base and framework support the entire structure:
- Observe the Structure’s Foundation: Periodically check the foundation for any shifts or deterioration. If it’s wooden (skids or piers), inspect for signs of wood-boring pests (like termites or carpenter ants), rot, or fungal growth. Ensure good ventilation underneath to prevent moisture buildup.
- For Concrete Foundations: Look out for cracks, especially hairline ones, which could compromise stability over time. Address these promptly with appropriate concrete sealants.
- Inspect Walls and Siding: Check the exterior siding for loose panels, cracks, or peeling paint. Repair or repaint as needed to maintain weather protection. Look for any signs of pests trying to gain entry.
Doors, Windows, and Ventilation
These components are crucial for security and interior environment control:
- Seal Doors and Windows: Finally, don’t neglect the doors and windows. Make sure they’re sealed well against weather elements; check weatherstripping for wear and reapply caulk or sealant around frames when necessary. This prevents water intrusion, drafts, and helps maintain a stable internal temperature.
- Check Hardware: Lubricate hinges and locks to ensure smooth operation and prevent rust. Verify that all latches and locks provide adequate security.
- Ensure Adequate Ventilation: If your shed is prone to dampness or condensation, ensure any vents are clear and functioning. Consider adding additional passive vents or a small solar-powered fan to improve airflow, which is critical for preventing mold and mildew.
Seasonal and Annual Checks
- Spring Cleaning: After winter, give your shed a thorough cleaning, both inside and out. Remove debris, sweep floors, and wash down exterior surfaces.
- Fall Preparation: Before winter sets in, ensure all repairs are done, and the shed is secure against harsh weather. Store away any items that could be damaged by cold or damp.
Remember, regular, proactive maintenance helps you spot minor issues before they become significant, costly problems. It’s a small investment of your time with immense rewards in preserving your shed’s condition, extending its lifespan, and ensuring it remains a functional and attractive asset to your property for decades.
Conclusion: A Testament to Your Craftsmanship
Congratulations! In constructing your shed, you’ve embarked on a remarkable journey, progressing from the initial spark of an idea to drafting a detailed design, selecting the perfect materials, and meticulously piecing them together with precision. You’ve navigated the complexities of construction, embraced the art of personalization with thoughtful final touches, and committed to the essential practice of regular maintenance.
Now, take a moment to stand back and truly admire your handiwork. This isn’t just a shed; it’s a profound testament to your skills, dedication, and vision. Every plank, every nail, every coat of paint reflects your effort and creativity. This durable, functional, and aesthetically pleasing structure is more than just extra storage; it’s a valuable extension of your home, designed to serve your specific needs exceptionally well for years to come. May your new shed bring you immense satisfaction and practical utility, a proud symbol of what you can achieve with your own hands.