
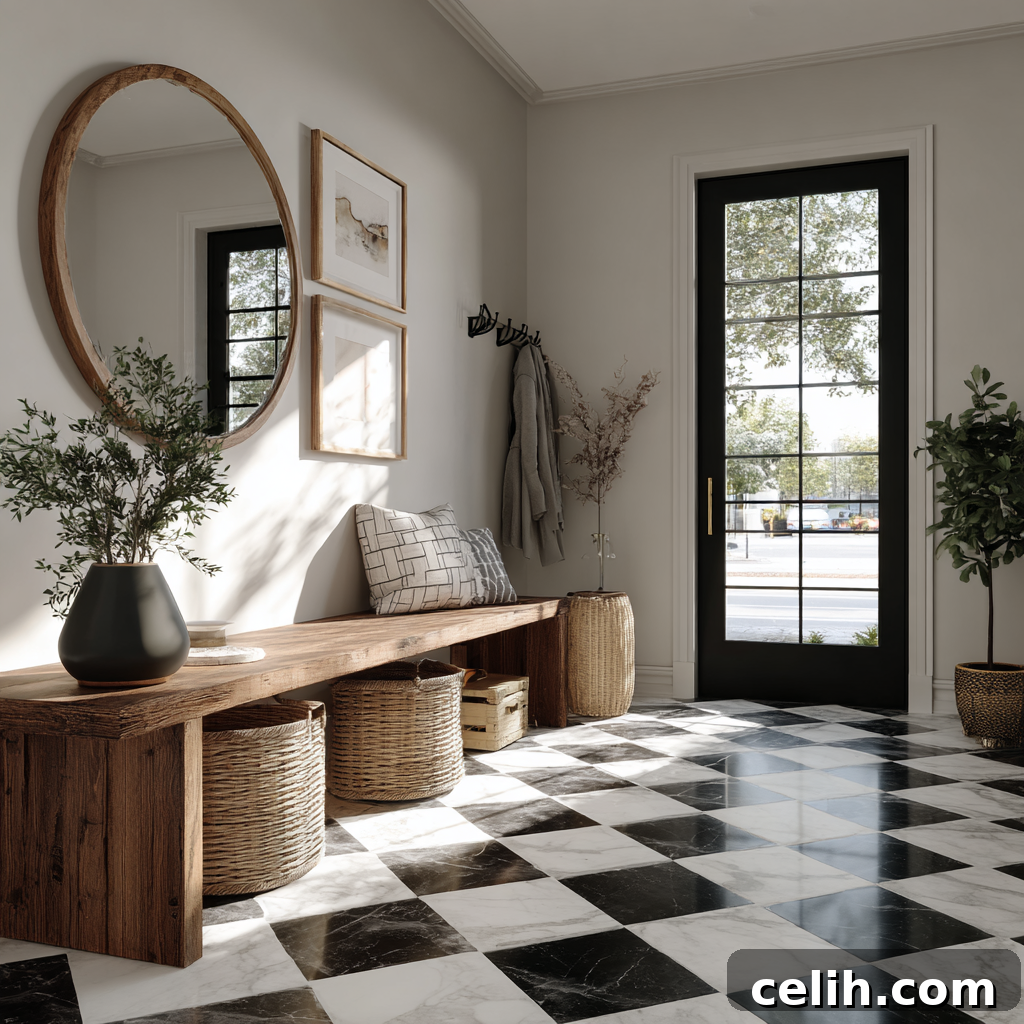
The entryway or hallway is the first glimpse guests get into your home – it’s your home’s handshake, setting the entire tone for what lies within. Despite its crucial role in creating a lasting first impression and enduring constant foot traffic, this high-traffic area is often overlooked, left to show wear and tear, or stuck in a dated style. A scuffed, uninspired entryway can subtly diminish the overall appeal of an otherwise beautiful home.
However, transforming this pivotal space doesn’t require an extensive and costly renovation. The good news is that a simple, focused weekend tile project can breathe incredible new life into your entryway and adjacent hallways. By installing durable, stylish tiles right by your front door, you instantly inject character, brighten the area, and craft an unforgettable welcome. This seemingly small change delivers a surprisingly substantial impact, enhancing both aesthetics and functionality.
Revitalize Your Home: The Impact of Tiling Your Entryway and Hallway
Why Tiles Are the Perfect Choice for High-Traffic Small Spaces
Tiles offer an unparalleled blend of aesthetic appeal and robust practicality, making them an ideal flooring solution for the most demanding areas of your home. They are particularly well-suited for entryways and hallways, where their inherent properties shine.
- Unmatched Durability: Entryways and hallways are subjected to relentless foot traffic, the scuffs of muddy boots, the drips of rainy weather, and the occasional spilled drink. Quality tiles, such as porcelain and ceramic, are engineered to withstand these daily assaults. They are exceptionally hard-wearing, highly water-resistant, and remarkably easy to clean. A quick mop is often all it takes to restore their pristine appearance, ensuring they look as good as new for years to come. Unlike wood or carpet, tiles resist scratches, dents, and moisture damage, providing a long-lasting and resilient surface. Natural stone tiles like slate or granite also offer incredible durability and a unique, timeless aesthetic.
- Enhanced Safety Features: The safety of your family and guests is paramount, especially in busy transition zones. Many modern floor tiles are available with slip-resistant finishes, an invaluable feature that significantly reduces the risk of slips and falls. This makes them an exceptionally smart and responsible choice for households with active children, playful pets, or elderly relatives, offering crucial peace of mind without compromising on style. Look for tiles with a higher coefficient of friction for maximum anti-slip properties.
- Limitless Design Versatility: The world of tile design is vast and inspiring, offering an incredible range of styles to complement any home decor. From the rustic charm of slate or terracotta to the sleek, minimalist appeal of modern polished porcelain, there’s a tile to match every vision. Light, glossy tiles are particularly effective in making narrow hallways feel more spacious and bright by reflecting light, while textured matte finishes can introduce warmth, sophistication, and expertly conceal everyday scuffs and dirt. Tiles can mimic the look of wood, concrete, marble, or fabric, providing luxurious aesthetics at a fraction of the cost and with superior performance.
- Effortless Maintenance: Beyond their durability, tiles are incredibly low-maintenance. Their non-porous surfaces (especially ceramic and porcelain) repel spills and stains, making cleanup a breeze. Dirt, dust, and allergens simply sit on the surface, ready to be swept or mopped away, contributing to a healthier indoor environment compared to carpets that trap particles. For grout lines, periodic sealing can further protect against staining and ensure longevity.
- Value Addition to Your Home: Updating the flooring in high-impact areas like entryways and hallways with quality, stylish tiles can significantly enhance your home’s perceived value. It demonstrates attention to detail and a commitment to quality, making a positive impression on potential buyers should you decide to sell in the future. It’s an investment that pays dividends in both daily enjoyment and long-term property value.
With an abundance of styles, textures, and finishes available, tile stands out as a practical, stylish, and long-term solution to refresh even the busiest and most frequently used spaces in your home, transforming them into inviting and beautiful zones.
Inspiring Design Ideas for Entryways and Hallways
A compact entryway or hallway is far from a design limitation; it’s an exhilarating canvas, perfect for making a bold design statement without overwhelming the entire house. This confined area allows you to experiment with patterns, colors, and textures that might be too intense for larger rooms, creating a unique focal point right at your home’s threshold.
- Patterns That Pop with Personality: Unleash your creativity with dynamic tile patterns. Layouts like herringbone or chevron create a sense of movement and direction, making a hallway feel more expansive and energetic. These patterns can guide the eye deeper into your home, adding architectural interest. For timeless elegance, a classic black-and-white checkerboard floor remains an iconic choice, instantly infusing the space with personality, depth, and a touch of vintage charm. Consider variations with larger or smaller squares, or even mixing different shades of gray for a contemporary twist. Geometric patterns, starburst designs, or even intricate Moroccan-inspired layouts can turn your floor into a captivating work of art.
- Mosaics and Borders for Defined Zones: Elevate your entryway with the artistry of mosaic tiles or decorative borders. Even a small section of intricately designed mosaic tiles can serve as a stunning focal point, much like a permanent, decorative rug. This defines the entry space, subtly signaling to guests that they’ve arrived in a special place. Borders, whether contrasting in color, texture, or pattern, can frame the entire area, adding sophistication and visual structure. Use mosaic tiles made from glass, ceramic, or natural stone to introduce glimmer, color, and texture, transforming a simple floor into an impressive design element.
- Strategic Color Play to Influence Perception: Color has a profound impact on how a space is perceived. Light tiles – think soft greys, creamy beiges, or crisp whites – are excellent for making tight areas appear brighter, more open, and undeniably welcoming. They reflect natural and artificial light, counteracting the often-windowless nature of hallways. Conversely, darker tiles, such as charcoal, deep navy, or rich terracotta, can introduce a sense of depth, drama, and grounded sophistication, perfect for creating a luxurious or cozy atmosphere. For maximum impact, combine light and dark tiles in patterns or striking borders to create visual interest and highlight architectural features.
- Texture and Finish for Multi-Sensory Appeal: The finish of your tiles can dramatically alter the feel of a space. Matte wood-look tiles offer the warmth and organic appeal of hardwood with the unrivaled practicality and durability of porcelain, an ideal solution for busy entryways. Glossy tiles, with their reflective surfaces, excel at bouncing light around, creating a luxe, expansive, and high-end feel, though they may show dirt and footprints more readily. Don’t shy away from mixing materials: imagine a durable tiled “pad” at the immediate entry, seamlessly transitioning into warmer wood flooring or plush carpeting further into your home, creating distinct zones and visual interest. Consider tiles with subtle texture, like a slightly rougher stone finish, to add tactile interest and enhance slip resistance.
- Tile Size and Shape Considerations: The size and shape of your tiles also play a critical role in the overall design. Large format tiles can minimize grout lines, creating a more seamless and expansive feel in smaller areas, visually stretching the space. Smaller tiles or penny rounds, conversely, introduce intricate detail and can be used to create unique patterns or emphasize a particular zone. Rectangular tiles can be laid in various directions to elongate or widen a hallway, depending on their orientation.
- Grout Color: The Unsung Hero: Often overlooked, grout color is a powerful design tool. A contrasting grout color (e.g., dark grout with light tiles) can highlight the tile pattern and add definition, creating a bold, graphic look. A matching grout color, on the other hand, allows the tiles to blend more seamlessly, creating a unified, expansive surface that makes the space feel larger and cleaner. Don’t underestimate the impact of this subtle choice.
The secret to successful entryway tiling lies in striking the right balance. If your chosen tiles feature bold colors or intricate patterns, keep the surrounding walls and décor relatively simple and understated to avoid visual clutter. If you opt for a more neutral or minimalist floor, let strategic accessories, a vibrant piece of art, or a brightly painted front door provide the necessary accent and personality, ensuring your entryway feels cohesive and thoughtfully designed.
Measuring and Planning Ahead – Ensuring a Seamless Project
Embarking on any home improvement project without adequate preparation is a recipe for frustration, unexpected costs, and delays. Before you even think about removing old flooring, dedicate some time to meticulous planning and precise measurements. A little foresight will undoubtedly save you significant time, money, and stress in the long run.
- Measure Your Space with Utmost Care: Begin by sketching a detailed diagram of your entryway and hallway. Accurately measure the length and width of each section, including any alcoves or unusual angles. Multiply these dimensions to calculate the total square footage. For example, a 5-foot by 8-foot foyer will require 40 square feet of tiling. For irregular shapes, break them down into smaller, manageable rectangles or squares and sum their areas. Double-check all measurements to prevent costly errors.
- Thoughtfully Consider Tile Size and Layout: The size of your chosen tiles will impact both the visual outcome and the installation process. Larger format tiles can cover more area quickly, often resulting in fewer grout lines and a more expansive feel. Smaller tiles or intricate mosaics, while offering rich detail, will require more individual pieces, more cuts, and potentially a more complex installation process. Complex layouts, such as diagonal, herringbone, or chevron patterns, are visually stunning but invariably require more cuts and thus more wastage. Factor this into your quantity calculations.
- Always Account for Wastage: This is a golden rule in tiling. It is absolutely crucial to order 10–15% more tiles than your exact measured area. This buffer accounts for various factors: inevitable cuts around obstacles (door frames, corners), potential breakages during installation or transport, and provides extra pieces for future repairs if a tile ever gets damaged. For complex patterns or first-time DIYers, you might even consider increasing this to 20% for peace of mind.
- Simplify the Math with a Tile Calculator: If calculations aren’t your strong suit, don’t fret! Online tile calculators are invaluable tools. Simply input your room’s dimensions and the size of your chosen tiles, and the calculator will precisely tell you how many tiles you need, including that all-important wastage buffer. This eliminates guesswork and minimizes the risk of ordering too little or too much. A popular and reliable option is the Omni Calculator tile tool.
- Budget Realistically for All Components: Beyond the cost of the tiles themselves, a comprehensive budget must include all necessary materials. This means factoring in the price of quality grout, appropriate adhesive (thinset mortar), and potentially an underlayment (like cement board or an uncoupling membrane) to ensure a stable, long-lasting installation. If you’re tackling the project yourself, don’t forget to budget for tool rentals (e.g., a wet tile saw, trowels, spacers, level) or purchases. If you plan to hire a professional, obtain at least three detailed quotes to compare labor costs and ensure transparency. Also, consider costs for old flooring removal and disposal.
- Subfloor Preparation is Paramount: A smooth, stable, and clean subfloor is the foundation of any successful tile installation. Before laying new tiles, inspect your subfloor for any damage, unevenness, or moisture issues. You might need to repair or replace sections of subfloor, install a cement backer board, or use a self-leveling compound to ensure a perfectly flat surface. Skipping this crucial step can lead to cracked tiles, loose grout, and a significantly shortened lifespan for your beautiful new floor.
Thorough planning ensures that your tiling project proceeds smoothly, allowing you to avoid the frustration of running short on materials, encountering unexpected problems, or overspending at the last minute. It empowers you to approach your weekend tile transformation with confidence and competence.
Budget-Friendly Tips – Achieving Style Without Breaking the Bank
A stunning entryway transformation doesn’t have to necessitate draining your savings. With strategic planning and clever choices, you can achieve a high-end look on a modest budget, proving that style is accessible to everyone.
- Opt for Mid-Range, High-Value Tiles: While natural stone tiles like marble or granite can be luxurious, porcelain and ceramic tiles offer incredible versatility and value. These engineered tiles can beautifully mimic the look of more expensive materials, such as natural stone, wood, or even concrete, at a mere fraction of the cost. Given that entryways and hallways are typically smaller spaces, the total quantity of tiles needed is relatively low, making a few boxes of mid-range, stylish tiles a highly affordable investment with a significant visual return. Explore options from reputable tile manufacturers that offer both quality and aesthetic appeal.
- Master the Art of Mixing and Matching: To incorporate a touch of luxury without the hefty price tag, strategically use pricier decorative tiles as accents. Consider a decorative border around the perimeter of the entryway, or create a small “rug” effect with intricate mosaic tiles right inside the door. Pair these statement pieces with more affordable, plain tiles for the majority of the floor space. This clever approach allows you to enjoy high-end design elements where they make the most impact, while keeping overall costs down.
- Embrace the DIY Spirit Where Possible: Labor costs can be a significant portion of any renovation budget. If you possess a reasonable level of DIY skill and patience, tackling parts of the project yourself can lead to substantial savings. Consider taking on the demolition of old flooring, preparing the subfloor, or even laying the simpler sections of tile yourself. Grouting is also a relatively straightforward task that many homeowners can confidently complete. However, be honest about your skill level; complex cuts or uneven surfaces might be best left to a professional to avoid costly mistakes and re-work. Watch online tutorials and practice on scrap pieces before committing to your main floor.
- Keep the Design Simple for Efficiency: While elaborate patterns are beautiful, they often require more cuts, which translates to more waste and increased installation time. Simple grid patterns or straight layouts are not only incredibly efficient in terms of material usage and cutting time, but they can also look incredibly sleek and modern. A well-executed simple pattern often exudes a timeless elegance that complex designs sometimes lack. Sometimes, less is truly more when it comes to visual impact and budget adherence.
- Think Long-Term: Investment in Quality: While it might seem counterintuitive to spend more initially, investing in a slightly higher-quality tile for a high-traffic zone like an entryway is a smart long-term financial decision. Cheaper, less durable tiles may wear out faster, chip, or scratch easily, necessitating costly replacements sooner. A good quality porcelain or ceramic tile will withstand years of abuse, maintaining its beauty and functionality, saving you money and hassle down the road. Consider the total cost of ownership, not just the upfront purchase price.
- Hunt for Sales and Clearance Deals: Keep an eye out for sales, clearance events, and discontinued lines at your local tile suppliers or home improvement stores. You might find fantastic deals on high-quality tiles that are perfect for your project. Since entryways are often smaller, you might only need a few boxes, making clearance items an ideal option for scoring premium looks at bargain prices.
By implementing these budget-friendly strategies, you can stretch your renovation funds further without having to compromise on style, durability, or the stunning visual impact you desire for your revitalized entryway.
DIY vs. Hiring a Professional – Making the Right Choice for Your Project
Deciding whether to tackle your entryway tiling project yourself or to enlist the help of a professional installer is a crucial decision that depends on several factors: your skill level, available time, budget, and desired outcome. While laying tile in a hallway is certainly achievable for enthusiastic DIYers, it demands patience, precision, the right tools, and a willingness to learn.
- The DIY Approach: For the Hands-On Homeowner
- Pros: The most obvious benefit is significant cost savings on labor, potentially hundreds or even thousands of dollars. Successfully completing the project yourself also brings immense personal satisfaction and “bragging rights.” It’s an opportunity to learn a new skill and have complete control over every detail.
- Cons: Tiling is physically demanding and time-consuming. Expect a learning curve, especially for your first project, which can lead to mistakes that require costly fixes. It often involves a messy few days (or even weeks, depending on your pace), and you’ll likely end up with some sore muscles. Results may not be as perfect as a professional finish, particularly with complex patterns or challenging room layouts. You’ll also need to invest in or rent specialized tools like a wet tile saw.
- Best For: Simple layouts (like a straight grid) in square or rectangular spaces with a perfectly level subfloor. DIY is ideal if you have ample time, a modest budget, good attention to detail, and enjoy hands-on projects.
- Hiring a Professional Installer: For Flawless Results and Peace of Mind
- Pros: A professional installer brings expertise, experience, and specialized tools to the job. They can complete the work much faster, often with impeccable precision and a flawless finish. Professionals are adept at handling tricky cuts, working with uneven subfloors, and executing complex patterns with ease. They typically offer warranties on their work, providing peace of mind, and you won’t be left worrying about costly mistakes or an uneven installation.
- Cons: The primary drawback is the higher cost, as you’re paying for their skill, time, and specialized equipment. Scheduling can sometimes be an issue, as good contractors are often booked in advance.
- Best For: Complex designs, intricate patterns, large or irregularly shaped spaces, or if your subfloor requires significant preparation. Hiring a pro is also recommended if you have limited time, lack confidence in your tiling abilities, or simply prioritize a perfect, worry-free installation.
- The Hybrid Approach: The Best of Both Worlds
Many homeowners opt for a hybrid strategy to balance cost and quality. This involves doing some of the less specialized, more labor-intensive tasks yourself, then bringing in a professional for the critical, precision-demanding parts. For example, you could handle the demolition of old flooring, clean and prepare the subfloor, and even lay out the initial tile pattern. Then, hire a pro for the precise cutting and setting of the tiles, particularly around edges, obstacles, or for complex patterns. You might also choose to do the grouting yourself, as it’s typically less intricate than tile setting.
No matter which route you choose, thorough research is key. If hiring a professional, seek multiple quotes, check references, and view their portfolio. If DIYing, immerse yourself in online tutorials and guides to ensure you’re well-equipped with knowledge before you begin.
Conclusion – Transform Your Home One Tile at a Time
Reimagining your entryway or hallway doesn’t demand an extensive, budget-draining renovation. With the focused effort of a weekend tile project, you possess the power to create an exceptionally welcoming first impression that beautifully sets the tone for your entire home. This small, yet significant, upgrade proves that profound home transformations often stem from the simplest, most intentional changes.
From embracing bold patterns and vibrant colors to ensuring meticulous planning and smart budgeting, tiles offer an unparalleled combination of durability, timeless style, and a substantial design impact within even the most confined spaces. With careful measuring (and perhaps a little assistance from an online tile calculator), intelligent financial decisions, and the right approach to installation—whether you choose to tackle it yourself or enlist a professional—your once-overlooked hallway can be elevated into an unforgettable showcase of your home’s character.
Why wait to enhance one of the most crucial areas of your living space? A fresh, inviting tile floor in your entryway isn’t just an aesthetic upgrade; it’s a testament to thoughtful home design, proving that the biggest and most impactful changes truly begin with the most accessible and practical steps.