
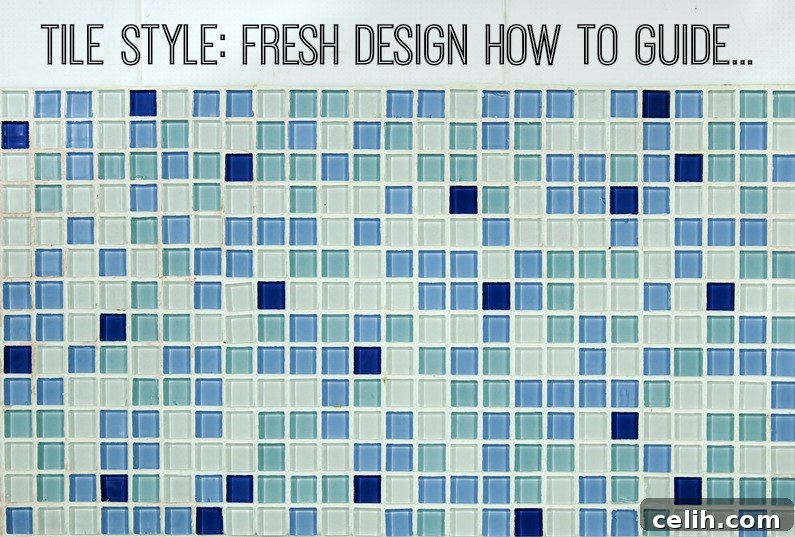
Tiles have evolved far beyond their traditional role as mere protective surfaces. Today, they stand as powerful design elements, capable of injecting texture, color, and undeniable character into virtually any space. From the sleek sophistication of modern kitchens and the tranquil serenity of spa-like bathrooms to the inviting warmth of hallways and the dramatic flair of dining room accent walls, tiles offer unparalleled versatility in home renovation and interior design.
Embarking on a DIY wall tiling project might seem daunting at first, but for small, straightforward areas without complex obstructions, it’s an incredibly rewarding endeavor that is well within the reach of most homeowners. The secret to a professional-looking finish lies in meticulous planning, careful execution, and understanding the right techniques. This comprehensive guide will walk you through every step of transforming your walls with beautiful, durable tiles, empowering you to add significant value and personal style to your home.
Mastering Your DIY Wall Tiling Project: From Planning to Perfection
1. The Art of Preparation: Laying the Groundwork for Success
Success in any DIY project, especially tiling, hinges on thorough preparation. Before you even think about applying adhesive, you need to ensure you have the right tools, materials, and a perfectly prepared surface.
1.1. Essential Tools and Materials: What You’ll Need
Having the correct equipment on hand will make the job smoother, safer, and more efficient. Here’s a detailed list of what you’ll need:
- Tape Measure: For accurate calculations and layout planning.
- Spirit Level (or Laser Level): Absolutely critical for ensuring perfectly straight lines, both horizontally and vertically.
- Claw Hammer: For securing battens and general utility.
- Tile Cutter: Essential for precise cuts. Manual score-and-snap cutters are great for ceramic, while a wet saw is ideal for porcelain or natural stone. Many tile shops offer rentals.
- Tile Spacers: Available in various sizes (e.g., 2mm, 3mm) to ensure uniform grout lines.
- Grout Spreader (or Rubber Grout Float): For forcing grout into the joints evenly.
- Tile File or Rubbing Stone: To smooth rough edges of cut tiles.
- Notched Adhesive Spreader (Trowel): The size of the notches should match your tile size and type (e.g., smaller notches for mosaics, larger for large format tiles).
- Safety Gear: Gloves (to protect hands from adhesive and grout) and safety goggles (crucial when cutting tiles).
- Wooden Battens (or Straight Edge): Two straight pieces of timber, used as a temporary support for your first row of tiles.
- Screws and Drill: For securely attaching the battens to the wall.
- Mixing Bucket and Paddle: For thoroughly mixing adhesive and grout.
- Sponges and Clean Water: For cleaning up excess adhesive and grout.
- Primer: To ensure optimal adhesion, especially on porous or painted surfaces.
- Tile Adhesive: Choose the right type for your tiles and substrate (e.g., flexible adhesive for large tiles, rapid-set for quick projects).
- Grout: Select a color that complements your tiles. Sanded grout for wider joints (1/8 inch or more), unsanded for narrower joints.
- Sealant (optional but recommended): For natural stone tiles or porous grout.
1.2. Accurate Measurement and Tile Estimation
Measure the area you intend to tile meticulously. Calculate the total square footage (or square meters) of the wall. Your tile retailer can assist in determining the exact number of tiles required. Always add a waste factor, typically 5-10% extra, to account for cuts, breakages, and future repairs. For complex patterns like herringbone or diagonal layouts, you might need to increase this to 15%. Many reputable retailers offer a return policy for unopened boxes of tiles, so it’s always better to over-order slightly than to run short mid-project. Don’t forget to estimate quantities for tile adhesive and grout; your retailer can provide guidance based on your chosen tiles and coverage rates.
1.3. Surface Preparation: The Foundation of Durability
The wall surface must be clean, dry, sound, and smooth. This is paramount for proper adhesion and a lasting finish.
- Clean: Remove any wallpaper, loose paint, grease, or dirt. Use a suitable cleaner or degreaser if necessary.
- Dry: Ensure the surface is completely dry. Moisture can lead to adhesive failure.
- Sound: The wall must be structurally stable. Repair any cracks, holes, or crumbling plaster with appropriate filler. Any loose plaster or drywall should be repaired or replaced.
- Smooth and Level: Uneven surfaces will result in uneven tiling. Skim-coat or sand down any bumps. For extremely uneven walls, consider applying a leveling compound.
- Prime: Apply a suitable primer. This improves adhesion, seals porous surfaces, and reduces suction, giving you more working time with the adhesive. Always follow the manufacturer’s instructions for drying times.
- Waterproofing (for Wet Areas): If tiling a shower enclosure or other areas prone to high moisture, apply a liquid waterproofing membrane according to the product guidelines. This is a critical step to prevent water damage behind your tiles.
1.4. Planning Your Layout and Setting Guide Lines
A well-planned layout minimizes cuts and ensures a symmetrical, professional appearance.
- Dry Layout: If possible, lay out a section of your tiles on the floor to visualize the pattern and make a “tile gauge.” Place a wooden batten along the edge of the laid tiles and mark the exact positions of the tiles, including spacer gaps. This gauge will be invaluable for transferring the layout to the wall.
- Finding Your Starting Point: For most wall tiling projects, especially those without a finished floor, it’s best to start with the second or third full row up from the bottom. This allows for any necessary cuts at the bottom to be hidden or less noticeable, especially if the floor isn’t perfectly level.
- Marking the Wall: Using your tile gauge and tape measure, mark out the entire tiled area on the wall in pencil. Determine where the top and bottom of your design will come, adjusting for optimal visual balance. The goal is to avoid tiny slivers of tile at the edges.
- Establishing Guidelines: Draw a vertical and horizontal centerline through the middle of your intended tiled area. Use a spirit level to ensure these lines are perfectly straight. These lines will be your primary reference points for accurate tile placement.
- Dealing with Cuts: If your tiled area extends to the edge of a wall or a door frame, it’s aesthetically pleasing to ensure any cut tiles at opposing ends of a row are of equal size. This prevents a “skew-whiff” appearance. Adjust your starting point slightly if needed to achieve this balance.
- Securing the Batten: Mark the bottom of your lowest full row of tiles. Secure a wooden batten horizontally to the wall at this level using screws and a drill. Use your spirit level rigorously to ensure this batten is perfectly straight and level. This will provide a solid, temporary ledger for your first row of tiles, preventing them from slipping down while the adhesive cures.
2. The Tiling Process: Adhering Your Vision
2.1. Mixing and Spreading Adhesive
Carefully mix your tile adhesive according to the manufacturer’s instructions. Consistency is key – it should be smooth, lump-free, and resemble thick peanut butter or hummus. Avoid mixing too much at once, as it has a limited ‘open time’ before it begins to harden. Using your notched trowel, scoop up some adhesive and apply it to a small section of the wall, typically enough for 2-3 rows of tiles. Hold the trowel at a 45-degree angle, spreading the adhesive in even, horizontal lines. This creates ridges that collapse when the tile is pressed, ensuring good coverage. Avoid applying too much adhesive; excess will squeeze out from under the tiles, creating a mess that will need to be cleaned immediately.
For larger tiles (12×12 inches or more), it’s often recommended to “back-butter” each tile. This involves applying a thin layer of adhesive to the back of the tile in addition to the wall, ensuring 100% coverage and preventing hollow spots that can lead to cracks.
2.2. Laying the Tiles: Precision and Pace
Begin with the first tile of your second (or higher) full row, placed directly above your secured batten. Press the tile firmly into the adhesive with a slight twisting motion to ensure good contact. Immediately check its alignment with your spirit level. Work quickly but carefully, adding the remaining tiles along that row. Insert tile spacers into the gaps between tiles as you go, ensuring uniform spacing. Adjust the positions of the tiles until they are perfectly aligned and evenly spaced. It’s crucial to wipe away any excess adhesive that oozes into the grout lines or onto the tile surface as you go; dried adhesive is significantly harder to remove later.
Continue working in small sections, spreading adhesive and laying tiles row by row. Consistently use your spirit level to check for straightness and plumbness. Don’t be afraid to pull up a tile and reapply adhesive if it’s not sitting correctly – it’s easier to fix now than after the adhesive sets.
2.3. Cutting Tiles: Mastering the Art of Precision
You will inevitably encounter areas that require cut tiles – around corners, edges, outlets, and fixtures.
- Straight Cuts: For ceramic or porcelain tiles, a manual tile cutter (score-and-snap) works by scoring a line and then breaking the tile along that score. For more demanding materials or very long cuts, a wet saw provides cleaner, more precise results.
- Curved or Irregular Cuts: Tile nippers are useful for small, intricate cuts or nibbling away edges. For cutting around pipes or creating curved shapes, a tile-cutting saw with a diamond blade or a grinder with a diamond wheel attachment might be necessary.
- Measuring for Cuts: Always measure twice, cut once. Mark your cut lines clearly on the tile with a pencil or marker. Remember to account for the thickness of the tile spacer when measuring for cuts at edges.
- Smoothing Edges: After cutting, use a tile file or rubbing stone to smooth any rough edges, which will prevent injuries and ensure a neat finish, especially if the edge will be visible.
2.4. Cleaning as You Go
As you lay your tiles, immediately wipe away any adhesive that gets on the face of the tiles or squeezes up between the joints. A damp sponge or cloth works best. If left to dry, adhesive becomes extremely difficult, if not impossible, to remove without damaging the tile surface or grout lines. Maintain clean grout lines for the best grouting results later.
3. Grouting and Finishing: The Final Touches
3.1. When to Grout
Once all your tiles are laid, resist the urge to grout immediately. Allow the tile adhesive to cure completely, typically 24-48 hours, depending on the product, tile size, and environmental conditions. Removing the temporary battens at this stage is safe. If you grout too soon, moisture from the grout can interfere with the adhesive’s curing process, compromising its strength.
3.2. Mixing and Applying Grout
Mix your chosen grout according to the manufacturer’s instructions. Achieve a consistent, paste-like texture – not too runny, not too stiff. Too much water will weaken the grout and cause discoloration. Using your rubber grout float, scoop a generous amount of grout and spread it diagonally across the tile joints, pressing firmly to force the grout deep into the gaps. Work in small sections (e.g., 3×3 feet) to prevent the grout from drying too quickly.
3.3. Cleaning Excess Grout
Once a section is grouted, wait 15-30 minutes for the grout to slightly firm up (this is called the “hazing” stage). Then, using a damp (not soaking wet) sponge, gently wipe the excess grout from the tile surface in a diagonal motion. Rinse your sponge frequently in a bucket of clean water. Avoid digging into the grout lines; your goal is to clean the tile face while leaving the grout in the joints. You may need to perform several passes with a clean, damp sponge to remove all the grout haze.
After the initial clean-up, allow the grout to cure for several hours (or as per manufacturer’s instructions). You may notice a thin, powdery haze on the tiles once completely dry. This “grout haze” can typically be buffed away with a clean, dry cloth or a specialized grout haze remover, if necessary.
3.4. Removing Spacers and Battens
After the adhesive has set (usually overnight), carefully remove all tile spacers. If they are embedded in the adhesive, you might need pliers or a utility knife to pry them out. Once all tiles are firmly set, you can also remove the temporary wooden battens, carefully prying out the screws. Any small holes left by the screws can be filled and touched up as necessary.
3.5. Sealing the Grout (Optional but Recommended)
For natural stone tiles or in wet areas like showers, applying a grout sealer is highly recommended after the grout has fully cured (often 48-72 hours). Grout sealer penetrates the grout, making it resistant to moisture, stains, and mildew, thus extending the life and appearance of your tiled surface. Follow the sealant manufacturer’s instructions for application and reapplication frequency.
4. Final Thoughts and Maintenance
Congratulations, you’ve successfully tiled your wall! Take a step back and admire your handiwork. The immediate cleanup of tools and materials is also important; wash all buckets, trowels, and sponges thoroughly before adhesive or grout hardens on them. Ensure proper ventilation during and after the process to aid in curing.
For long-term maintenance, regular cleaning with pH-neutral tile cleaners is usually sufficient. Avoid harsh chemicals or abrasive scrubbers, especially on natural stone or delicate glazes. Re-seal grout lines periodically, particularly in high-traffic or wet areas, to maintain their protective qualities.
DIY wall tiling is a skill that improves with practice. By approaching your project with careful planning, attention to detail, and patience, you can achieve stunning, professional-quality results that will enhance your home for years to come. Enjoy your newly tiled space!