
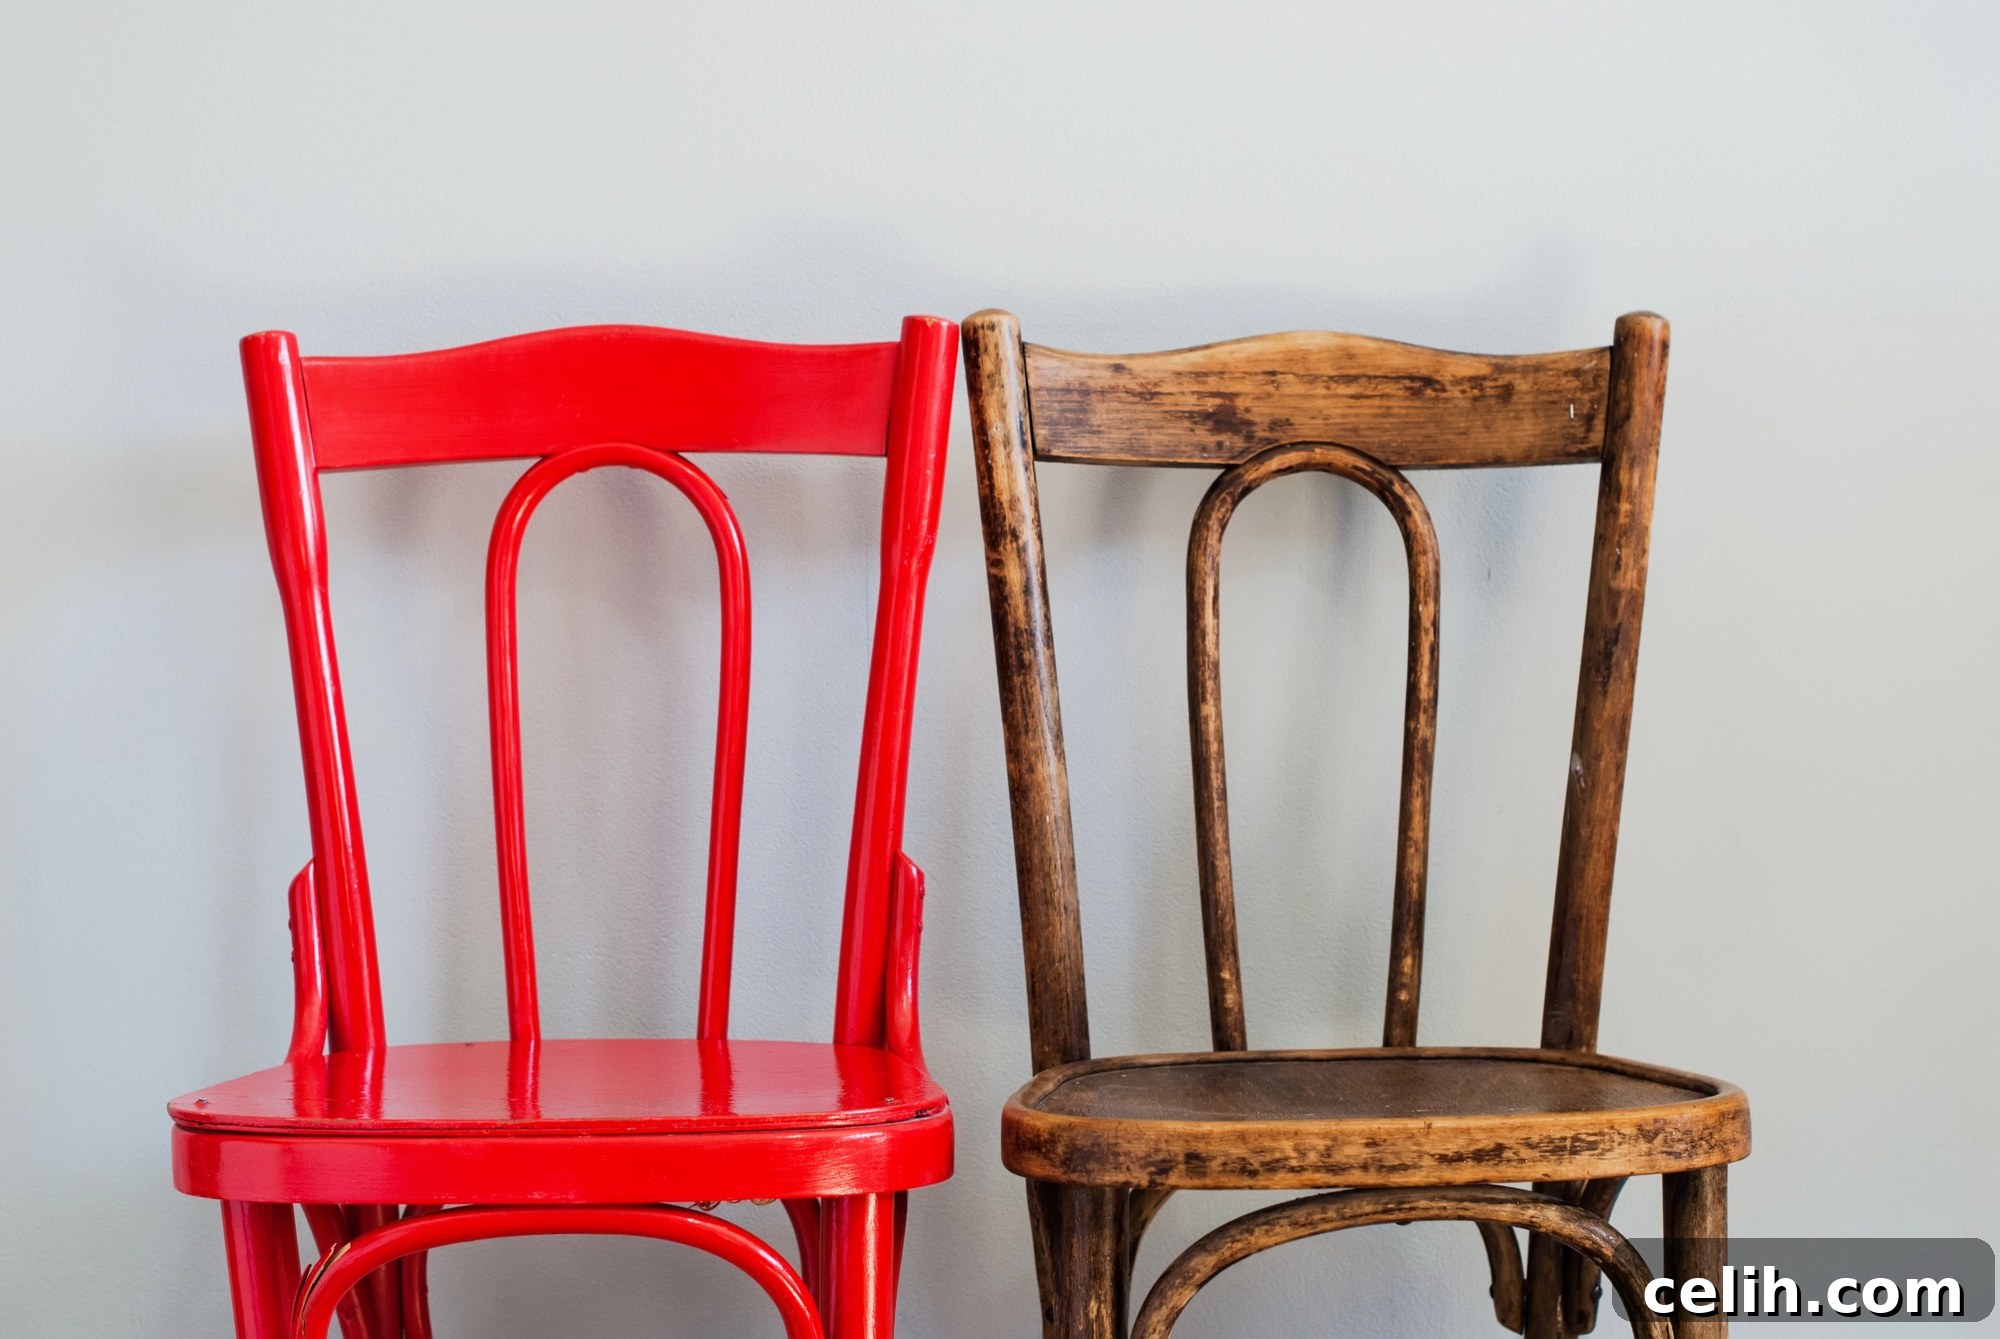
In an era increasingly focused on sustainability and personal expression, upcycling furniture has emerged as a beacon of creative home decoration. This transformative trend offers a unique opportunity to breathe new life into forgotten pieces, turning them into personalised, stylish, and functional additions to any interior. Far more than just a passing fad, upcycling is a conscious choice that champions eco-friendliness, reduces waste, and allows individuals to infuse their living spaces with a narrative that is uniquely their own.
Whether you’re a seasoned DIY enthusiast with a workshop full of tools or a beginner eager to embark on your first creative project, upcycling provides an accessible pathway to crafting bespoke furniture. It’s an art form that encourages imagination, problem-solving, and a hands-on approach to home improvement. This comprehensive guide will delve into the exciting world of furniture upcycling, offering insights on how to select the perfect pieces for transformation, what essential supplies you’ll need, and a range of techniques to turn old furniture into cherished new treasures.
The Ultimate Guide to Upcycling Furniture: Transform Your Home Sustainably
Why Upcycle? The Growing Appeal of DIY Furniture Projects in Home Decor
The burgeoning popularity of DIY projects in home décor, particularly furniture upcycling, is a clear indicator of a widespread desire for deeper connection and meaning within our living spaces. This movement transcends mere cost-saving; it’s about crafting an environment that reflects individuality, passion, and a commitment to responsible consumption. Upcycled pieces aren’t just furniture; they are conversation starters, heirlooms in the making, and tangible expressions of personal style that mass-produced items simply cannot replicate.
One of the primary drivers behind this trend is the increasing awareness of sustainability in our living spaces. Upcycling directly addresses environmental concerns by diverting items from landfills and reducing the demand for new manufacturing. By giving old furniture a new lease of life, we actively participate in a circular economy, conserving natural resources and minimizing our carbon footprint. This eco-conscious approach resonates deeply with consumers who are increasingly seeking ethical and responsible ways to furnish their homes. Beyond the environmental benefits, upcycling offers a therapeutic and rewarding creative outlet, allowing individuals to develop new skills, unleash their artistic flair, and experience the satisfaction of transforming something old into something beautiful and functional.
Finding Your Next Project: Choosing the Right Furniture Pieces for Upcycling
The first exciting step in any upcycling journey is selecting the right piece of furniture. While almost anything can be upcycled with enough imagination, choosing wisely can make the process smoother and the results more rewarding. Look for pieces with good bones – a solid structure, durable materials, and a design that holds potential. Consider both the aesthetic possibilities and the practical challenges. Here are some ideal candidates for your next upcycling project:
- Wooden Chairs
Wooden chairs are arguably one of the most versatile and rewarding furniture items to upcycle. Their relatively simple structure makes them an excellent starting point for beginners, yet they offer an expansive canvas for creativity. A fresh coat of vibrant or muted paint can instantly update their look, while distressing techniques can impart a charming, vintage appeal. For a more sophisticated transformation, consider reupholstering the seat with a luxurious fabric or adding decorative elements like stencilled patterns or hand-painted motifs. Dining chairs, accent chairs, or even old rocking chairs can be reimagined as stylish seating, plant stands, or unique decorative elements, adding character and a pop of personality to any room.
- Old Dressers and Chests of Drawers
An old dresser holds immense potential for reinvention. With multiple drawers and a substantial surface area, it can be transformed into a stunning focal point. Beyond simply refinishing the wood or applying a bold new colour, consider replacing the original knobs or handles with unique, modern hardware to instantly elevate its aesthetic. You could also line the drawers with decorative paper, apply stencils to the front panels, or even repurpose it entirely – perhaps as a chic bathroom vanity, a functional TV stand, or a stylish bar cabinet. Dressers offer ample space for experimentation, allowing you to create a piece that perfectly complements your evolving interior design theme.
- Coffee Tables and Side Tables
As central elements in living spaces, coffee tables and side tables are fantastic candidates for a creative revamp. Their accessible size and often sturdy construction make them easy to work with. Simple transformations might include sanding down the existing finish and applying a fresh coat of paint or stain to align with new interior themes. For a more artistic approach, consider adding decorative tiles, a mosaic pattern, or even embedding interesting objects under a resin top. You could also replace the legs for a different height or style, or add small storage compartments. An upcycled coffee table not only serves as a functional piece but also becomes an engaging conversation starter, reflecting your unique creative vision.
- Bookshelves and Storage Units
Revitalising a bookshelf can dramatically alter the ambiance and functionality of a room. These pieces offer structural versatility, allowing for a range of transformative options. Beyond repainting, consider adding a decorative wallpaper or fabric backdrop to the rear of the shelves to create depth and visual interest. Integrated LED lighting can highlight displayed items, while adding doors or drawers can convert open shelving into concealed storage. A minimalist approach with a single bold colour, or a dynamic design with patterned sections, can both inject a fresh vibe into the space, turning a practical item into an eye-catching display for books, collectibles, or art.
- Vintage Trunks and Suitcases
Vintage trunks and suitcases possess an inherent charm and a palpable sense of history, making them truly special upcycling projects. The transformation can involve meticulously restoring their original beauty by cleaning and polishing hardware and wood, or giving them a completely new identity. Imagine a vibrant painted trunk serving as a quirky coffee table, or a stack of carefully cleaned suitcases repurposed into a chic, eclectic storage unit or side table. You could line the interiors with new fabric, add castors for mobility, or even reinforce them to serve as unique seating. The ability of an upcycled vintage trunk to add a fascinating piece of history to modern interiors is unparalleled.
- Beyond the Basics: Other Upcycling Opportunities
Don’t limit your imagination to traditional furniture. Other items like old wooden crates can become stylish storage or shelving, while forgotten picture frames can be transformed into decorative trays or unique wall art. Pallets can be deconstructed and rebuilt into outdoor furniture or vertical gardens. Even old doors can find new life as headboards or desk tops. The key is to see potential in the discarded and imagine a new purpose for it.
The Upcycling Journey: A Step-by-Step Guide to Transforming Your Furniture
Once you’ve chosen your perfect piece, the real fun begins. The upcycling process is a journey that involves careful preparation, thoughtful material selection, and the application of various creative techniques. Each stage is crucial to achieving a professional and long-lasting finish.
1. Preparing Your Furniture: The Foundation for Success
Before any paint or new finish is applied, meticulous preparation is key. This stage might seem tedious, but it directly impacts the durability and aesthetic quality of your finished project. Skipping steps here can lead to peeling paint, uneven surfaces, and ultimately, disappointment.
- Cleaning and Inspection
Begin by thoroughly cleaning the entire furniture piece. Use a degreaser or a mild soap-and-water solution to remove accumulated dust, grime, oil, and any old polishes. Pay close attention to nooks and crannies. After cleaning, inspect the furniture for any structural damages such as loose joints, wobbles, cracks, or chipped wood. Address these issues promptly: use wood glue to secure loose joints, wood filler for cracks and chips, and reinforce any weak areas with brackets if necessary. Ensure all repairs are completely dry before moving on.
- Sanding and Stripping
Sanding is often the most vital step, especially if you plan to paint or varnish. It creates a ‘tooth’ for new coatings to adhere to, ensuring a smooth and even finish. Start with a coarser grit sandpaper (e.g., 80-120 grit) to remove any existing varnish, paint, or deep scratches. Progress to a medium grit (150-180 grit), and finish with a fine grit (220 grit or higher) for a silky-smooth surface. If the existing finish is very thick or badly flaking, chemical paint stripper might be necessary, but always follow safety instructions and ensure good ventilation. After sanding, wipe away all dust with a tack cloth or a damp cloth, allowing it to dry thoroughly.
- Priming
Priming provides an essential base layer that helps new paint adhere better, blocks stains or wood tannins from bleeding through, and ensures a more uniform topcoat color. Choose a primer appropriate for your furniture’s material (wood, laminate, metal) and your chosen topcoat. For older or darker wood pieces, a stain-blocking primer is highly recommended. Apply one to two thin, even coats, allowing each coat to dry completely according to the manufacturer’s instructions.
2. Gathering Your Arsenal: Finding the Best Upcycling Supplies
The quality of your supplies significantly impacts the outcome. Investing in good tools and materials will make the process easier and ensure a more durable and professional finish.
- Paints and Finishes
The world of paints offers endless possibilities. High-quality spray paints are excellent for achieving a smooth, even finish on intricate pieces and come in a vast array of colors and textures (matte, satin, glossy). Chalk paint is popular for its matte, distressed look and minimal prep requirements. Milk paint offers a soft, velvety finish and can be used for chippy effects. Latex or acrylic paints are versatile and widely available. Don’t forget topcoats like varnishes, waxes, or polycrylic sealants to protect your beautiful new finish from wear and tear.
- Brushes, Rollers, and Applicators
Good quality brushes are essential for smooth, streak-free paint application. Invest in a few different sizes for details and larger surfaces. Small foam rollers are ideal for large flat areas, providing an even finish with minimal brush strokes. For distressing or waxing, lint-free cloths or specific wax brushes will be beneficial.
- Hardware and Decorative Elements
New knobs, pulls, or hinges can dramatically change the look of a piece. Explore different styles, from vintage to modern. Consider stencils for intricate patterns, decorative papers or fabrics for decoupage, or even new legs or castors to alter the height or mobility of your furniture.
- Safety Gear
Always prioritize safety. Wear gloves to protect your hands from paint, chemicals, and splinters. A good quality respirator mask is essential when sanding or using spray paints and chemical strippers, ensuring proper ventilation. Safety glasses protect your eyes from dust and debris.
3. Unleashing Creativity: Techniques for Upcycling Your Furniture
Mastering various techniques is what truly transforms ordinary furniture into extraordinary pieces. Don’t be afraid to experiment and combine different methods to achieve a unique look.
- Painting and Staining
After priming, apply your chosen paint in thin, even coats. Multiple thin coats are always better than one thick coat, as it prevents drips and ensures a smoother finish. Allow ample drying time between each coat. For staining, ensure the wood is bare and sanded smoothly. Apply the stain evenly with a cloth or brush, wiping off excess according to the product instructions to achieve your desired depth of color. Top with a clear protective finish.
- Distressing and Antiquing
To create a charming, weathered, or vintage look, try distressing. This can be achieved by lightly sanding edges and raised details after painting to reveal the base layer or original wood beneath. Another method is ‘wet distressing’ where you rub areas with a damp cloth before the paint fully cures. For an antiqued effect, apply a dark wax over chalk paint or a light-colored painted surface, buffing it into crevices to create a subtle, aged patina.
- Stenciling and Decoupage
Stenciling allows you to add intricate patterns or motifs. Secure your stencil firmly with painter’s tape and apply paint with a brush or sponge using an up-and-down dabbing motion to prevent bleeding. Decoupage involves applying paper or fabric cut-outs to a surface using a special adhesive, then sealing it with multiple layers of varnish for a smooth, durable finish. This is perfect for adding bespoke patterns or personal touches.
- Upholstery and Fabric Applications
For chairs, benches, or headboards, learning basic upholstery can be incredibly rewarding. This involves removing old fabric, replacing foam if necessary, and stapling new fabric securely onto the frame. For a less intensive approach, you can use fabric adhesive to apply decorative fabric panels to flat surfaces like drawer fronts or cabinet doors, adding texture and warmth.
- Adding New Features
Beyond surface treatments, consider structural alterations. Attaching new legs can change the height and style of a table or cabinet. Adding castors makes heavy furniture mobile. Integrating small shelves, drawers, or even battery-operated LED lights can enhance both the aesthetics and functionality of your upcycled piece, truly transforming its purpose.
Beyond the Brush: Maximizing Your Upcycling Success
As you delve deeper into the world of upcycling, you’ll discover that continuous learning and attention to detail are your best allies. Avoiding common pitfalls and embracing ongoing care will ensure your creations stand the test of time.
Common Mistakes to Avoid in Furniture Upcycling
- Neglecting Surface Preparation: Rushing the cleaning, sanding, and priming steps is the most common reason for paint peeling, chipping, or an uneven finish. Invest time here; it pays off.
- Using Low-Quality Materials: Cheap paints, brushes, or sealants might save money upfront but can compromise the durability and aesthetic appeal of your project in the long run.
- Rushing the Process: Patience is a virtue in upcycling. Allow adequate drying time between coats and steps. Forcing it will lead to smudges, bubbles, and an inferior finish.
- Ignoring Safety Precautions: Working with paints, solvents, and power tools requires protective gear and good ventilation. Never compromise on safety.
- Being Afraid to Experiment: While planning is good, don’t be so rigid that you can’t adapt or try something new. Sometimes the best discoveries come from unexpected turns.
Caring for Your Upcycled Treasures
To ensure your revitalized furniture remains beautiful for years, proper care is essential. Dust regularly with a soft cloth. For painted or sealed surfaces, clean spills immediately with a damp cloth and mild soap. Avoid harsh chemical cleaners, as they can damage finishes. Protect your pieces from direct sunlight and extreme temperature changes, which can cause fading or warping. For upholstered items, vacuum regularly and spot clean as needed. With a little care, your upcycled creations will continue to tell their unique story.
Finding Inspiration and Community
The upcycling community is vibrant and ever-growing. For endless inspiration, explore platforms like Pinterest and Instagram, where countless DIY enthusiasts share their projects. Blogs and YouTube channels offer detailed tutorials and tips. Local workshops can teach you specific techniques, while flea markets, antique shops, and second-hand stores are treasure troves for finding your next project. Engage with online upcycling groups to share ideas, ask questions, and celebrate successes. The shared passion for transforming the old into the new makes upcycling not just a hobby, but a lifestyle.
Conclusion: Embrace the Art of Upcycling
Upcycling furniture is a wonderfully rewarding journey that marries creativity with sustainability. It empowers you to create unique, personalised pieces that tell a story, infuse character into your home, and contribute positively to the environment. From choosing the perfect neglected item to applying the final protective coat, each step is an opportunity for self-expression and skill development. So, gather your tools, unleash your imagination, and embark on your next upcycling adventure. The possibilities are limitless, and the satisfaction of transforming something old into something extraordinary is truly unparalleled. Start today and discover the joy of crafting a home that truly reflects you.