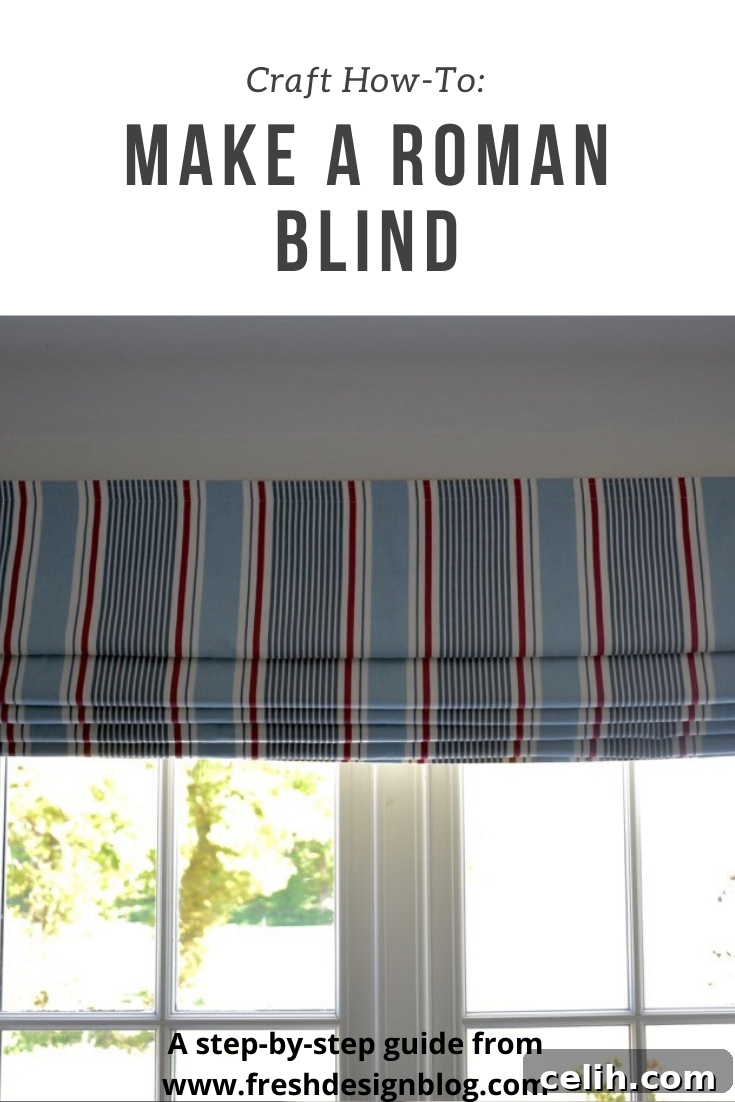
Spending more time at home has presented many of us with the perfect opportunity to tackle those lingering home improvement projects. Recently, with a new extension completed, our former master bedroom has transitioned into a dedicated guest room, prompting a much-needed mini-makeover. The simplest changes often have the biggest impact, and for this space, updating the window dressings was key. I decided to replace the heavy, light-blocking curtains with a custom-made Roman blind, aiming for a fresh, airy feel and maximum light ingress.
Our home, built around 1900, features charmingly quirky, non-standard windows. Crafting a custom Roman blind offered the perfect solution to achieve a precise fit without the hassle and expense of bespoke shop-bought options. Having successfully created several blinds before, I was confident I could tackle this project with minimal new purchases, utilizing leftover materials where possible. This guide will walk you through the process, empowering you to create beautiful, functional Roman blinds for your own unique spaces.
Essential Materials for Your DIY Roman Blind Project
Embarking on a custom Roman blind project is a rewarding experience, allowing you to perfectly match your decor and achieve a tailored finish. Before you begin, gather these essential supplies to ensure a smooth crafting process:
- Wooden Baton: A sturdy piece of wood, approximately 2 inches wide by 1 inch thick, cut to the exact desired finished width of your blind. This serves as the top mounting point.
- Small Screw-in Eyes: These metal eyes will be screwed into the baton and guide the blind cords, ensuring smooth operation.
- Blind Cord: Durable cord specifically designed for window blinds, chosen in a color that complements your fabric.
- Blind Tape: Also known as Roman blind tape or rod pocket tape, this crucial item features small pockets for the dowel rods and rings for the cords. While you *can* manage without it by sewing your own pockets and rings, using blind tape significantly simplifies the process and ensures a professional finish.
- Thin Wooden Doweling or Specialist Fiberglass Rods: These rods provide the structure for your blind’s neat folds. Choose a thickness that fits comfortably into your blind tape pockets.
- An ‘Acorn’ (Cord Toggle): A decorative and functional toggle that attaches to the end of your blind cords, making them easy to hold and operate.
- Main Fabric: The decorative fabric for the front of your blind. For this project, I used Sail stripe fabric in Marine from Terry’s Fabrics, selected for its crisp appearance and durability. Consider the fabric’s weight and drape; medium-weight fabrics are often easiest to work with.
- Lining Fabric: Essential for protecting your main fabric from sun damage, adding body to the blind, and providing a neat finish on the reverse. Options include standard sateen lining, thermal lining for insulation, or blackout lining for complete light control.
- Velcro (Hook and Loop): You’ll need both sides of the Velcro, ideally with a sticky-backed adhesive, in a length equal to your baton’s width. This will secure the blind to the baton.
- Staple Gun: While not strictly essential, a staple gun with suitable staples will make covering the baton and attaching Velcro much quicker and more secure.
- Needle and Thread: For hand-sewing finishing touches and securing critical areas.
- Sewing Machine: An absolute must for achieving straight, strong seams efficiently. Attempting this project entirely by hand would require extreme patience and considerably more time.
- Wall Cleat: A safety device to wrap and secure the blind cords, keeping them safely out of reach of children and pets.
Crafting Your Custom Roman Blind: A Comprehensive Step-by-Step Guide
Creating your own Roman blind might seem daunting, but with careful measuring and basic sewing skills, it’s a highly achievable and rewarding DIY project. Follow these detailed steps to construct a beautiful, functional window treatment that perfectly complements your home decor.
Step 1: Preparing Your Baton and Taking Initial Measurements
Begin by determining the finished width of your Roman blind. This is typically the width of your window recess plus an additional 1 to 2 inches on each side to minimize light leakage and ensure a neat overlap. Cut your wooden baton precisely to this determined width. In my case, existing curtain rail holes presented a challenge, so I adapted the baton length slightly to utilize them, avoiding further drilling into potentially unstable plaster. Always consider your window’s unique characteristics and any structural constraints when making these decisions.
Step 2: Covering the Baton for a Professional Finish
Take a strip of your lining fabric – or a coordinating plain fabric – cut slightly larger than the baton. Tightly wrap the fabric around the wooden baton, securing it in place with a staple gun. The goal here is a taut, smooth finish, as any looseness will affect the appearance and operation of your blind. If you don’t have a staple gun, you can hand-sew the fabric, but ensure it’s pulled extremely tight to prevent sagging.
Step 3: Measuring and Preparing Your Main Fabric
For the main fabric, you will typically need a full width of material. To determine the length, measure from the desired starting point above the window (where the top of the blind will sit) down to where you want the blind to finish when fully extended below the window. Add 3 inches to this measurement. This extra length accounts for both the top and bottom hems. Carefully iron a 1.5-inch hem all around the perimeter of your main fabric piece. This crisp, pre-pressed edge will make subsequent sewing steps much easier and more precise.
Step 4: Cutting and Attaching the Lining Fabric
Cut your lining material to the same width as your main fabric. For the length, cut it slightly shorter than the main fabric, allowing for a wider hem. The key is for the lining to sit discreetly within the main fabric, ensuring it’s not visible from the front or sides of the finished blind. Fold in the wider hem along both sides and the bottom of the lining. Then, carefully hand-sew the lining to the main fabric along these three edges, leaving the top edge open. Some crafters prefer to attach the Velcro to the top at this stage, but leaving it open provides a valuable opportunity to adjust for any minor imperfections later.
Step 5: Precision Measuring for Blind Tape and Folds
Now comes one of the most critical steps: calculating the placement of your blind tape, which dictates the number and crispness of your blind’s folds. The spacing directly influences how neatly your Roman blind stacks when raised. I wanted my blind to stack tightly at the top of the window to maximize natural light, so I opted for five folds, one more than standard. You can utilize online calculators, such as Terry’s Fabrics online calculator, to accurately determine your rod spacings based on your desired finished length and number of folds. This meticulous measurement ensures aesthetically pleasing and consistent folds.
Step 6: Attaching the Blind Tape with Accuracy
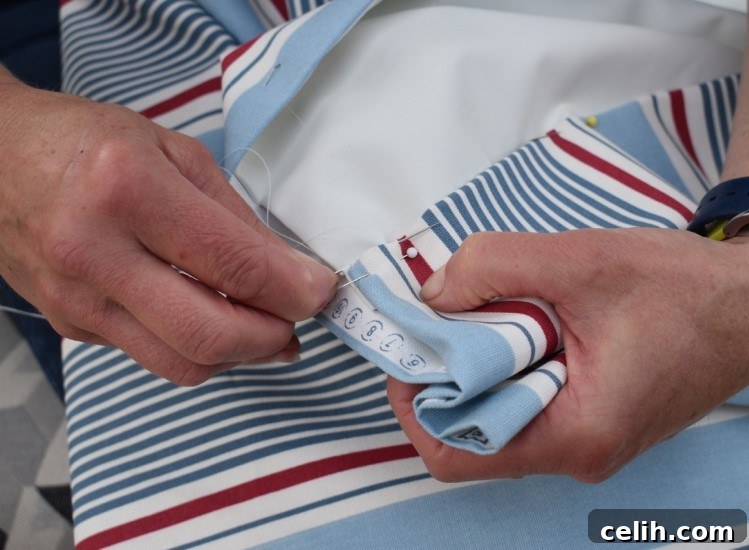
Once your tape spacings are calculated, it’s time to sew on the blind tape. I highly recommend sewing one strip at a time. This methodical approach allows you to detect and correct any alignment issues early on, preventing major problems later. The absolute key here is straightness; if your tapes are even slightly off, your finished Roman blind will never fold neatly. After sewing each strip, fold the blind edges together and visually check that both ends of the tape are at the same height. This simple verification step is crucial for a professional-looking result. Continue this process until all blind tapes are securely in place.
Step 7: Securing the Top Hem and Velcro
Fold the top hem of your Roman blind over to create a clean edge. Position one side of your Velcro (the loop side, typically) as close to the top of this folded hem as possible and firmly press it into place. While sticky-backed Velcro offers initial adhesion, I strongly advise sewing it into place as well. Over time, adhesive-only Velcro can peel, especially with repeated use or changes in temperature, leading to frustrating detachments. Hand-sew any remaining loose ends to ensure a tidy finish. Finally, sew up one end of each blind tape, leaving the other end open for rod insertion.
Step 8: Inserting the Dowel Rods for Structure
Measure and cut your dowel rods (or fiberglass rods) to the precise length of your blind tape strips. They should fit snugly inside the rod pockets but remain hidden behind the blind itself. Once cut, carefully insert each rod into its respective pocket on the blind tape. After all rods are in place, sew up the remaining open end of each tape to secure the rods permanently. These rods are crucial; they create the crisp, horizontal folds characteristic of Roman blinds, ensuring a smooth and elegant lift.
Step 9: Preparing the Baton for Cord Mechanism
This step involves careful planning for the lifting mechanism. First, decide how many blind cords you’ll need. For a full-width blind, typically five or six cords are used, depending on the fabric’s weight and the blind’s size. For my high window and heavier fabric, I opted for six cords to ensure robust strength and ease of lifting. Take your covered wooden baton. Insert a screw-in eye an inch from each end, centered on the bottom edge. Measure the distance between these two end eyes. Then, divide this measurement by (the number of required eyes + 1) to determine the equal spacing for your intermediate eyes. For instance, a 55-inch baton with end eyes 53 inches apart, needing four more eyes, would mean dividing 53 by 5 (4 intermediate eyes + 1 for the segments), resulting in 10.6-inch intervals. Mark and screw in the remaining eyes at these precise intervals. Finally, attach the other side of the Velcro (the hook side) to the front face of the baton, as close to the top edge as possible, securing it firmly with staples (or hand-sewing if preferred, though stapling is quicker and stronger here).
Step 10: Attaching and Threading the Blind Cords to the Fabric
Now, for the final stages of your Roman blind assembly! Carefully measure and cut your blind cords. The outermost cord (on the side opposite your raising mechanism) will be the longest, requiring a length equal to the blind’s width plus its full length, plus extra for handling. Each subsequent cord can be progressively shorter. Now, transfer your eye measurements from the baton to the blind itself. Measure in one inch from the end of your first blind tape strip, and firmly knot your first cord to the bottom tape loop at this point. Pass this cord upwards through all subsequent tape loops above it. Repeat this process for each cord, measuring across 10.6 inches (or your calculated interval) from the previous cord’s attachment point before knotting the next cord to the bottom tape loop and threading it upwards. A useful tip: once each cord has passed through the topmost tape loop, tie a loose temporary knot. This prevents the cords from slipping back through while you maneuver the blind into position for the next steps.
Step 11: Final Assembly: Attaching Blind to Baton and Threading Cords
Carefully attach your finished Roman blind fabric to the prepared wooden baton. Align the Velcro strips on the top of the blind with those on the baton, pressing them together firmly along the entire width. This connection needs to be secure to support the blind’s weight and ensure smooth operation. Next, starting with the first cord (the longest one), un-tie its temporary knot and feed it through each screw-in eye on the baton, starting from the one directly above its attachment point on the blind, and continuing across all subsequent eyes until it dangles freely on the control side. Repeat this process for each remaining cord. Remember, each successive cord will pass through fewer eyes on the baton as you move towards the control side. Ensure all cords are fed through neatly, without tangles.
Step 12: Installing the Wall Cleat and Finishing the Cords
I always prefer to install the wall cleat at this final stage, as it allows for precise positioning. You may find it helpful to have an extra pair of hands to hold the blind up and out of the way. Pull all the blind cords taut, ensuring they are straight and untangled, and then position the cleat on the wall. It’s crucial for the cleat to be installed high enough to be well out of reach of small children and pets, as cord safety is paramount. Once positioned, mark the screw holes, drill pilot holes if necessary, and securely fasten the cleat to the wall. Wrap the excess cords around the cleat to hold the blind at the desired height. Finally, gather all the loose ends of the cords, thread them through your acorn (toggle), ensuring they are all correctly tensioned. Cut the cords to your preferred length, tie them all together in a single, secure knot, and pull the acorn up to hide the knot, providing a neat and decorative finish.
I am absolutely delighted with the transformation brought about by this DIY Roman blind. The crisp, marine stripe fabric and the streamlined design allow significantly more natural light to filter into what was once a rather dark room, creating a much brighter and more inviting atmosphere. This project not only saved money compared to custom-made options but also provided the immense satisfaction of creating something beautiful and perfectly tailored for our home.
The exquisite fabric used in this Roman blinds project was generously provided by Terry’s Fabrics, a leading home furnishings retailer. They offer a vast selection of materials and essential kits for those inspired to embark on their own Roman blind creations. Should you prefer the convenience of a ready-made option, Terry’s Fabrics also stocks an extensive range of both ready-made and made-to-measure blinds to suit every style and requirement.
Images (c) Write Image for you Media
Pin it for later inspiration!