
Mastering Grass Edging: The Ultimate Guide to Perfect Lawn Borders and Enhanced Curb Appeal
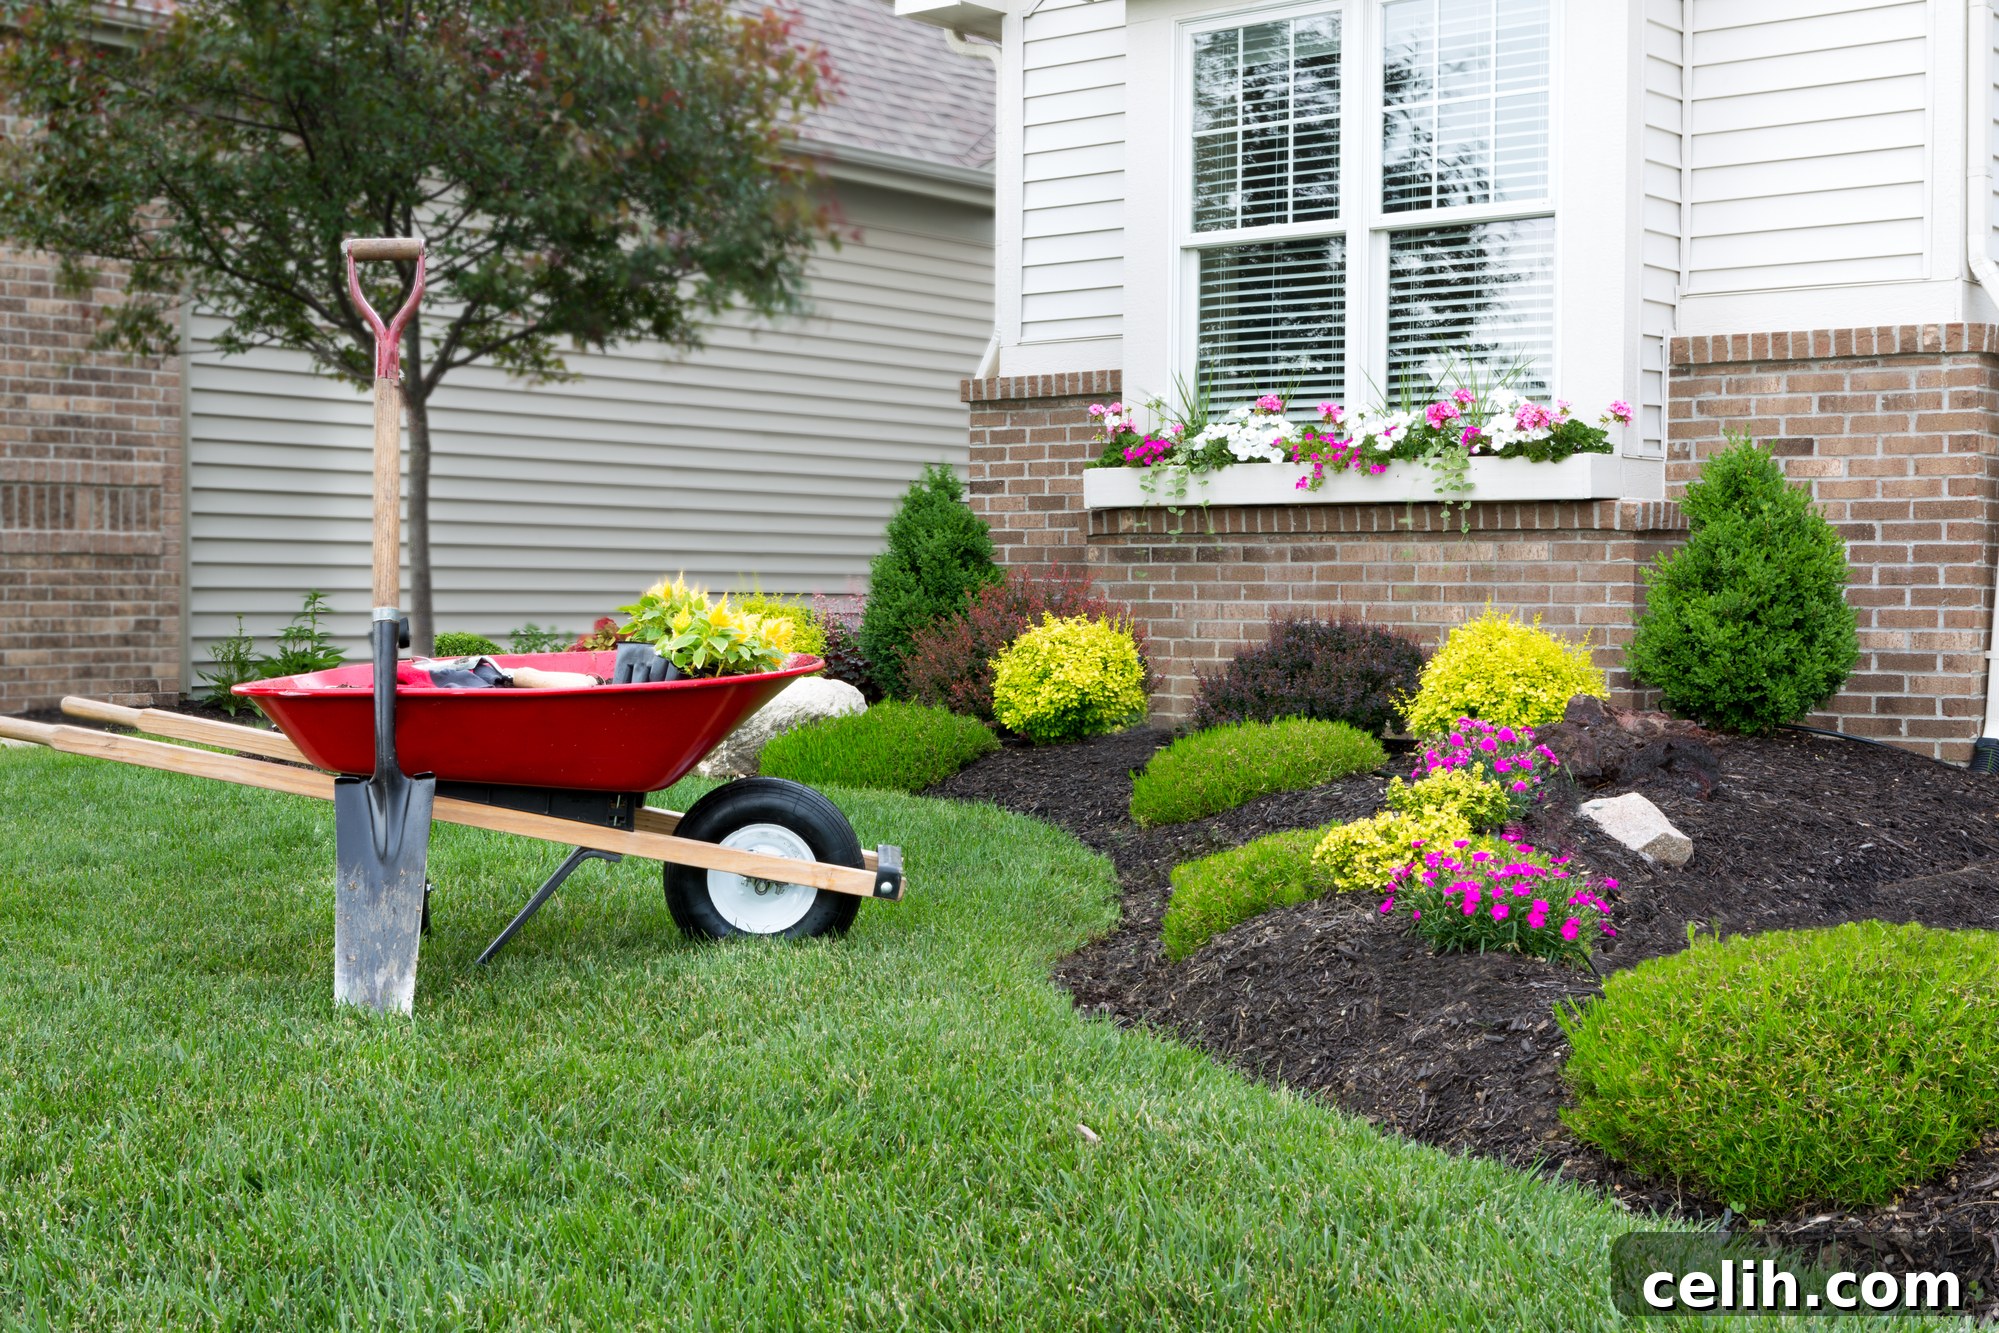
A meticulously edged lawn has an undeniable impact, instantly elevating a home’s aesthetic and curb appeal. This isn’t merely a coincidence; it’s the transformative power of effective grass edging. Far more than just a decorative touch, proper lawn edging is fundamental to maintaining a vibrant, healthy, and organized outdoor space. Whether you’re a seasoned gardener seeking to refine your techniques or a newcomer eager to achieve professional-looking results, understanding the principles of grass edging is key. This comprehensive guide will delve into why grass edging is indispensable and equip you with the knowledge to master this essential lawn care practice, ensuring your lawn remains pristine and well-defined year-round.
The Indispensable Importance of Grass Edging for a Pristine Lawn
You’re about to discover why neat grass edging is not just an aesthetic luxury, but a critical component for cultivating and maintaining a tidy, robust, and healthy lawn. Grass edging establishes a clear, intentional boundary that separates your lawn from adjacent landscape features such as flower beds, pathways, driveways, or patios. This defined line serves multiple vital functions that contribute to both the beauty and ecological balance of your garden.
1. Preventing Grass Invasion and Creep
One of the primary benefits of a well-defined edge is its effectiveness in preventing turf grass from encroaching into areas where it doesn’t belong. Without a physical barrier or regularly cut line, grass can quickly spread into flower beds, vegetable patches, or gravel paths, creating a messy and unkempt appearance. This invasive growth competes with desired plants for nutrients and water, potentially stunting their development. Edging acts as a proactive measure, keeping your lawn contained and your garden beds protected.
2. Inhibiting Weed Growth and Pest Migration
Beyond grass, a crisp edge can also play a significant role in managing weeds. By creating a physical gap or barrier, it becomes more difficult for weeds to migrate from one area to another. This reduces the overall weed burden on your flower beds and makes it easier to spot and remove any unwanted plants that do appear. Furthermore, a defined border can subtly deter certain pests, as it disrupts their easy access pathways between different parts of your garden. It creates a cleaner environment where pests have fewer hiding spots and less direct passage to your prized plants, contributing to a healthier lawn ecosystem.
3. Facilitating Easier and More Efficient Lawn Maintenance
Edging dramatically simplifies routine lawn care tasks. When your lawn has a clean border, mowing and trimming become far more straightforward. You can guide your mower along a distinct line without fear of damaging nearby plants or garden features. String trimming is also made easier, as the edge provides a clear guide, preventing accidental cuts into flower beds or against hard surfaces. This precision not only saves time but also reduces the risk of damaging your gardening equipment or other landscape elements, ensuring a smoother and more enjoyable maintenance experience. Over time, consistent grass edging helps to preserve the intended form and structure of your lawn, guaranteeing it remains compact, well-groomed, and aesthetically pleasing.
4. Enhancing Curb Appeal and Property Value
A sharp, clean edge provides a professional, finished look to any landscape. It adds a level of polish that can significantly boost your home’s curb appeal, making it appear well-maintained and cared for. This visual appeal is not just for show; it can actually increase your property’s market value. Potential buyers often associate a tidy exterior with a well-cared-for home overall, making a well-edged lawn a smart investment in your property.
5. Promoting Overall Lawn Health
By containing grass growth and reducing competition from weeds, edging contributes to a healthier lawn. Proper boundaries help ensure that your lawn receives adequate nutrients and water without being overly stressed by invasive species. This focused environment allows your turf to thrive, displaying a richer color and denser growth, which are hallmarks of a truly healthy lawn.
In essence, grass edging is far more than just a design element; it is a critical, multi-functional aspect of comprehensive lawn care that every homeowner should embrace for a beautiful and thriving outdoor space.
Exploring Diverse Techniques for Effective Grass Edging
To achieve those crisp, professional-looking borders, a variety of methods are available, each with its own advantages, suitable for different preferences, lawn sizes, and available tools. Let’s delve into the various techniques you can employ to keep your yard’s edges sharp and impeccably maintained.
1. Manual Edging: Precision and Control
Manual edging involves using hand-held tools to create a defined cut between your lawn and adjacent areas. This method offers the highest degree of precision and is ideal for smaller lawns, intricate designs, or areas where power tools might be unwieldy. While it requires more physical effort, the control it provides is unmatched.
- Tools: Common tools include a half-moon edger (a long-handled tool with a crescent-shaped blade), an edging spade, or a specialized lawn edging knife.
- Pros: Excellent for intricate curves and precise lines; quiet operation; cost-effective tool acquisition; provides a good workout.
- Cons: Labor-intensive and time-consuming, especially for larger areas; requires a steady hand and practice to achieve consistently straight or smooth lines.
2. Power Edging: Speed and Efficiency
For larger lawns or those seeking a quicker, less strenuous method, power edgers are an excellent choice. These tools use electric or gas-powered motors to spin a blade or line, rapidly cutting through grass and soil to create a clean edge.
- Tools: Dedicated electric or gas-powered lawn edgers are available. Many string trimmers (weed wackers) also come with an edging function, allowing the head to rotate 90 degrees for vertical cutting.
- Pros: Significantly faster and less physically demanding than manual edging; ideal for long, straight stretches and larger properties; produces consistent results with practice.
- Cons: Can be noisier; requires fuel or electricity; initial investment in equipment; may not be as precise as manual tools for very tight curves or delicate areas; potential for damage to nearby plants if not handled carefully.
3. Physical Barriers (Hard Edging): Permanent Definition
This technique involves installing permanent or semi-permanent materials to create a physical divide between your lawn and other garden elements. Hard edging offers a durable solution that requires minimal ongoing maintenance once installed, providing a clear, unwavering line.
- Materials: Popular choices include:
- Metal Edging: Steel or aluminum strips offer a sleek, modern look and are very durable, resisting rust and bending.
- Plastic/Rubber Edging: More flexible and economical, often made from recycled materials. Suitable for curved designs.
- Concrete/Paver Edging: Provides a robust, long-lasting border that can integrate seamlessly with patios or walkways.
- Bricks or Natural Stones: Offer a classic, rustic aesthetic. They can be laid flush with the ground or slightly raised.
- Wood Edging: Treated lumber, railroad ties, or decorative logs can provide a natural and sturdy border.
- Pros: Highly durable and long-lasting; significantly reduces ongoing edging effort; adds a structural and aesthetic element to the landscape; effectively prevents grass creep.
- Cons: Higher initial cost and more involved installation process; less flexible to change designs later; improper installation can potentially affect root systems or drainage.
4. Chemical Edging (Use with Caution)
While less common and generally discouraged due to environmental concerns, chemical edging involves applying an herbicide along the desired border to inhibit grass growth. This method eliminates the need for physical cutting or barrier installation.
- Pros: Requires minimal physical effort; can provide a very clean line if applied precisely.
- Cons: Not environmentally friendly; risk of harming desirable plants or affecting soil health; temporary solution requiring reapplication; potential health risks from chemical exposure. This method is generally not recommended for eco-conscious gardeners or those with children/pets.
Ultimately, the best technique for your lawn will depend on its specific needs, the size and complexity of your landscape, your physical capacity, budget, and environmental considerations. Combining techniques, such as using power edging for long stretches and manual tools for intricate curves, can also yield excellent results.
Essential Tools and Equipment for Achieving Impeccable Grass Edging
The success of your grass edging project hinges significantly on having the right tools for the job. Depending on the technique you’ve chosen – be it manual, power, or hard edging – you’ll need specific equipment to achieve those crisp, clean borders in your yard. Investing in quality tools and maintaining them properly will not only make the task easier but also ensure better, more lasting results.
1. For Manual Edging
- Half-Moon Edger: This classic tool features a long handle and a semi-circular, sharpened blade. It’s perfect for creating deep, clean cuts along straight or gently curved lines. It works by pushing the blade vertically into the ground and rocking it to cut through turf.
- Lawn Edging Knife/Spade: Similar to a half-moon edger but often with a sharper, more pointed blade. It allows for precise control, especially in tight spots or when detailing intricate curves. An ordinary sharp garden spade can also be used, though a dedicated edger provides better ergonomics.
- Garden Hose or Rope: Essential for marking out your desired lines, especially for creating fluid curves or ensuring perfectly straight runs before you begin cutting.
- Hand Trowel/Small Shovel: Useful for scooping out loose soil and cut grass after edging, helping to create a clean trench.
2. For Power Edging
- Dedicated Electric or Gas-Powered Lawn Edger: These machines are specifically designed for edging. They typically feature a vertical rotating blade that slices cleanly through grass and soil. Electric models are lighter and quieter, suitable for smaller to medium lawns with nearby power access. Gas models offer more power and portability, ideal for larger properties. Look for models with adjustable depth settings for versatility.
- String Trimmer (Weed Wacker) with Edging Function: Many modern string trimmers allow the head to pivot 90 degrees, transforming them into an effective edger. While not as robust as a dedicated edger for very deep cuts, they are highly versatile for regular maintenance and lighter edging tasks. Ensure your model has this specific feature if you plan to use it for edging.
3. For Installing Hard Edging (Physical Barriers)
- Shovel and Pickaxe: For digging the initial trench where your edging material will be installed. A trenching shovel (narrow blade) is particularly useful.
- Rubber Mallet: Essential for gently tapping bricks, pavers, or stone into place, ensuring they are level and securely seated without damaging them.
- Level (Spirit Level): Crucial for ensuring your hard edging is installed perfectly flat and even, preventing uneven lines and trip hazards.
- Measuring Tape and Stakes/String: For precise layout and accurate measurements of your hard edging materials.
- Tamper: Used to compact the base material (like sand or gravel) in your trench before laying the edging, ensuring a stable foundation.
- Cutting Tools (Specific to Material): Depending on your chosen material, you might need tin snips for metal, a utility knife for plastic, or a wet saw/angle grinder for bricks and pavers.
4. Essential Safety Gear and Maintenance Supplies
Regardless of the tools you choose, prioritize safety and proper maintenance:
- Gloves: Protect your hands from blisters, cuts, and dirt.
- Protective Eyewear: Crucial for shielding your eyes from flying debris, especially when using power tools.
- Sturdy Footwear: Protects your feet from potential tool accidents.
- Tool Sharpening Kit: Keep your blades sharp. Sharp blades produce cleaner cuts, which promotes the health of your lawn and makes the job easier and safer. Dull blades tear grass, inviting disease.
- Cleaning Supplies: Brushes, cloths, and appropriate lubricants for cleaning and maintaining your tools after each use, preventing rust and prolonging their lifespan.
With the right selection of tools and adherence to safety precautions, grass edging can be a surprisingly straightforward and satisfying task, significantly enhancing the overall aesthetic and health of your yard.
A Step-By-Step Guide to Achieving Perfectly Edged Lawn Borders
Achieving perfectly crisp and defined lawn borders is a satisfying endeavor that significantly enhances your garden’s appearance. Follow this detailed step-by-step guide to master the art of grass edging, ensuring professional results every time.
Step 1: Preparation is Key
- Mow Your Lawn: Before you begin edging, ensure your lawn is freshly mowed. This allows you to see the true height of the grass and provides a clear baseline for your edging work.
- Clear the Area: Remove any obstacles from your path, such as toys, rocks, or garden decor, to ensure an unobstructed work area and prevent damage to your tools.
- Gather Your Tools: Have all your chosen tools – whether a half-moon edger, power edger, string trimmer, or materials for hard edging – readily available, along with safety gear like gloves and protective eyewear.
Step 2: Marking Out Your Edge Line
This is a crucial step for achieving a neat and consistent edge.
- For Curves: Lay a garden hose or a length of rope along the desired path. This flexible guide allows you to experiment with different curves until you achieve the perfect flowing line.
- For Straight Lines: Use a straight-edged object, such as a long piece of lumber, a string line stretched between two stakes, or the edge of a pathway/driveway, as your guide.
- Consider Depth and Width: Think about how deep you want your edge to be and how wide any trench should be if you’re creating one. For aesthetic appeal, consistency is paramount.
Step 3: The Cutting Process (Manual or Power Edging)
Once your line is marked, it’s time to make the cut.
- Manual Edging: Position your half-moon edger or spade on the marked line. Step firmly onto the tool’s footrest to drive the blade deep into the turf, aiming for a depth of 2-4 inches (5-10 cm) to cut through grass roots. Rock the tool slightly to make a clean break. Move the tool forward, overlapping your previous cut slightly, and continue along the entire marked line. Maintain a consistent angle to ensure a uniform cut.
- Power Edging: Turn on your electric or gas edger (or string trimmer in edging mode). Guide the tool along your marked line, allowing the blade or string to do the work. Maintain a steady pace and consistent depth. Power edgers often have a guide wheel that helps keep the cut straight. For string trimmers, keep the line parallel to your desired edge and gently walk backward to create a clean line.
Step 4: Removing Cut Grass and Soil (Creating a Trench)
After making your initial cut, you’ll need to clear the debris.
- Create a Trench: Use a hand trowel, a small shovel, or even your edger blade to scoop out the loose grass, soil, and debris from the newly cut edge. This action creates a small, clean trench that further emphasizes the defined border and helps prevent immediate re-growth back into your flower bed.
- Trench Dimensions: Aim for a trench that is wide enough to prevent grass from quickly re-establishing itself but not so wide that it becomes a tripping hazard or collects too much debris. A width of 2-4 inches (5-10 cm) is generally effective.
- Dispose of Debris: Collect all removed material and add it to your compost pile or dispose of it appropriately.
Step 5: For Hard Edging Installation
If you’re installing physical barriers, these additional steps are crucial after trenching:
- Prepare the Base: For bricks, pavers, or stones, add a thin layer of sand or gravel to the bottom of your trench. This provides a stable, level base and aids in drainage. Compact this layer firmly with a hand tamper.
- Install Edging Material: Carefully place your chosen edging material into the trench. Use a rubber mallet to gently tap each piece into place, ensuring it is level with the adjacent pieces and at the desired height (flush with the lawn or slightly raised).
- Check for Level: Continuously check your work with a spirit level to ensure the entire edge is even.
- Backfill and Secure: Once all material is in place, backfill the trench with soil, gravel, or sand on both sides of the edging, tamping it down firmly to secure the barrier in position.
Step 6: Finishing Touches and Maintenance
- Clean Up: Sweep away any remaining debris or soil from pathways and adjacent areas.
- Light Watering: If you’ve disturbed a lot of soil, a light watering can help settle the soil around your new edge.
- Regular Trimming: To maintain the crispness, plan to re-edge or trim regularly, typically every 2-4 weeks during peak growing season.
By following these meticulous steps, your yard will boast impeccably neat and precise edges, significantly elevating its overall appearance and contributing to a healthier landscape.
Maintenance Tips for Keeping Your Grass Edges Consistently Sharp
Achieving those perfectly sharp lawn borders is just the beginning; the real secret to a stunning landscape lies in consistent, proactive maintenance. Grass edging is not a one-time task but an ongoing commitment that ensures your outdoor space retains its clean, crisp appearance and health. Here are essential maintenance tips to keep your edges looking their best.
1. Establish a Regular Edging Schedule
The most crucial tip for maintaining sharp edges is consistency. During the peak growing seasons (spring and summer), grass grows rapidly, meaning your edges will quickly soften if neglected. Make a schedule and stick to it. For most lawns, re-edging every two to four weeks will prevent the grass from overgrowing and blurring the defined lines. In slower growth periods, you might extend this to monthly or even less frequently.
2. Proper Tool Maintenance for Cleaner Cuts
The effectiveness of your edging largely depends on the condition of your tools. A dull blade or a worn-out string trimmer line will tear and bruise the grass, leading to an uneven cut and potential damage to the turf. Always:
- Sharpen Blades: Regularly sharpen the blades of your manual edger, power edger, or even a spade. Sharp blades make clean cuts, which are healthier for the grass and require less effort from you.
- Clean Tools: After each use, clean off soil, grass clippings, and sap from your tools. This prevents rust and corrosion, extending their lifespan. Lubricate moving parts on power edgers.
- Replace Worn Parts: For string trimmers, replace the line when it becomes too short or frayed. For power edgers, inspect the blade periodically and replace it if it’s bent, cracked, or excessively worn.
3. Manage Weeds in the Edge Trench
Even with a well-defined edge, weeds can sometimes sprout within the trench or right next to a hard barrier. Regularly inspect these areas and pull out any weeds by hand before they become established. A thin layer of mulch in the trench can also help suppress weed growth and retain moisture, adding an extra layer of neatness.
4. Inspect and Maintain Hard Edging Materials
If you’ve installed physical barriers like metal, plastic, bricks, or stones, they also require periodic attention:
- Check for Shifts: Over time, hard edging can shift due to soil movement, foot traffic, or freeze-thaw cycles. Periodically inspect your barriers to ensure they are still level and securely in place.
- Address Gaps: If you notice gaps or uneven sections, reposition the material and re-secure it, possibly by adding more sand or soil to the base and tamping it down.
- Clean Surfaces: Brush away dirt, moss, or mildew that might accumulate on brick, stone, or concrete edging to maintain its aesthetic appeal.
5. Consider Edging Material for Long-Term Solutions
While manual and power edging provide immediate results, installing a permanent edging material like metal, plastic, or stone can significantly reduce the frequency of active edging required. These materials act as a continuous barrier, keeping your grass in place and your edges sharp with minimal effort beyond occasional cleaning and inspection. This can be a worthwhile investment for a truly low-maintenance, polished look.
Remember, a well-maintained edge is the finishing touch that elevates the beauty of your entire lawn and garden. The consistent effort you put into maintaining those crisp lines will undoubtedly be worth it, transforming your outdoor space into a landscape you can be proud of.
Frequently Asked Questions About Grass Edging
Here are answers to some common questions gardeners and homeowners have about grass edging:
What Are the Potential Hazards of Grass Edging and How Can They Be Avoided?
Potential hazards include injuries from sharp tools or fast-moving blades (cuts, abrasions, eye injuries), strain from improper posture or repetitive movements (back pain, muscle fatigue), and damage to underground utilities (sprinkler lines, buried cables). These can be avoided by always wearing appropriate safety gear (gloves, protective eyewear, sturdy footwear), using correct ergonomic techniques, and performing a thorough yard assessment before digging to identify and mark any buried lines. Always read your tool’s manual for specific safety instructions.
How Often Should I Edge My Lawn for the Best Results?
For optimal results and to maintain a consistently neat appearance, lawn edging should typically be performed every two to four weeks during the active growing seasons (spring and summer). This frequency prevents significant overgrowth of grass onto pathways or garden beds, making each subsequent edging session quicker and easier. During dormant or slower growth periods in fall and winter, you can reduce this frequency to once a month or even less.
Are There Any Eco-Friendly Alternatives to Traditional Grass Edging Methods?
Yes, absolutely! The most eco-friendly approaches involve using natural materials for physical barriers. Opt for recycled materials like composite lumber made from plastic, or natural stones, bricks, and wood (sourced sustainably). These durable materials provide an effective and aesthetically pleasing edge without relying on chemicals or excessive energy consumption. Creating a deep, hand-dug trench can also be an eco-friendly ‘soft’ edge without any added materials.
Can Grass Edging Harm My Lawn or Plant Life in Any Way?
When performed correctly, grass edging does not harm your lawn or adjacent plant life; in fact, it promotes their health by defining boundaries and reducing competition. However, improper techniques can be detrimental. Edging too deeply or too aggressively can sever valuable grass roots, making the lawn vulnerable. Similarly, careless edging near flower beds can damage the roots of desired plants or even sever stems. Always use correct edging methods, maintain appropriate depth, and be mindful of surrounding vegetation to prevent harm.
What’s the Best Time of Year to Perform the Initial Edging?
The best time to perform your initial, most thorough edging is in early spring, just as the grass begins its active growth cycle. This allows you to establish clean lines before significant overgrowth occurs. Subsequent maintenance edging can then be done regularly throughout the growing season.
Can I Use a String Trimmer (Weed Wacker) for Edging?
Yes, many modern string trimmers are designed with an edging function that allows the head to pivot 90 degrees. While they are excellent for maintaining existing edges and lighter touch-ups, a dedicated edger typically provides a cleaner, deeper, and more consistent cut for establishing new edges or dealing with very overgrown areas. If using a string trimmer, ensure you have a steady hand and a clear guide.
What Are Common Mistakes to Avoid When Edging?
Common mistakes include: cutting too shallowly (which won’t deter grass creep), cutting too deeply (damaging roots), creating uneven or wavy lines, rushing the job, neglecting tool maintenance (dull blades tear grass), and not wearing safety gear. Take your time, mark your lines carefully, and ensure your tools are sharp and well-maintained.
Conclusion: The Enduring Value of a Well-Edged Lawn
In a nutshell, grass edging is far more than a mere aesthetic embellishment for your garden; it’s a crucial practice for promoting overall lawn health, simplifying maintenance, and significantly enhancing your property’s curb appeal. By establishing clear, defined borders, you effectively prevent grass invasion, reduce weed growth, and create a pristine backdrop for your landscape.
With the right tools, whether manual edgers for precision or power edgers for efficiency, and a solid understanding of the techniques, you can effortlessly maintain a neat, manicured lawn. Remember, however, that the key to lasting beauty lies in regular upkeep. Consistent re-edging and proper tool maintenance are vital for preserving those sharp lines and ensuring your efforts yield enduring results. Don’t underestimate the profound impact of a well-edged lawn – it is truly the defining finish your garden needs to stand out and thrive.