
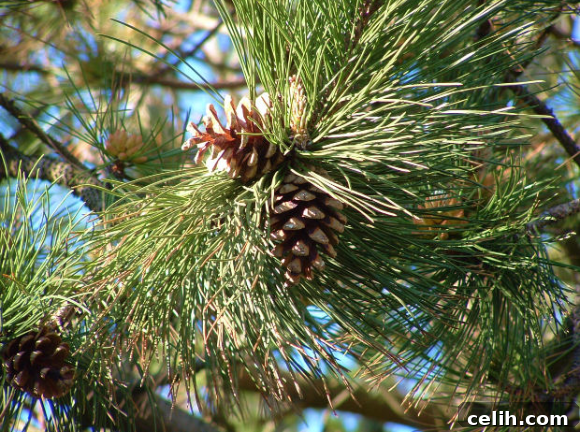
Embrace Nature’s Charm: Creative Pine Cone Crafts for a Festive Season
As the holiday season draws near, many of us look for unique ways to infuse our homes with festive cheer without breaking the bank. If you’re seeking budget-friendly Christmas decorations, aiming for a more natural aesthetic, or simply eager to try something wonderfully different, then look no further than the humble pine cone. These versatile treasures from nature are readily available and offer endless possibilities for crafting stunning DIY projects. Imagine transforming simple pine cones into elegant wreaths, charming tree ornaments, practical firelighters, or even stylish place card holders. Beyond their natural beauty, crafting with pine cones provides a fantastic opportunity for a family outing and a sustainable approach to holiday decor. So, gather your loved ones, pack some hot chocolate, and embark on a fun-filled adventure to collect nature’s bounty.
Collecting and Preparing Your Pine Cones for Crafting
The first step in any pine cone crafting journey is, of course, collecting them! Pine forests are abundant with these natural wonders at this time of year. Organize your family into a cheerful workforce, arm yourselves with collecting baskets, and head out for a memorable day in nature. Not only is it an excellent excuse for fresh air and exercise, but it also provides a unique bonding experience for everyone involved. Seek out cones of various sizes and shapes, as diversity will enhance your projects.
Once you’ve amassed your collection of pine cones, proper preparation is crucial before you begin crafting. They need to be thoroughly dried and cleaned to ensure durability and prevent any unwanted guests (like tiny bugs) from making their way into your home. Start by gently brushing off any loose dirt, leaves, or debris. For a quick and effective drying method that also encourages closed cones to beautifully open into their full, spiky, architectural glory, try this oven technique:
- Preheat your oven to approximately 100 degrees Celsius (210 degrees Fahrenheit).
- Line a baking tray with aluminum foil or parchment paper to catch any sap or debris.
- Arrange your pine cones in a single layer on the prepared tray, ensuring they don’t overlap.
- Bake them for about an hour. Keep a close eye on them to prevent burning – you’re drying them, not cooking them! The heat will help evaporate moisture and coax those tightly closed cones to unfurl their scales, making them perfect for decorative purposes.
Alternatively, you can air dry your pine cones by spreading them out on newspaper in a warm, dry area for several days or even a week. While this method takes longer, it’s equally effective. Once dried, your pine cones are ready to be transformed into beautiful festive creations.
Traditional Pine Cone Door Wreath: A Timeless Welcome
Nothing says “welcome home for the holidays” quite like a beautifully crafted traditional Christmas wreath. Using pine cones adds an authentic, rustic charm that store-bought wreaths often lack. For this classic design, you’ll need a sturdy oasis ring (easily found at florists or online craft stores) as your base, and some plastic-covered garden wire for securing your elements. A selection of fresh greenery, such as vibrant holly with its berries and fragrant fir branches, will complete your natural aesthetic.
Begin by preparing your pine cones. Take a length of garden wire and wrap it securely around the base of each pine cone, carefully threading it through the spikes until it’s as discreet as possible. Leave a substantial ‘stalk’ of wire extending from the bottom of the cone. This wire stalk will be your anchor. Using this method, wire 8 to 10 of your chosen pine cones at even intervals around the oasis ring, ensuring they are firmly in place. Distribute them strategically to create a balanced look.
Next, it’s time to incorporate your fresh greenery. Carefully remove any excess leaves from your holly branches and trim the stems down to a manageable length of about 3 to 4 centimeters. Wearing gloves at this stage is highly recommended to protect your fingers from the prickly holly and any sap. Push the trimmed holly stems firmly into the oasis ring, positioning them around the base of the pine cones. Continue adding holly until you’ve created a lush, green foundation.
Fill in any remaining gaps or visible sections of the oasis ring with small fir twigs. The goal is to completely conceal the base, creating a seamless, organic appearance. Finally, to add those quintessential festive touches, wire on decorative elements like cinnamon sticks tied with elegant colored ribbon, or tiny, shimmering baubles. These small details will elevate your traditional pine cone wreath, making it a truly captivating display for your front door throughout the holiday season.
Modern Pine Cone Door Wreath: Contemporary Elegance
For those whose taste leans towards a more contemporary and chic aesthetic for their holiday decor, a modern pine cone door wreath offers a stylish alternative. This design emphasizes clean lines, metallic finishes, and a sophisticated appeal. To embark on this project, you’ll need a more substantial collection of pine cones – approximately 40 to 50, depending on their size and your desired fullness. The base for this wreath will typically be a wire or wicker ring, readily available online, at craft shops, or even garden centers.
The key to the modern look lies in the metallic transformation of your pine cones. Divide your collected cones into roughly three distinct piles. Select different metallic spray paints such as shimmering bronze, classic silver, and opulent gold. These colors instantly elevate the natural forms of the cones to a sleek, modern finish. If your wreath is destined for outdoor display, particularly in unpredictable climates, invest in water-resistant spray paint to ensure its beauty endures through varying weather conditions.
Once your beautifully painted pine cones are completely dry, it’s time to assemble your wreath. Using garden wire, attach the cones to your chosen ring. You can experiment with different orientations and arrangements to create visual interest. A popular modern technique involves arranging the cones in distinct rows: one row facing inwards towards the center of the ring, another row facing straight outwards, and a third row angled slightly outwards. You can either mix the metallic colors randomly for a dynamic, eclectic look or dedicate one color to each row for a more structured, gradient effect. This contemporary pine cone wreath will undoubtedly add a touch of sophisticated glamour to your door, making a striking statement that blends natural elements with modern design.
Scented Pine Cone Firelighters: Warmth and Aroma
What evokes the spirit of Christmas more perfectly than the warm glow and crackle of a roaring fire? Pine cones, with their naturally high oil content, are incredibly flammable and make excellent kindling all by themselves. However, transforming them into scented pine cone firelighters takes this concept a step further, adding a delightful festive aroma to your home while also serving as charming, thoughtful gifts. For this aromatic project, you’ll need a collection of large, well-opened pine cones, a small quantity of soy wax (easily sourced from online suppliers), and your preferred scented oil – classic cinnamon or bright orange work wonderfully for the holidays, but seasonal blends like frankincense and myrrh or cranberry are also excellent choices.
The process of making these scented firelighters is simple but requires careful handling of hot wax. First, find a small container for each pine cone that will hold it upright and steady, such as an old ramekin, a sturdy mug, or even a recycled yogurt pot. This will ensure the cone remains stable as the wax sets. Next, you’ll need to melt your soy wax. The safest method for melting wax is using a double boiler. Fill a large saucepan with a few inches of water and bring it to a gentle boil. Place your soy wax in a smaller metal can or a heatproof bowl that fits inside the saucepan, ensuring the bottom of the smaller container doesn’t touch the bottom of the larger one, creating a water bath. Stir the wax gently as it melts until it achieves a smooth, liquid consistency.
Once the wax is fully melted, carefully add a few drops of your chosen scented oil. Stir it in thoroughly to ensure the fragrance is evenly distributed. Then, with extreme caution, pour about two tablespoons of the melted, scented wax into the bottom of each pine cone container, directly around the base of the upright cone. Allow the wax to cool and harden completely. As it dries, the wax will securely adhere to the pine cone, creating a solid base. Once firm, you can gently lift the pine cone firelighter out of its mold. These beautiful, fragrant firelighters make an attractive display piled in a basket beside your fireplace, or wrapped individually in cellophane bags tied with festive ribbons, they become delightful handmade gifts that embody the warmth and spirit of the holiday season.
Charming Christmas Tree Decorations: Nature’s Ornaments
Transforming pine cones into festive Christmas tree decorations is one of the simplest yet most rewarding holiday craft ideas. Their natural, rustic charm brings a touch of the outdoors indoors, creating a beautiful contrast with traditional baubles and lights. The beauty of these ornaments lies in their versatility and the ease with which they can be customized to suit any decor style.
One classic and effortlessly elegant approach is to give your pine cones a magical, snowy touch. Begin by lightly spraying the entire pine cone with a metallic spray paint – gold, silver, or bronze for a glamorous look, or white for a frosted, ethereal feel. Once the paint is dry, carefully dip the very ends of the pine cone spikes into a small dish of white or iridescent glitter. This creates a stunning “snow-kissed” effect that shimmers beautifully under the tree lights. For a more vibrant look, you can use colored glitter to match your tree’s theme.
Another lovely idea is to paint the entire cone a solid color – perhaps a deep forest green, a rich cranberry red, or a snowy white – and then add small embellishments. You can glue tiny beads, miniature faux berries, or even small, delicate ribbons to the scales of the cone. For a truly natural aesthetic, consider leaving the pine cone unpainted and simply adding a sprig of dried lavender or a small cinnamon stick tied with twine.
To prepare your pine cones for hanging, create a simple loop. Take a piece of strong, dark-colored thread, thin twine, or even fine fishing line (for an almost invisible hang). Securely tie one end around one of the top scales of the pine cone, ensuring it’s knotted tightly. Create a loop with the other end, long enough to hang comfortably from a branch, and tie it off. You can also use small screw eyes or hot glue a piece of ribbon directly to the top of the cone for a more polished finish. These handmade pine cone ornaments add a unique, personal touch to your Christmas tree, reminding everyone of the beauty of nature and the joy of DIY crafts.
Elegant Pine Cone Place Card Holders: A Personalized Touch
Elevate your holiday table setting with charming and elegant pine cone place card holders. These delightful little crafts add a personalized, natural touch to your festive gatherings, making each guest feel special. For this project, you’ll need a set of pine cones that are roughly consistent in size for a cohesive look, some reliable all-purpose glue, and a pack of air-hardening modeling clay, which is widely available from online suppliers and craft stores. If you wish to customize your cones further, a can of spray paint in your desired color will also come in handy.
Begin by preparing your bases. Take the air-hardening modeling clay and roll it into small, uniform balls. Then, gently flatten each ball into a disc shape, aiming for a diameter of about 5 centimeters (2 inches) and a thickness of approximately 1 centimeter (0.4 inches). These discs will provide a stable foundation for your pine cones. Next, take your first pine cone and apply a small amount of all-purpose glue to its flat bottom. Carefully press the glued base of the pine cone firmly into the center of one of your clay discs. Ensure it’s centered and upright. Repeat this process for all your pine cones, creating a matching set of holders. Once all the cones are secured to their clay bases, set them aside in a well-ventilated area to dry completely. Air-hardening clay typically takes 24-72 hours to fully harden, so plan accordingly.
While the clay is drying, or once it’s fully hardened, you can choose to personalize your pine cones. A light dusting of gold or silver spray paint can add a touch of sophistication, or you could opt for a festive red or green to match your table decor. You might also consider adding a touch of glitter to the tips for extra sparkle. Once fully dry and decorated, these holders are ready for use. To display your place cards, simply gently push the bottom edge of each card between the top spikes or scales of the pine cone. The natural crevices of the cone will hold the card securely in place. These charming pine cone place card holders are not only beautiful but also reusable, allowing you to bring natural elegance to your table for many celebrations to come, making them a sustainable and lovely addition to your holiday traditions.