
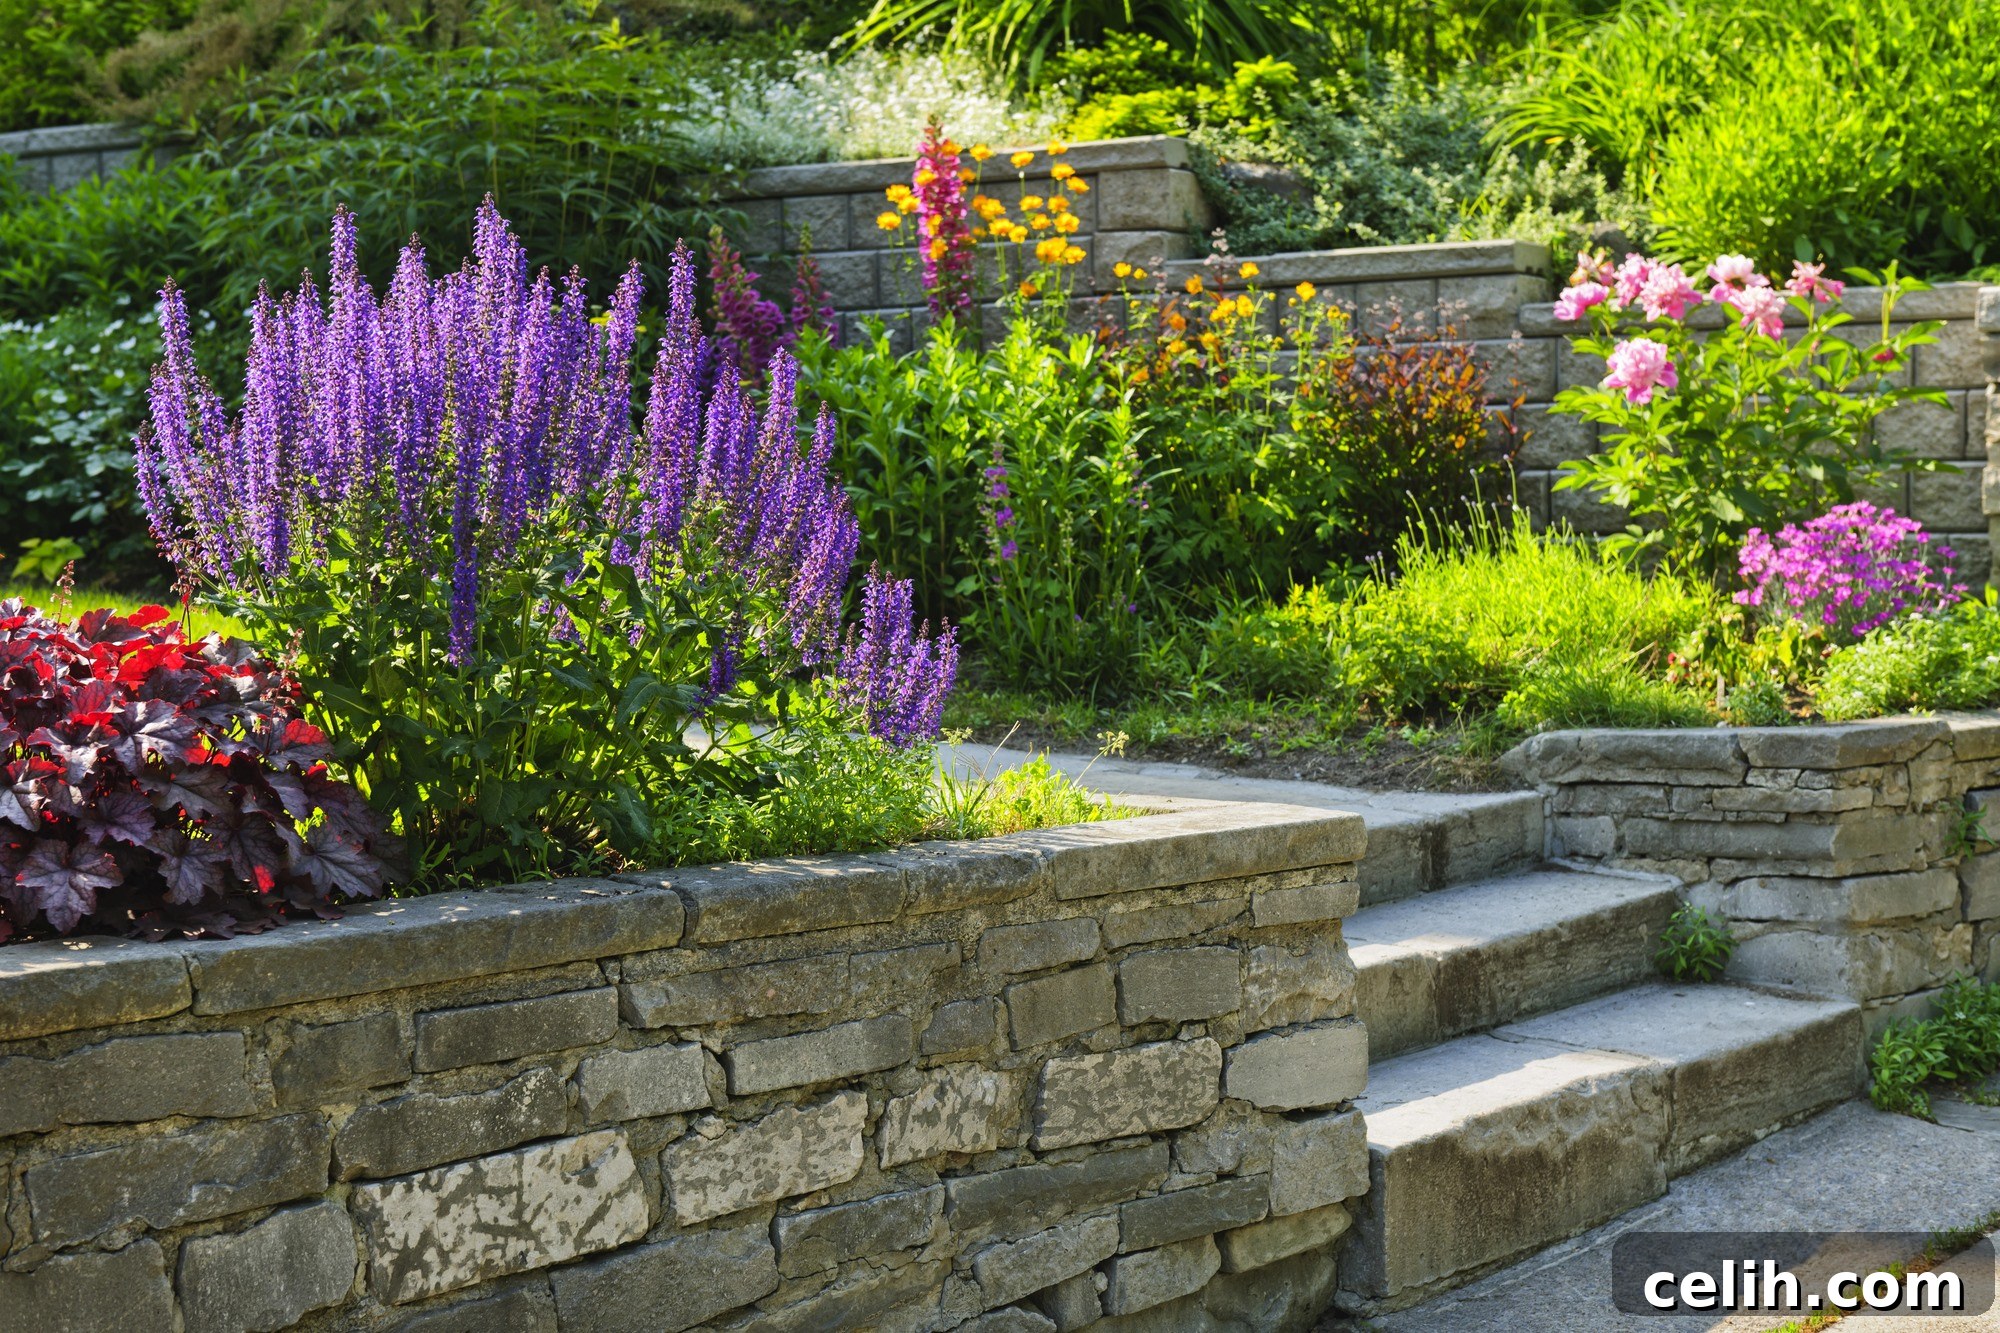
Landscape walls are more than just functional barriers; they are integral architectural features that define outdoor spaces, add significant aesthetic value, and serve crucial practical purposes. From elegant garden dividers that frame vibrant flowerbeds to robust retaining walls that prevent soil erosion and create usable terrain, these structures are cornerstones of thoughtful exterior design. Achieving both lasting beauty and structural integrity in a landscape wall necessitates meticulous planning, precise construction, and diligent, ongoing maintenance. This comprehensive guide will walk you through every stage of creating a robust and visually appealing landscape wall, offering essential advice to ensure its splendor and stability endure for generations.
Strategic Planning and Meticulous Preparation
The journey of constructing a high-quality landscape wall begins long before the first shovel breaks ground. It demands strategic foresight and meticulous planning to ensure the finished structure perfectly integrates with your existing landscape and fulfills its intended function. Start by defining the wall’s primary purpose. Is it a retaining wall to manage a sloped yard, a decorative border for a garden bed, a freestanding element to create seating, or a barrier to delineate different outdoor zones? Understanding its role will inform every subsequent decision.
Site Analysis and Regulatory Compliance
Thorough site analysis is paramount. Evaluate the terrain: assess the soil composition, its drainage characteristics, and overall stability. If building on a slope, identify the direction and volume of water runoff, as this will heavily influence drainage solutions. Consider the sun exposure and wind patterns in the chosen location, as these factors can impact material longevity and plant choices around the wall. Before any excavation begins, always investigate local building codes and regulations. Many areas require permits for walls exceeding a certain height, especially retaining walls, to ensure structural safety. Consulting with local authorities or a professional landscape architect can prevent costly compliance issues down the line.
Material Selection: Aesthetics Meets Functionality
The choice of material significantly impacts both the wall’s aesthetic appeal and its structural performance. Your decision should harmonise with your budget, the architectural style of your home, and the overall vision for your garden. Common options include:
- Natural Stone: Offers a timeless, organic look. Options range from rustic fieldstone to elegant flagstone or cut granite. While beautiful and incredibly durable, natural stone can be more expensive and labor-intensive to install.
- Concrete Blocks: Available in various styles, including traditional cinder blocks, decorative segmental retaining wall (SRW) blocks with split-face or tumbled finishes. These are highly versatile, durable, and generally more cost-effective and easier to install than natural stone. Interlocking systems provide excellent stability.
- Brick: Provides a classic, traditional appeal that can beautifully complement many home styles. Bricks are durable but require skilled masonry work for proper installation with mortar.
- Wood: Offers a warm, natural, and often more budget-friendly option, particularly for lower decorative walls or raised garden beds. However, wood requires more maintenance (sealing, staining) and has a shorter lifespan compared to stone or concrete, especially when in direct contact with soil. Treated lumber or rot-resistant species like cedar or redwood are recommended.
- Gabion Walls: A modern and permeable option consisting of wire cages filled with rocks, offering excellent drainage and a distinctive industrial-natural aesthetic.
Consider the material’s long-term maintenance requirements, its ability to withstand local weather conditions, and how it will age over time. The elegance of a well-planned landscape wall not only embellishes your garden but also fortifies its structural integrity, blending beauty with purpose in your outdoor sanctuary.
Site Preparation: Laying the Groundwork for Success
Once your plan is finalized and materials chosen, begin site preparation. Start by thoroughly clearing the designated area of all vegetation, including grass, weeds, and roots. Mark the exact perimeter of your wall using stakes and string lines to ensure precise alignment. Next, excavate the trench for your foundation. The depth and width of this trench are critical. Ensure it’s wide enough to accommodate your wall blocks and base material, typically at least twice the width of the wall itself. The depth must extend below your region’s frost line to prevent frost heave, which can cause significant damage to the wall over time. Level the trench bottom meticulously; any unevenness here will compromise the entire structure’s stability. A firm, level base is the non-negotiable prerequisite for a durable and long-lasting landscape wall.
Constructing a Robust Foundation
The foundation is the unsung hero of any landscape wall, bearing the structure’s weight and resisting the immense lateral pressure exerted by the soil, especially for retaining walls. Crafting this essential element with precision is paramount for the wall’s long-term stability and structural integrity.
Excavation and Base Material
As mentioned, the trench must be sufficiently deep, typically 6-12 inches deeper than the frost line, to prevent ground freezing and thawing from shifting the wall. The width should provide ample working room and a stable platform for the wall itself. Once excavated, compact the trench bottom thoroughly using a hand tamper or plate compactor. Next, introduce your foundational material – typically a layer of compacted gravel or crushed stone. This granular substrate serves multiple critical functions: it distributes the wall’s weight evenly, provides excellent drainage to prevent water accumulation beneath the foundation, and acts as a resilient buffer against soil movement. This base layer should be at least 6-12 inches thick, depending on the wall’s height and the soil conditions. Spread the material in lifts (layers) of 2-4 inches, compacting each lift thoroughly before adding the next. This multi-stage compaction ensures maximum density and stability.
Precision Leveling and Alignment
Employing a level and a string line is absolutely crucial at this stage to ensure your foundation is perfectly level and precisely aligned. For longer walls, consider using a laser level or transit for unparalleled accuracy. Any deviation or unevenness in the foundation will be amplified as you build upwards, potentially leading to a crooked or unstable wall. Spend extra time verifying the levelness in all directions (front-to-back and side-to-side) and ensuring the string line defines a perfectly straight or smoothly curved path for your wall. A perfectly laid foundation is the bedrock of a successful landscape wall, offering the confidence to proceed with the upward construction, knowing your structure has a solid beginning.
Expert Wall Construction Techniques
With a meticulously prepared foundation, the actual construction of your landscape wall can begin. This phase demands attention to detail and adherence to proper building techniques to ensure both structural integrity and aesthetic appeal.
Laying the First Course and Staggering Joints
Begin by carefully laying the first course of your chosen building blocks—whether they are natural stones, bricks, or concrete units—directly onto the leveled foundation. Each unit must be placed with care, ensuring it is perfectly level and aligned with the string line. This first course is the most critical; any errors here will propagate throughout the wall. For subsequent courses, offset the joints in a staggered pattern (e.g., a half-bond or running bond pattern). This staggering is essential for enhancing the wall’s stability, distributing weight evenly, and preventing vertical cracks from forming. Each block should bridge the joint of the course below, creating a robust, interconnected structure.
Bonding Materials: Mortar and Adhesives
Depending on your chosen materials and design, you will use either mortar or a robust landscape adhesive to bond the elements together. For brick or some natural stone walls, mortar acts as a strong “glue” that secures the wall’s integrity. When applying mortar, ensure it forms a full bed beneath each block, not just along the edges. Proper consistency and even distribution are key for a seamless and enduring connection between each layer. For many segmental concrete retaining wall blocks, specialized landscape adhesives are used to bond the layers, providing a strong, flexible connection without the need for traditional mortar. Always follow the manufacturer’s recommendations for application and curing times.
Crucial Drainage Solutions
Proper drainage behind a landscape wall, especially a retaining wall, is paramount to prevent hydrostatic pressure buildup, which can cause bowing, cracking, or even collapse. Integrate effective drainage systems during construction:
- Weep Holes: These are small openings left in the lower courses of the wall, typically every few feet, to allow water to escape from behind the wall.
- Gravel Backfill: A layer of clean, coarse gravel (e.g., 3/4-inch washed stone) should be placed immediately behind the wall, extending from the foundation to near the top. This granular material facilitates water percolation downwards.
- Perforated Drain Pipe: For most retaining walls, a perforated drain pipe (often called a French drain) should be laid at the base of the gravel backfill, just above the foundation. This pipe collects water that drains through the gravel and directs it away from the wall to a suitable discharge point. Ensure the pipe is wrapped in filter fabric to prevent soil particles from clogging it.
- Geotextile Fabric: Placing a layer of geotextile fabric between the gravel backfill and the native soil prevents soil migration into the drainage system while still allowing water to pass through.
This comprehensive drainage system works synergistically to mitigate water pressure, curb soil erosion, and significantly reduce the risk of structural damage from water accumulation.
Maintaining Alignment and Plumb
As you build upwards, regularly assess the wall’s height, levelness, and alignment. Use a carpenter’s level or a laser level for horizontal accuracy and a plumb line or spirit level for vertical accuracy (ensuring the wall is perfectly straight up and down). Periodic checks ensure that each part of the wall remains true to the intended design, maintaining a consistent, straight, and plumb profile as the wall ascends. Small adjustments can be made with a rubber mallet if units are not mortared, but for mortared walls, precision in placement is crucial from the outset.
Reinforcement for Taller Walls
For taller retaining walls (typically over 3-4 feet), additional reinforcement may be necessary. This can include integrating geogrid layers between courses of blocks, which extends into the soil behind the wall to provide increased stability, or using deadman anchors. Consult engineering guidelines for specific requirements based on wall height and soil conditions. While this guide focuses on general landscape walls, always prioritize safety and structural integrity.
Finishing Touches and Ongoing Care
Once the main structure of your landscape wall is complete, adding finishing touches and implementing a routine maintenance schedule will ensure its longevity and continued aesthetic appeal.
Aesthetic and Functional Enhancements
Enhance the wall’s visual allure and protect its top course by adding capstones, coping stones, or ornamental trim. These elements provide a finished look, protect the top of the wall from direct water penetration (which can degrade mortar joints or block surfaces), and can even create additional seating opportunities. Capstones should be secured with mortar or landscape adhesive. Beyond structural finishing, consider integrating elements like low-voltage lighting along the wall for evening ambiance and safety, or building in small planters for added greenery.
Protective Treatments
To further fortify the wall’s surface against the elements, consider applying a waterproofing or protective sealant. For concrete or natural stone, sealants can prevent moisture penetration, inhibit staining, and reduce efflorescence (white mineral deposits). For wooden walls, applying a high-quality wood stain or sealant will protect against rot, insect damage, and UV degradation, significantly extending its lifespan. These treatments should be reapplied periodically according to manufacturer instructions.
Regular Inspection and Prompt Repairs
A proactive approach to maintenance is key to preventing minor issues from escalating into major, costly repairs. Periodically inspect the wall for any signs of damage, especially after heavy rainfall, harsh winters, or significant seismic activity. Look for:
- Cracks: Hairline cracks might be normal settling, but wider or expanding cracks indicate structural issues.
- Bulges or Leaning: These are serious signs of excessive pressure or foundation failure and require immediate professional assessment.
- Displaced Stones or Mortar Degradation: Loose blocks or crumbling mortar joints compromise the wall’s stability.
- Drainage Issues: Check weep holes and drain pipes for clogs. Look for areas where water is pooling behind the wall.
- Efflorescence: While often harmless, excessive efflorescence can indicate water ingress.
Swiftly address these issues upon identification. Minor cracks in mortar can be re-pointed, loose stones re-secured, and efflorescence cleaned. Ignoring these early warning signs can lead to further degradation and potentially catastrophic failure.
Keeping it Clean
It’s essential to regularly clear away detritus, fallen leaves, vegetation growth (especially moss or algae), and excess soil from the wall’s façade and base. This prevents drainage issues, inhibits biological growth that can damage surfaces, and preserves its structural integrity. Wash the wall periodically with water and a mild cleaner to remove dirt and grime. For stubborn moss or algae, a diluted bleach solution or specialized outdoor cleaner can be used, always testing a small, inconspicuous area first.
Harmonious Landscaping Around the Wall
Upon the establishment of your landscape wall, thoughtfully embellishing its environs will amplify its visual allure and seamlessly integrate it into your outdoor setting. The goal is to soften its hard edges and create a cohesive, attractive garden space.
Thoughtful Plant Selection
Introduce a variety of plants at the base and along the top of the wall to imbue the landscape with vibrancy and texture. Choose low-upkeep shrubbery, perennial flora, or ground-cover plants that complement the wall’s material and color. Consider plants with shallow root systems that won’t compromise the wall’s foundation. Examples include creeping thyme, sedum varieties, ornamental grasses, dwarf conifers, or trailing flowering plants that can spill over the wall’s edge. Ensure your plant choices are suitable for your local climate zone and the specific sun exposure of the wall. Avoid planting large trees or expansive shrubs too close to the wall – their aggressive root systems can exert pressure on the foundation, leading to cracks, displacement, or even structural failure over time. Maintain a safe distance, typically at least 5-10 feet, depending on the mature size of the tree.
Mulch and Ornamental Gravel
Employ mulch or ornamental gravel at the base of the wall and around plantings to confer a tidy and polished appearance. Beyond aesthetics, these ground covers simultaneously aid in erosion control by protecting the soil surface from rainfall, suppress weed growth, and help retain moisture within the soil, reducing the need for frequent watering. Choose a mulch that complements your wall material and garden style, such as shredded bark, wood chips, or decorative stones.
Integrating Lighting and Features
Consider adding subtle landscape lighting to highlight the wall’s texture and plantings during the evening hours. Built-in benches or steps can transform a simple wall into a functional and inviting space. These design elements not only enhance beauty but also increase the usability and value of your outdoor living area.
Comprehensive Inspection and Maintenance Regimen
Ensuring the prime condition of your landscape wall demands a consistent regimen of regular examinations and proactive upkeep tasks. This approach allows for prompt identification and resolution of any issues, thereby averting more extensive and expensive repairs in the future.
Seasonal Inspections
Conduct thorough inspections at least twice a year, ideally in spring and fall, and particularly following intense rainfall, prolonged droughts, or severe freeze-thaw cycles. These extreme weather events can put significant stress on landscape structures. During your inspection, carefully examine the entire wall surface and foundation area for any indications of wear, settling, or erosion. Pay close attention to:
- Cracks: Look for new cracks or existing ones that have widened. Even small cracks can allow water infiltration, leading to larger problems.
- Bulges or Leaning: Use a long level or plumb line to check if the wall is still perfectly vertical and straight. Any outward bulging or leaning is a critical warning sign.
- Joint Integrity: For mortared walls, check for crumbling, cracked, or missing mortar joints. For dry-stacked or adhesive-bonded walls, look for loose or shifted blocks.
- Drainage System: Verify that weep holes are clear of debris and that any drain pipes are functioning correctly, discharging water freely away from the wall. Inspect the gravel backfill area for signs of soil erosion into the gravel.
- Foundation Exposure: Ensure the base of the wall remains properly covered and hasn’t been undermined by erosion.
- Vegetation Growth: Look for plant roots growing into the wall joints or cracks, which can exert pressure and cause damage.
Prompt Addressing of Issues
Fix any identified cracks, displaced stones, or mortar joint issues promptly upon identification to avert further deterioration. Small repairs made early are significantly less disruptive and costly than waiting until major structural damage occurs. For mortar issues, consider re-pointing (removing old, damaged mortar and replacing it with new). Loose blocks in dry-stacked walls may need to be reset and potentially stabilized with landscape adhesive. If you discover significant structural problems like leaning or large cracks, it is highly recommended to consult a professional landscape contractor or structural engineer for an expert assessment and repair plan.
Thorough Cleaning Practices
Keep the wall clean. Wash it now and then with water and a soft cleaner (such as a mild detergent or diluted outdoor cleaner) to remove accumulated dirt, moss, or algae growth. A pressure washer can be effective for cleaning, but use it with caution and at a low setting, especially on older mortar joints or softer stone, to avoid damage. Regular cleaning not only preserves the wall’s aesthetic appeal but also prevents biological growth from causing long-term degradation of the surface material. By adhering to these comprehensive inspection and maintenance practices, you can significantly extend the life and beauty of your landscape wall.
Conclusion: A Lasting Investment in Your Outdoor Space
Constructing a landscape wall is a rewarding endeavor that necessitates meticulous planning, the application of correct construction methodologies, and a steadfast commitment to continuous maintenance to secure its structural robustness and enduring durability. A well-designed and expertly built wall is far more than just a boundary; it is a fundamental element that enhances the functionality, aesthetics, and overall value of your property.
By diligently following the detailed steps described in this comprehensive manual—from the initial site analysis and material selection to the precision of foundation installation, the careful construction of each course, and the integration of crucial drainage systems—you lay the groundwork for a structure built to last. Adhering to consistent inspection and maintenance practices, including regular cleaning, timely repairs, and thoughtful surrounding landscaping, will enable you to construct a landscape wall that not only enhances the attractiveness and functionality of your outdoor area but also significantly contributes to its long-term value for many years ahead.
Whether your project involves erecting a robust retaining wall to reclaim sloped land, a charming garden fence to define intimate spaces, or an elegant decorative structure to add architectural interest, dedicating the necessary time and energy to proper construction and maintenance efforts will yield profound and enduring benefits. This commitment ensures prolonged enjoyment of your landscape wall, providing a beautiful and functional addition to your outdoor sanctuary across multiple seasons and through all the changing years.