
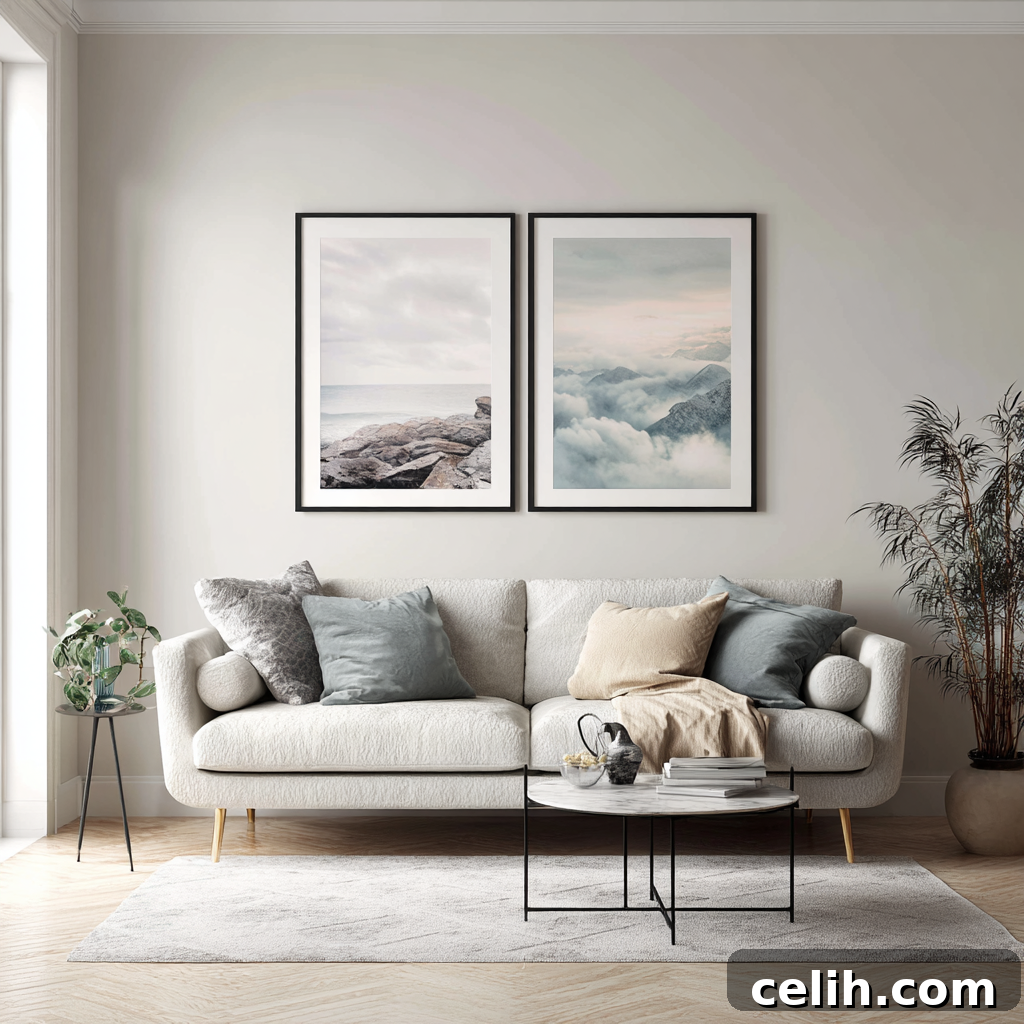
Are you looking at your walls and feeling like they’re just… waiting? Waiting to be filled with character, with stories, with the moments that truly make your house a home? Many of us have countless precious memories stored on our phones and cameras, yet our living spaces often lack that personal touch. If you’re ready to move beyond digital screens and give your favorite photos the prominence they deserve, creating stunning canvas prints is an exceptional way to bring life and personality to any room. The journey from a digital image to a professional-quality piece of wall art involves a few crucial steps and thoughtful considerations. This definitive guide will walk you through everything you need to know, ensuring your cherished memories are transformed into breathtaking canvas displays that resonate with your unique style.
Choosing the Perfect Photo for Your Canvas Print
Selecting the right image is the cornerstone of creating exceptional canvas wall art. Not every photo that captivates you on a small screen will translate well to a large, prominent display. A common pitfall is choosing an image that appears sharp and vibrant on a phone, only for it to become blurry, pixelated, or muddy when enlarged to canvas size. This issue rarely stems from the printing service itself; more often, it’s a matter of the original photo’s quality and suitability for enlargement.
The absolute key to a crisp, high-quality canvas print is image resolution. Aim for a minimum of 300 DPI (dots per inch) at the final print size. To put this into perspective, if you’re planning a 16×20 inch canvas, your digital image should ideally be around 4800×6000 pixels. A simple, effective test is to zoom into your photo at 100% on a computer screen. If it remains clear and sharp without visible pixelation, it’s likely a strong candidate for printing. Additionally, consider the file format; high-quality JPEGs, TIFFs, or PNGs are generally preferred over heavily compressed files.
Beyond technical specifications, the aesthetic quality of your photo matters immensely. Opt for images with a clear focal point and avoid overly cluttered compositions. Portraits, striking landscapes, close-ups with interesting textures, or vibrant still-life shots tend to excel on canvas. A helpful trick is the “squint test” – if you squint your eyes at the image and the main subject or focal point still stands out distinctly, the image possesses strong visual impact and is likely to print beautifully as a piece of custom wall art. Pay attention to lighting and focus as well; sharp details and balanced lighting will always yield superior results.
Enhancing Your Photo for Optimal Canvas Presentation
Once you’ve chosen your high-resolution image, a little strategic enhancement can elevate it from a good photo to a spectacular piece of wall decor. Canvas material inherently has a matte finish, which can sometimes subtly mute colors and soften details compared to glossy photo paper. To counteract this and make your images truly pop, a few simple editing adjustments are highly recommended.
Begin by boosting the contrast slightly to add depth and dimension. Canvas prints often benefit from a touch more contrast than what looks perfect on a screen. Next, fine-tune shadows and highlights to ensure intricate details are preserved in both the brightest and darkest areas of your image. A subtle increase in saturation or vibrance can also help colors appear richer and more vibrant on the canvas. Consider the mood you wish to evoke: warm tones, such as golden hour hues, tend to feel inviting and cozy, perfect for living rooms or bedrooms, while cooler tones can lend a modern, minimalist, or sophisticated ambiance to contemporary spaces.
Beyond color and tone, don’t overlook essential correctional tweaks. Cropping away distracting elements from the edges of your frame can significantly improve the composition and direct the viewer’s eye to your intended subject. For landscapes or architectural shots, ensuring horizons are perfectly level is crucial, especially for larger prints where any tilt will be glaringly obvious. These seemingly minor adjustments can make a profound difference in the overall professionalism and impact of your custom canvas print.
Strategic Sizing and Placement Tips for Impactful Wall Art
The size and placement of your canvas prints are just as critical as the image itself in determining the overall aesthetic impact on your room. A common guideline for wall art is that it should ideally fill approximately 60–75% of the available wall space above a piece of furniture, like a sofa, bed, or console table. To visualize this effectively before committing, use painter’s tape to map out the desired dimensions directly on your wall. For instance, if you have a 6-foot wide sofa, aim for a single canvas or a collection of prints that collectively span about 4 to 4.5 feet in total width.
Decide whether a bold single statement piece or a dynamic gallery wall best suits your space and your story. A single large canvas is perfect for showcasing one impactful, high-resolution photo – perhaps a breathtaking landscape, a striking portrait, or an abstract piece that commands attention. In contrast, a gallery wall offers an excellent opportunity for visual storytelling, allowing you to display a curated collection of travel memories, family milestones, or thematic photos. When creating a gallery wall, aim for odd numbers of prints, as these often create a more natural and visually appealing balance. Additionally, ensure there’s a cohesive element, whether it’s a consistent color palette, similar themes, or uniform frame styles, to tie the collection together. Remember to hang art at eye level, which for an average person standing, is typically with the center of the artwork about 57-60 inches from the floor.
Tailoring Your Canvas Art to Each Room’s Personality
The function and mood of each room should guide your canvas print choices. Different spaces call for distinct styles, sizes, and subject matter to truly enhance the atmosphere and complement the existing decor.
- Living Rooms: As central gathering spaces, living rooms are ideal for larger, bolder pieces or elaborate gallery walls that spark conversation. Think vibrant landscapes, abstract art, or cherished family portraits that reflect your personal style and create a welcoming ambiance.
- Bedrooms: These intimate retreats benefit from smaller, more personal, and calming images. Soft, serene landscapes, romantic couples’ photos, or tranquil abstract pieces in soothing color palettes work beautifully to promote relaxation and a sense of peace. Bedrooms often feel more luxurious with artwork that complements rather than dominates the space.
- Dining Rooms: Since people spend extended periods in dining rooms, medium to large canvas prints are appropriate. Food photography, travel shots showcasing culinary adventures, or vibrant still lifes of fruit and flowers can enhance the dining experience. Consider themes that encourage good conversation and an enjoyable atmosphere.
- Hallways and Corridors: These transitional spaces are perfect for creating engaging gallery walls with smaller canvases. They offer an excellent opportunity to display a series of related photos – perhaps a timeline of family growth, a collection from a memorable trip, or thematic abstract pieces – creating visual interest without overwhelming the narrow space.
- Home Offices: Choose motivational quotes, inspiring landscapes, or organized abstract pieces that foster productivity and creativity.
- Kids’ Rooms: Fun, colorful prints featuring their favorite characters, animals, or even their own artwork transformed into canvas can make their space truly special.
Professional Design Techniques for Gallery-Worthy Results
The distinction between a casual snapshot on canvas and a piece of art that looks like it belongs in a sophisticated gallery often lies in the thoughtful application of design techniques and finishing touches. These subtle yet impactful choices can truly elevate your canvas prints from merely “good” to absolutely gorgeous.
Refined Photo Editing for Canvas Excellence
While advanced photo editing skills are not strictly necessary, mastering a few basic adjustments can make an immense difference. Begin with precise cropping, not just to remove distractions, but also to enhance composition. Consider applying the rule of thirds to place your subject off-center for more dynamic visual interest. For scenes with horizons or architectural lines, always ensure they are perfectly level; a crooked line can be incredibly jarring on a large print.
Next, focus on exposure and contrast. As canvas printing can slightly flatten images, it’s beneficial to add a bit more “punch” than you might for a standard digital photo. A good starting point is to increase the contrast by 10-15% and then carefully adjust highlights and shadows to retain detail across the entire tonal range. Pay attention to white balance and color temperature; warm, golden tones often create inviting spaces on canvas, while cooler tones convey a modern, sophisticated feel. The choice should harmonize with the room’s existing color scheme and the desired mood. Finally, consider a touch of sharpening, especially for larger prints, as the canvas texture can sometimes slightly soften edges. Be careful not to over-sharpen, which can introduce artifacts.
Strategic Border and Framing Options
This is where significant customization comes into play, defining the final presentation of your canvas wall art. The most popular option for canvas prints is the gallery wrap, where the image extends around the edges of the canvas stretcher bars. This creates a clean, modern, frameless look that is particularly well-suited for contemporary spaces and is also more budget-friendly. For gallery wraps, consider the ‘mirror wrap’ option where the edges of the image are mirrored onto the sides, preventing crucial parts of your photo from being wrapped around. Alternatively, a solid color wrap (black or white) can provide a neat border effect.
For a more traditional or classic aesthetic, consider adding a digital border to the image before printing, or plan to frame the canvas after it arrives. A crisp white or neutral border can provide breathing room around a colorful image, making it pop and giving it an art gallery feel. Black borders, on the other hand, can add drama and sophistication, particularly with black and white photography. Floating frames, which leave a small gap between the canvas and the frame, are a popular choice for canvas prints, offering a polished look without obscuring the image’s edges. Choose frame materials like natural wood for a rustic feel, sleek metal for modern interiors, or painted wood to match your decor.
Crafting Cohesive Color Schemes for Multi-Piece Displays
When planning a multi-piece display or gallery wall with multiple canvas prints for a single space, establishing a cohesive color scheme is vital for a harmonious look. The prints don’t need to have identical color palettes, but there should be connecting elements that tie them together visually. This might be achieved through a consistent warm or cool tonal range across all pieces, a repetition of certain dominant colors, or a shared filter/style application.
A professional design tip is to select one dominant color or a secondary accent color that subtly appears in each canvas print within the collection. This creates visual unity without making the display feel overly uniform or monotonous. When integrating new canvas prints with existing room colors, try to echo those shades subtly in your art selection. For example, if your cushions have a soft blue, choose a canvas that features hints of that same blue. Consider using a color wheel to understand how colors complement or contrast each other – monochromatic, analogous, and complementary schemes can all create stunning effects depending on the desired mood.
Cost-Effective Canvas Solutions for Every Budget
Creating personalized canvas prints doesn’t have to break the bank. There are numerous ways to achieve beautiful results while being mindful of your budget. DIY canvas printing kits can be a fun and affordable option for smaller, less critical projects, allowing you to print photos at home and stretch them yourself. However, for larger prints, images with delicate color gradients, or when perfect accuracy is paramount, investing in professional printing services is usually worth the cost for superior quality and durability.
To maximize your budget, consider mixing different display formats within a single gallery wall. Combine one or two high-quality canvas prints with framed photographs, elegant mirrors, or floating shelves adorned with small decorative objects. This variety adds visual interest and can reduce the overall cost compared to a wall entirely composed of large canvases. You can also build your gallery wall gradually over time, acquiring pieces as your budget allows, and look for bundle discounts or seasonal sales often offered by printing companies to save significantly on multi-photo orders.
Maximizing Value with Multi-Photo Orders and Strategic Planning
Many reputable canvas printing services offer attractive discounts when you order multiple pieces simultaneously. If you’re planning a cohesive gallery wall or simply have several photos you wish to transform into art, ordering everything at once is a smart financial move. Not only does this save money per print, but it also helps ensure color consistency across all your custom canvas prints, as they will likely be processed in the same batch.
Another clever strategy is to order different sizes of the same photo. For instance, a large version of a beloved family portrait could be the focal point of your living room, while smaller, complementary versions are placed in a hallway or bedroom. This creates a cohesive visual theme throughout your home, maximizing the impact and value of your initial photo investment. Keep an eye out for special promotions, holiday sales, or loyalty programs offered by print providers to get the best possible deals on your personalized wall decor.
Creative Display Ideas Beyond Basic Wall Hanging
Once your beautifully crafted canvas prints arrive, don’t limit yourself to the conventional eye-level placement. There’s a whole world of imaginative ways to showcase your personalized wall art that can add depth, movement, and a unique personality to your living space. Thinking outside the box with your display can transform your home decor.
Play with Shape and Dynamic Layouts
Break away from the monotony of uniform sizing and explore how different shapes and arrangements can dramatically transform your wall art display. Square canvases are particularly trendy and versatile, working brilliantly in crisp, symmetrical grids (like a clean 2×2 or 3×3 layout) that exude modern sophistication. Panoramic prints, with their elongated form, are ideally suited for stretching across long horizontal spaces, such as above a sofa, headboard, or dining table, creating a dramatic focal point.
Embrace mixed sizing for added visual interest. A compelling arrangement could feature a single striking large canvas flanked by two smaller, complementary prints, instantly drawing the eye and creating a balanced yet dynamic vignette. Alternatively, consider a cascading or “stair-step” display where each canvas is hung at a slightly different height, introducing a playful sense of movement and flow that feels both artistic and stylish. Experiment with asymmetrical layouts, creating interesting negative space, or consider multi-panel canvas prints (diptychs, triptychs, or even more panels) where a single image is split across several canvases for a truly contemporary look.
Seamlessly Mix and Match with Other Décor Elements
Canvas prints don’t have to exist in isolation. Some of the most visually engaging walls are created by thoughtfully mixing canvases with a variety of other decorative elements. Imagine combining your custom canvas prints with framed photos, sleek mirrors, floating shelves adorned with curated objects, or even textural art pieces. The secret to a successful mixed display is maintaining a unifying thread – perhaps a shared color palette, a consistent theme, or a similar aesthetic style – to pull all the diverse elements together harmoniously.
Mirrors, in particular, are incredibly effective alongside canvas prints. They bounce natural light around the room, enhancing brightness, and add a wonderful sense of depth and dimension, creating a layered look that feels both spacious and intentionally designed. Try pairing a vibrant canvas with an intricately framed mirror, or integrating small, varied mirrors within a gallery wall arrangement. Incorporate plants on nearby shelves for organic texture, or subtle spotlights to highlight your favorite pieces, making your custom wall art a true focal point.
Rotate Your Art with the Seasons and Moods
Why confine your wall art to a single static display year-round? Swapping out your canvas prints with the changing seasons or your evolving moods is a delightful and effortless way to refresh your living space and keep your decor feeling current. Feature vibrant, sun-drenched beach photographs or cheerful floral prints in the summer, transition to cozy, warm-toned family portraits or autumnal landscapes in the cooler months, and welcome spring with bright, refreshing imagery. This dynamic approach ensures your home always feels fresh, relevant, and reflective of the current moment.
Canvas prints are remarkably lightweight and easy to store, making seasonal rotation a practical option. Simply slide them under a bed, into a closet, or within a designated art storage area until their season returns. This not only keeps your home decor lively and engaging but also allows you to make the most of all those cherished photos, giving each one its moment in the spotlight. It’s an excellent way to continually tell your evolving story through personalized wall art.
Final Thoughts on Creating Your Personalized Canvas Wall Art
Transforming your digital memories into tangible, beautiful canvas prints is a profoundly rewarding way to infuse your home with personal meaning and unique style. With careful photo selection, an understanding of optimal sizing and placement, and the application of a few simple yet effective editing and design techniques, you can create wall art that is not only visually stunning but also deeply personal and utterly unique. Whether you opt for a grand statement with a bold, oversized canvas or design a flexible, evolving gallery wall of smaller prints, your walls are waiting to tell your story. Give them a voice, let them reflect your life, your adventures, and your most cherished moments, and watch as your home transforms into a truly personalized sanctuary.