
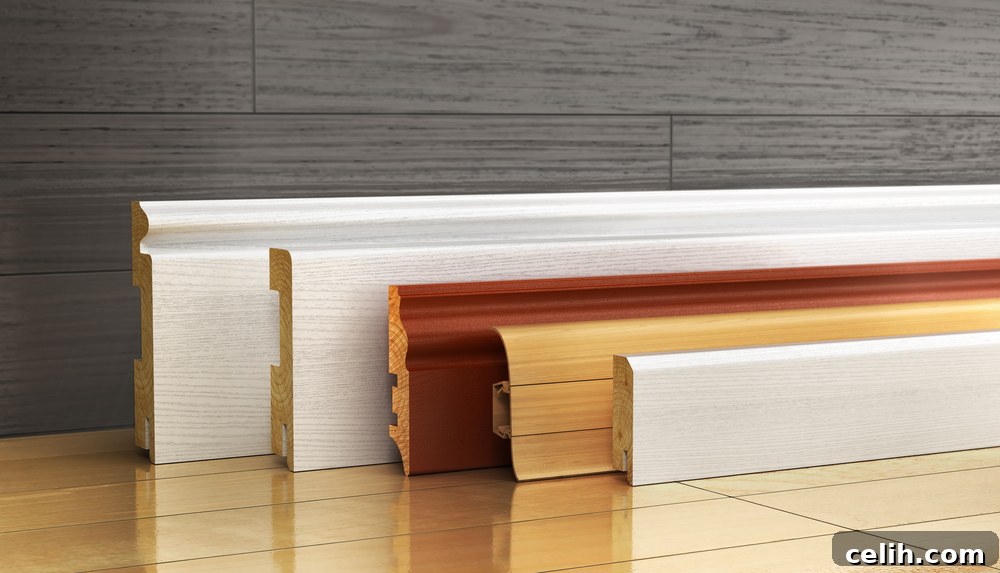
Skirting boards, also known as baseboards, are more than just a decorative element; they are a crucial finishing touch that significantly elevates the aesthetic appeal and functionality of any room. When embarking on a room renovation or decorating project, including skirting boards in your plans is a decision you won’t regret. These essential architectural features serve multiple practical purposes: they expertly conceal the often-uneven join between walls and floors, elegantly cover minor gaps, and provide an invaluable layer of protection against daily wear and tear at the base of your walls. Beyond their practical benefits, skirting boards add definition, character, and a polished look that can transform a good interior into a truly exceptional one.
For those new to the world of DIY or who have never attempted to fit skirting boards, the task might seem daunting. However, with the right guidance, it’s a perfectly achievable home improvement project that can save you money and provide immense satisfaction. This comprehensive guide offers two practical, step-by-step methods to help you achieve a professional finish. The first method, utilizing nails and adhesive, is ideal for beginners and offers a quick, secure installation. The second method, which involves screws, caters to more experienced DIY enthusiasts seeking a robust and long-lasting fixture. Let’s delve into mastering the art of skirting board installation, ensuring your home looks impeccable from floor to ceiling.
Why Skirting Boards Are Indispensable for Your Home
Understanding the full range of benefits that skirting boards offer can help you appreciate their value beyond mere aesthetics. They are fundamental elements in interior design and home protection:
- Concealing Imperfections: Walls are rarely perfectly straight, and floors rarely meet them with absolute precision. Skirting boards expertly hide these construction imperfections, creating a seamless and tidy junction.
- Wall Protection: The lower part of your walls is highly susceptible to damage from vacuum cleaners, furniture knocks, playful pets, and general foot traffic. Skirting boards act as a protective barrier, absorbing these impacts and keeping your walls pristine.
- Enhanced Aesthetics and Room Definition: Skirting boards add visual weight and a sense of completeness to a room. They define the perimeter, create a clear boundary between wall and floor, and provide a continuous line that can enhance the perceived height or length of a space.
- Covering Gaps and Wires: Small gaps often appear where flooring meets the wall, which can allow draughts or be unsightly. Skirting boards effectively seal these gaps. Additionally, they can discreetly conceal low-lying cables or wiring, contributing to a cleaner, safer environment.
- Increased Property Value: A well-finished interior, complete with properly installed skirting boards, contributes to the overall appeal and perceived quality of your home, potentially increasing its market value.
Essential Tools and Materials for Skirting Board Installation
Before you begin, gathering the correct tools and materials will ensure a smooth and efficient installation process. While specific items may vary slightly between methods, here’s a general list:
- Skirting Boards: Choose your desired profile, height, and material (MDF, pine, oak, etc.).
- Measuring Tape and Pencil: For precise measurements and markings.
- Spirit Level: To ensure your boards are perfectly level.
- Saw: A miter saw is highly recommended for accurate straight and angled cuts, especially for corners. A hand saw or jigsaw can also be used for simpler cuts.
- Strong Grab Adhesive: High-quality construction adhesive designed for wood and masonry.
- Caulk Gun: To apply adhesive and later, decorator’s caulk.
- Nail Gun and Nails (Method 1): Brad nailer or finish nailer with appropriate length nails.
- Electric Drill, Screws, Wall Plugs, Countersink Bit (Method 2): For drilling pilot holes, securing screws, and creating recesses for flush finishes.
- Utility Knife: For scoring lines and other fine adjustments.
- Pry Bar/Chisel (for removal): If replacing old skirting boards.
- Safety Gear: Eye protection and gloves are always recommended.
- Filler (Wood Filler/Spackle): To fill nail/screw holes and minor imperfections.
- Decorator’s Caulk: To seal gaps between the skirting board and the wall.
- Sanding Block/Paper: For smoothing surfaces before painting.
- Primer and Paint: To finish your newly installed skirting boards.
Method 1: Fitting Skirting Boards with Nails and Adhesive (Beginner-Friendly)
For those new to DIY projects, or simply looking for an efficient and secure installation, the combination of a nail gun and strong adhesive is an excellent choice. This method, endorsed by experts like Skirting4U Ltd, offers superior holding power compared to adhesive alone, minimizes damage to the boards, and is significantly faster than using screws. It’s the perfect approach for budding DIY enthusiasts eager to see quick, professional results.
For a visual aid, consider watching a relevant video tutorial before proceeding with the steps below:
Step 1: Precise Wall Measurement and Board Planning
Begin by meticulously measuring the length of the wall where your skirting board will be installed. Use a reliable tape measure and aim for accuracy. It’s advisable to measure at a couple of points along the wall to account for any slight variations. Plan how many individual board sections you’ll need, considering corners and room dimensions. Always purchase slightly more material than you calculate to allow for cutting errors or future repairs.
Step 2: Cutting Skirting Boards to Length
Transfer your precise wall measurements onto your chosen skirting board. Using a pencil, mark the exact length. For straight cuts, a miter saw set to 90 degrees will provide the cleanest and most accurate result. When dealing with internal or external corners, you’ll need to make miter cuts (typically 45-degree angles) to create seamless joins. Take your time with these cuts, as precision is key to a professional finish. Always use appropriate safety gear, including eye protection, when operating power tools.
Step 3: Dry Fitting for Perfect Alignment
Before applying any adhesive, place the cut skirting board against the wall in its intended position. This “dry fit” allows you to double-check that the board is the correct length and fits snugly. Push it firmly against the wall and the floor to ensure there are no noticeable gaps or misalignments. This step is crucial for identifying any necessary adjustments to your cuts before commitment, saving you time and material in the long run.
Step 4: Applying the Adhesive
Once you’re satisfied with the dry fit, remove the board. Apply a high-quality construction adhesive to the back of the skirting board. Instead of a single straight line, create a continuous “squiggly” or serpentine pattern across the back. This method ensures that the adhesive covers a larger surface area, maximizing contact with the wall and creating a stronger, more even bond. Apply the adhesive generously but avoid over-application, which could lead to excess squeezing out.
Step 5: Positioning and Securing the Board
Carefully place the adhesive-coated skirting board back against the wall, aligning it perfectly with the floor and any adjacent boards. Press it firmly along its entire length, ensuring uniform contact with the wall. Hold it in place for a few moments to allow the adhesive to begin bonding. This initial pressure is vital for establishing a strong, lasting connection between the board and the wall surface.
Step 6: Electrical and Plumbing Safety Check
Before reaching for your nail gun, it is absolutely critical to perform a thorough safety check for any hidden electrical wiring, water pipes, or gas lines behind the wall in the area where the skirting board will be installed. Use a stud finder with metal detection capabilities or consult building plans if available. Mark the exact locations of any plugs, switches, or visible cables above the skirting board. You must place nails *either side* of these points, never directly into them. If there is any uncertainty about concealed services, err on the side of caution and consider switching off the main electrical supply to the room before proceeding with nailing. Safety should always be your top priority.
Step 7: Nailing for Enhanced Stability
With the board firmly in position and safety checks complete, use your nail gun to add nails at regular intervals along the skirting board. Aim for consistent spacing, typically every 40-60 centimeters (16-24 inches), to provide optimal stability. If you’ve identified areas with electrical fittings or pipes, start nailing from the middle of the board and work outwards, placing nails strategically to avoid these sensitive zones. Ensure the nails are driven flush or slightly recessed below the surface of the wood, ready for filling later. This combination of adhesive and nails creates a robust and lasting fixture that will stand the test of time.
Voila! You should now have a securely fitted skirting board, adding a professional and polished finish to your room. Once the adhesive has cured, you can proceed with filling nail holes, caulking gaps, and painting.
Method 2: Fitting Skirting Boards with Screws (For the Experienced DIYer)
For those with more DIY experience who seek an exceptionally robust and potentially removable installation, fitting skirting boards with screws offers superior long-term stability and a secure fixture, especially on uneven walls. This method involves a few more steps but results in a highly durable finish.
Step 1: Measure, Cut, and Prepare Your Boards
As with the adhesive method, begin by precisely measuring the wall where the skirting board will be installed. Cut your skirting boards to the correct length, paying careful attention to creating accurate miter cuts for internal and external corners. Accuracy at this stage is paramount for a professional finish. Ensure your boards are clean and free of debris.
Step 2: Marking Screw Placement Points
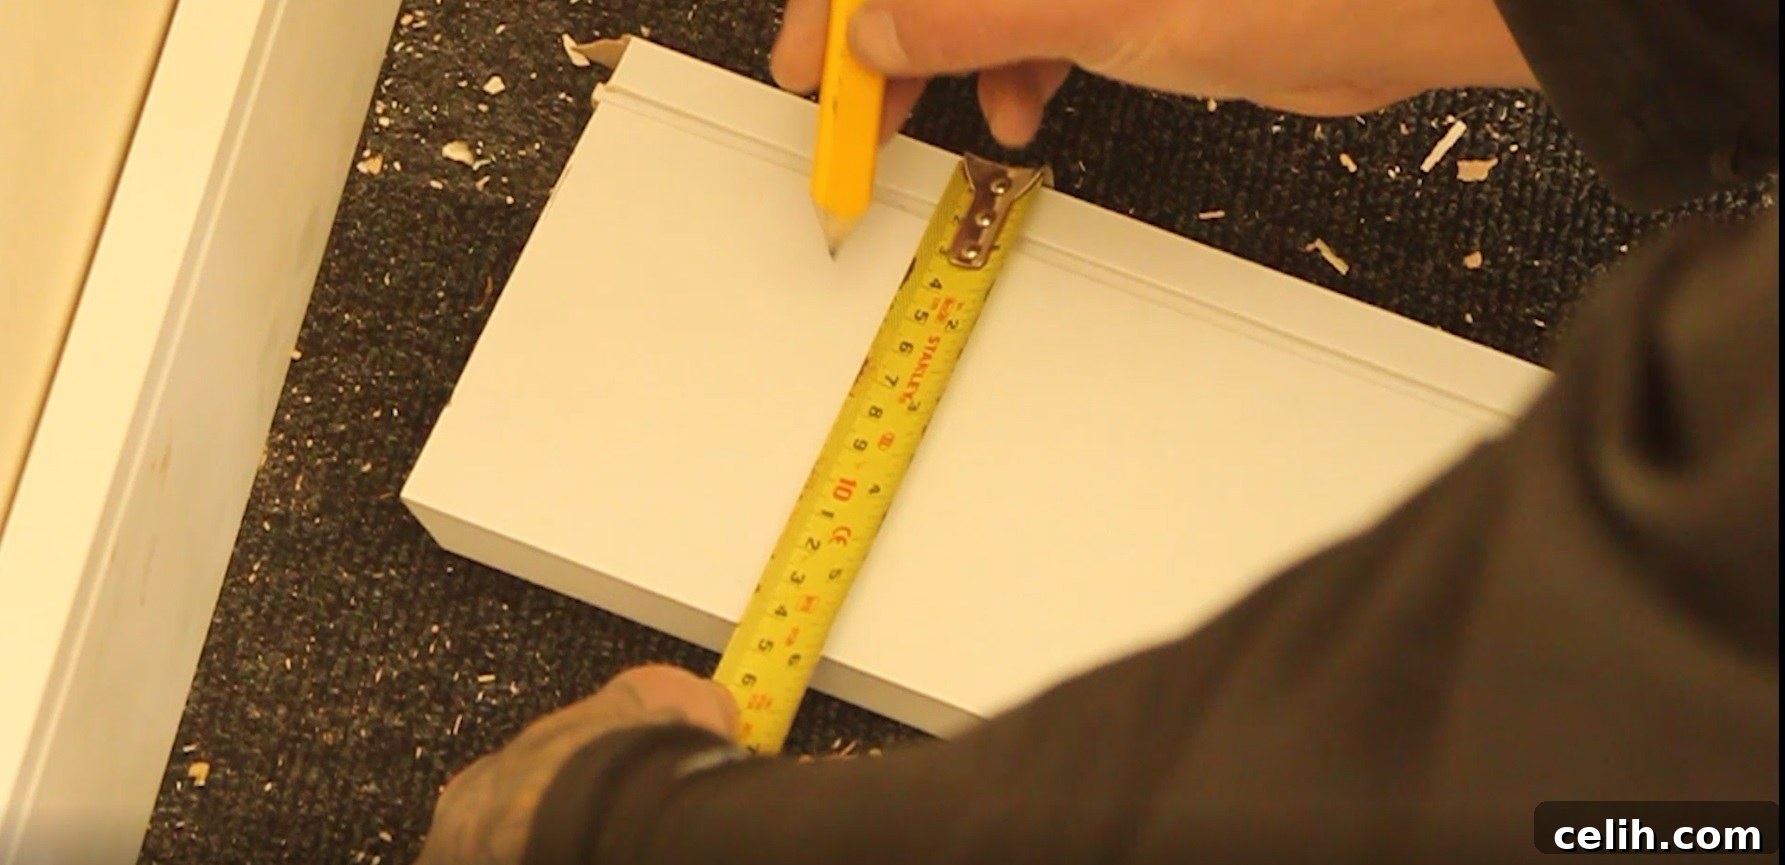
Lay your cut skirting board flat. Using a tape measure and pencil, mark approximately five to six equidistant points across the board where the screws will be fitted. These points should be evenly distributed along the length. For each point, find the horizontal center between the top and bottom edges of the board and make a clear mark. Avoid placing screws too close to the very ends of the board to prevent splitting.
Step 3: Drilling Pilot Holes in the Skirting Board
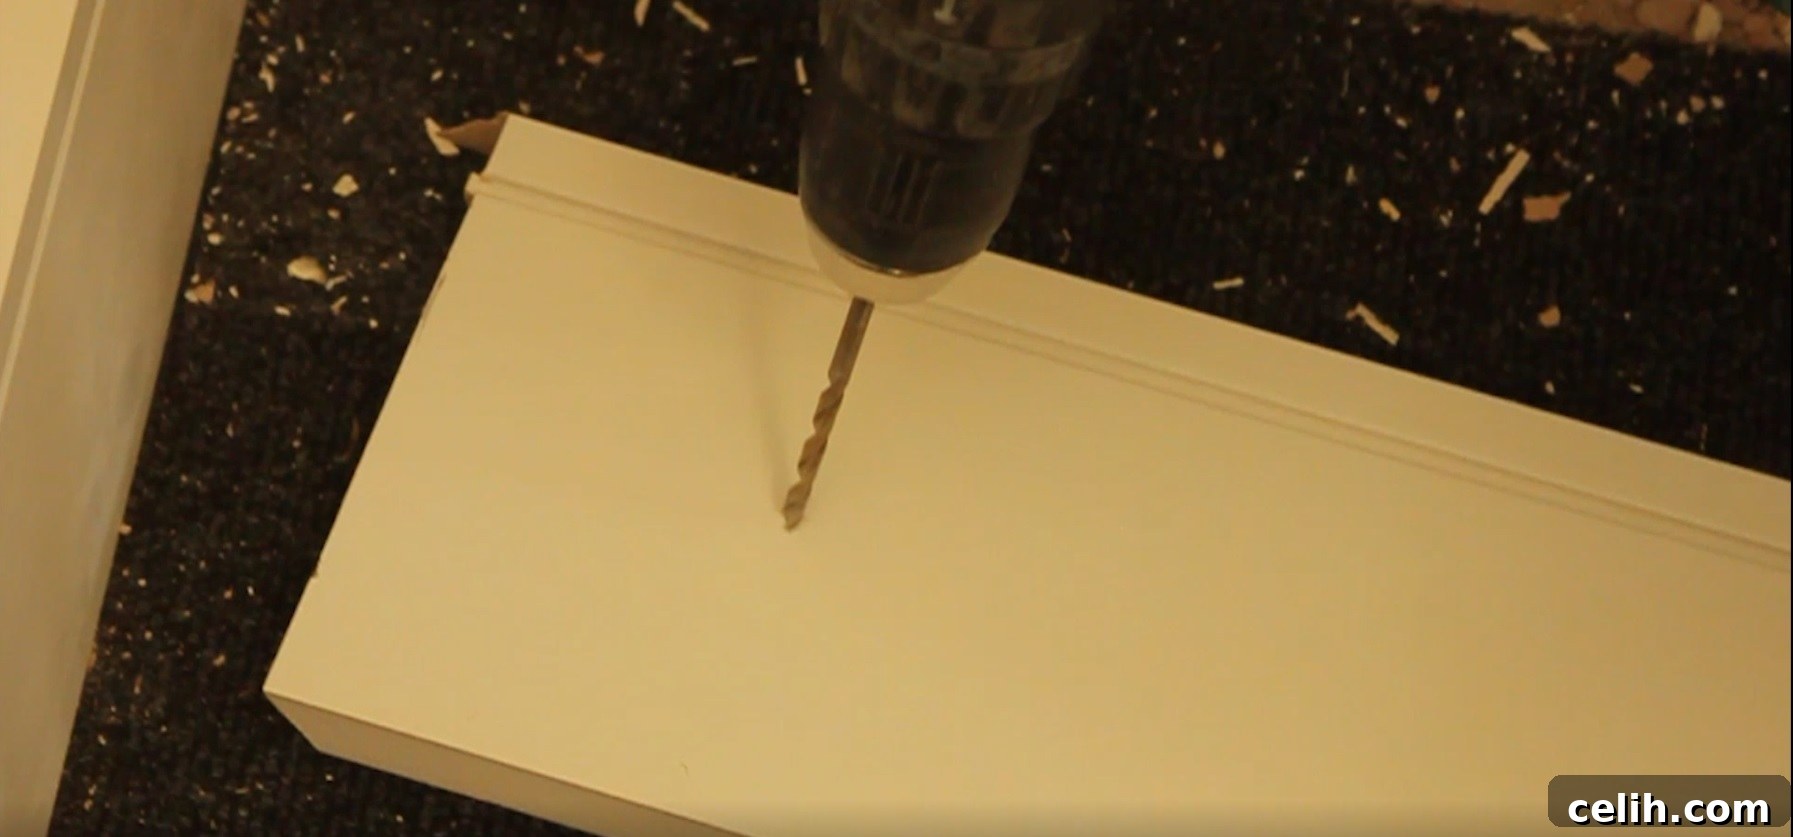
With the screw points marked, use an electric drill with a wood drill bit slightly smaller than the diameter of your screws to drill pilot holes through the board. These pilot holes prevent the wood from splitting when the screws are driven in. Ensure your drill is perpendicular to the board for straight holes. This is the first of two drilling operations for each screw location.
Step 4: Countersinking the Screw Holes
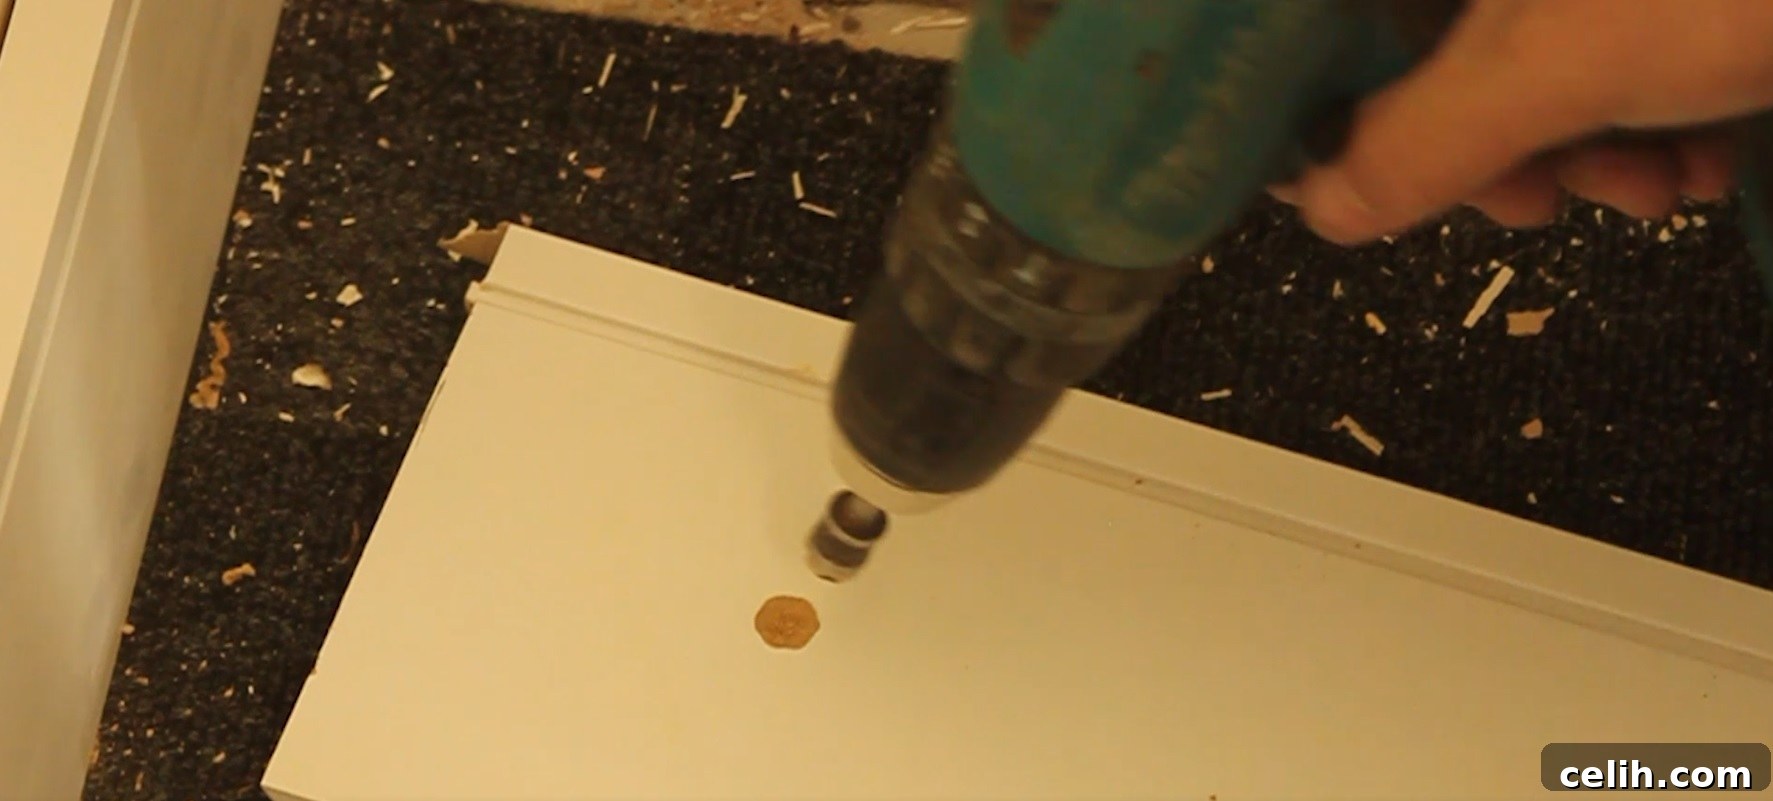
After drilling the pilot holes, use a countersink bit to create a conical recess around the top of each hole. This step is crucial because it allows the head of the screw to sit flush with or slightly below the surface of the skirting board. A flush finish is essential for a professional appearance, making the screw heads virtually invisible once filled and painted. Drill just deep enough for the screw head to recess, without going too deep.
Step 5: Applying Adhesive and Initial Board Placement
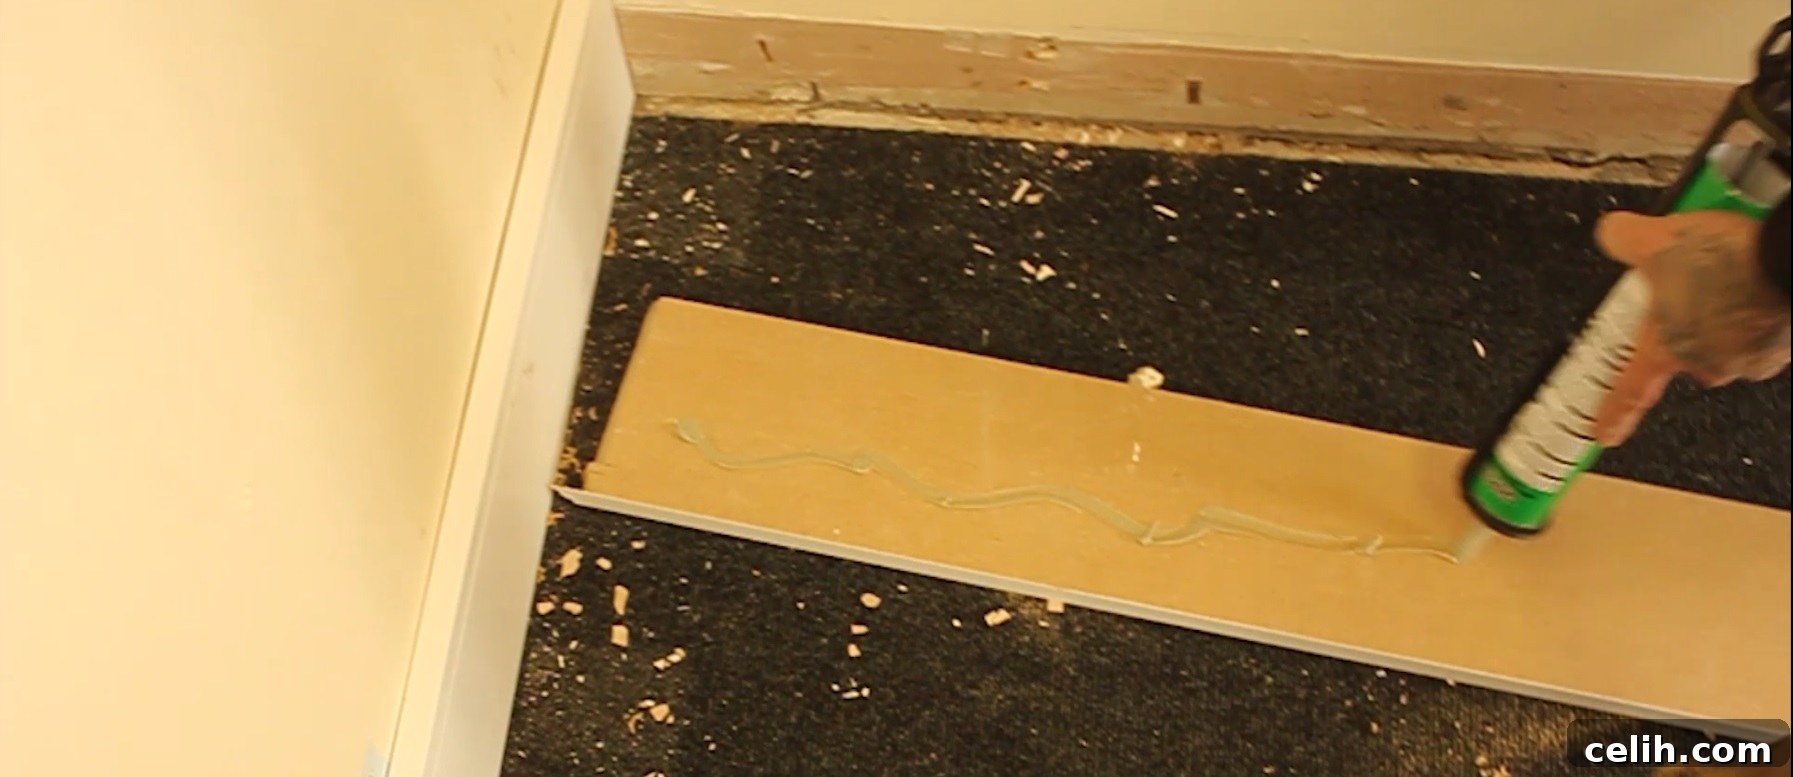
Apply a continuous “squiggly” line of strong grab adhesive to the back of the skirting board, covering a good surface area for optimal bonding. Carefully position the board against the wall, aligning it correctly with the floor and any adjacent boards. Press it firmly into place to allow the adhesive to make initial contact. Double-check for levelness using your spirit level at this stage.
Step 6: Marking and Drilling into the Wall
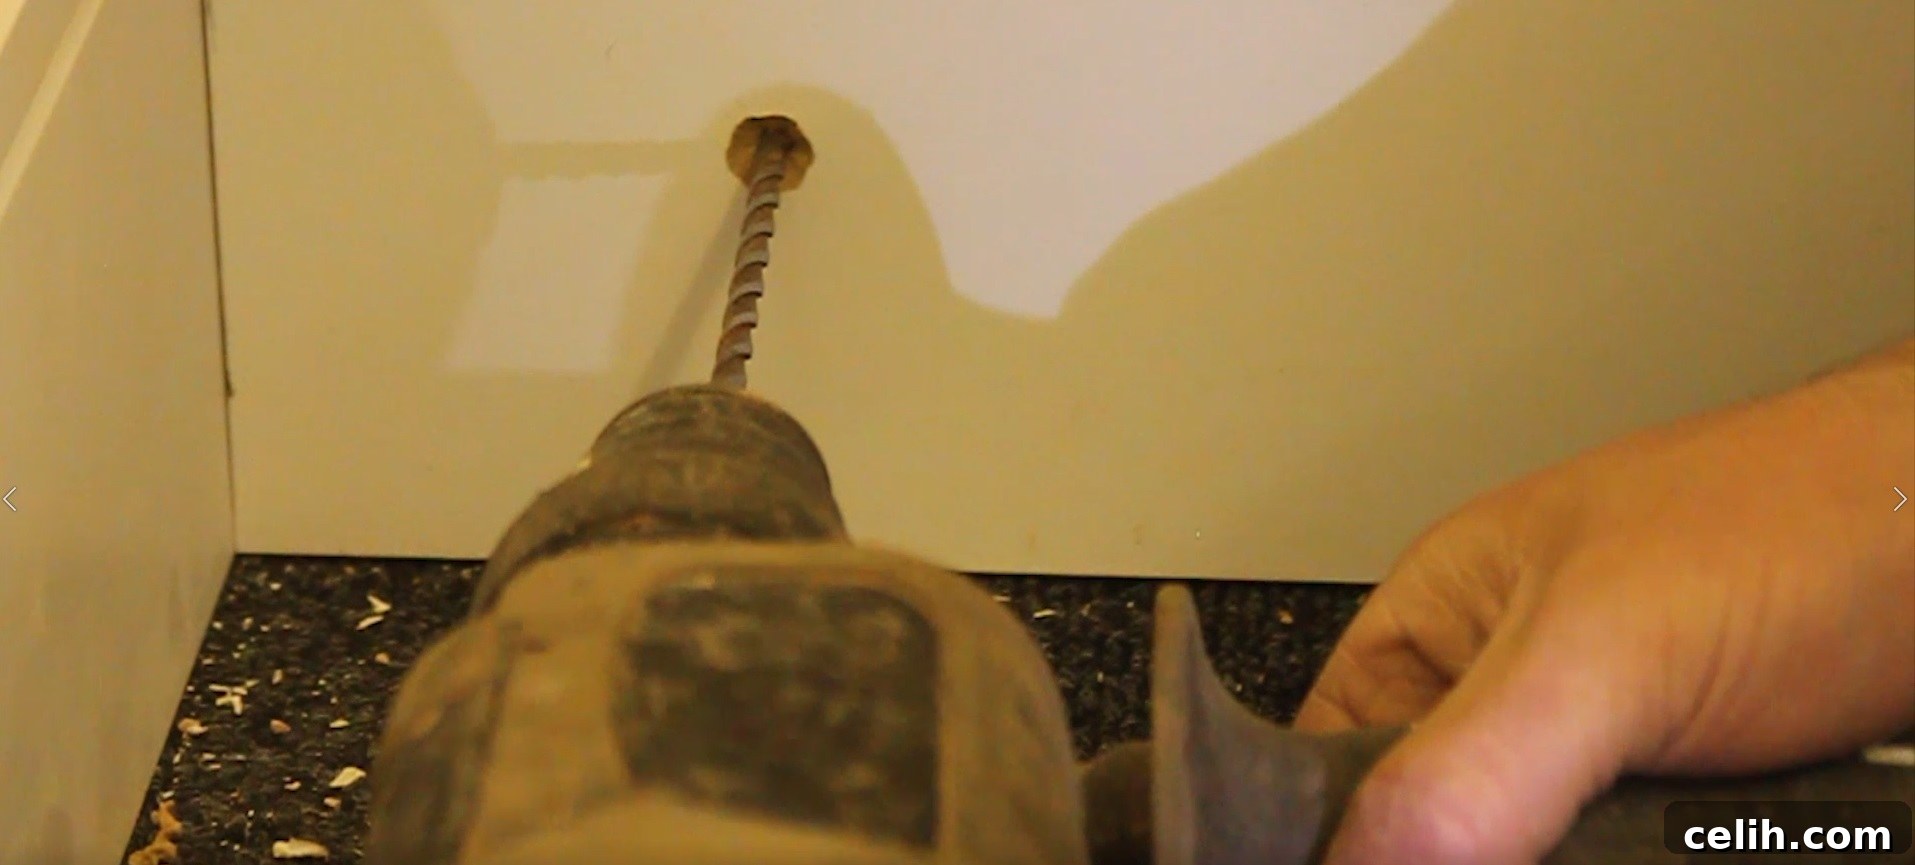
Once the board is temporarily held by the adhesive, use your drill (with a masonry bit if drilling into plaster over brick/concrete, or a wood bit for plasterboard/studs) and, using the pilot holes you’ve already made in the skirting board as guides, drill into the wall. Ensure you drill to an appropriate depth to accommodate the length of your wall plugs. This two-stage drilling process (board first, then wall through the board) ensures perfect alignment between the board and the wall.
Step 7: Inserting Wall Plugs
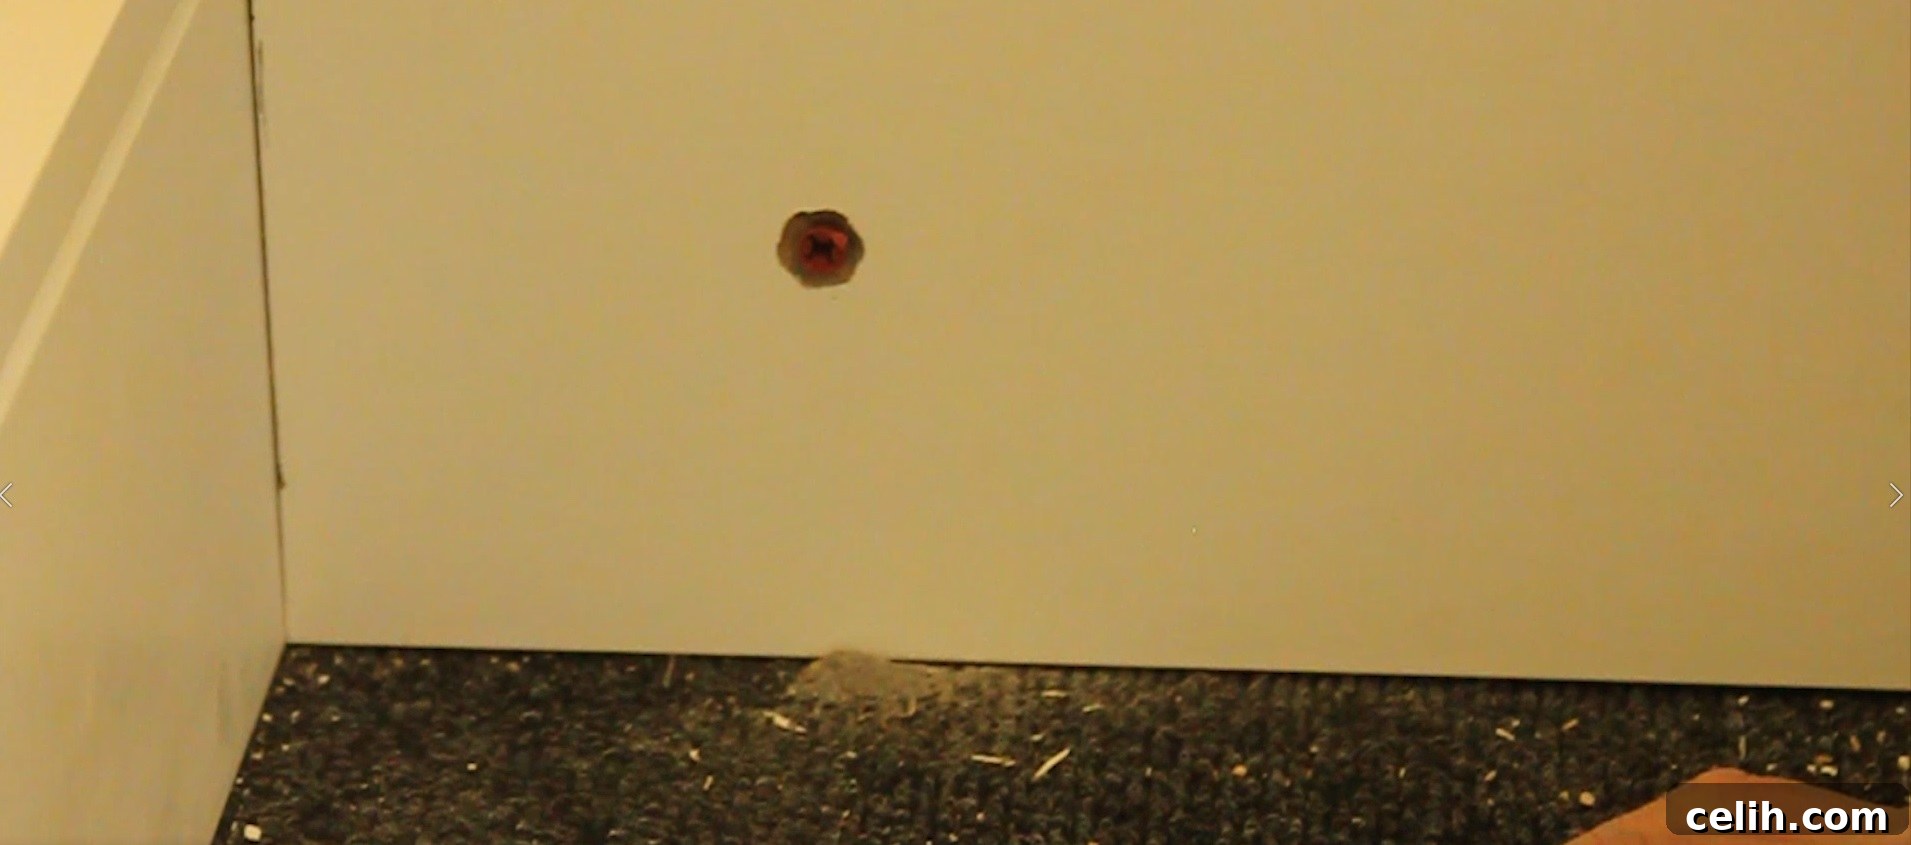
Remove the skirting board temporarily. Firmly insert the appropriate sized wall plugs into the holes you’ve just drilled into the wall. Use a hammer to gently tap them flush with the wall surface if necessary. Wall plugs provide a secure anchor point for your screws, especially in masonry or plasterboard, ensuring a tight and lasting fit for your skirting boards.
Step 8: Securing the Skirting Board with Screws
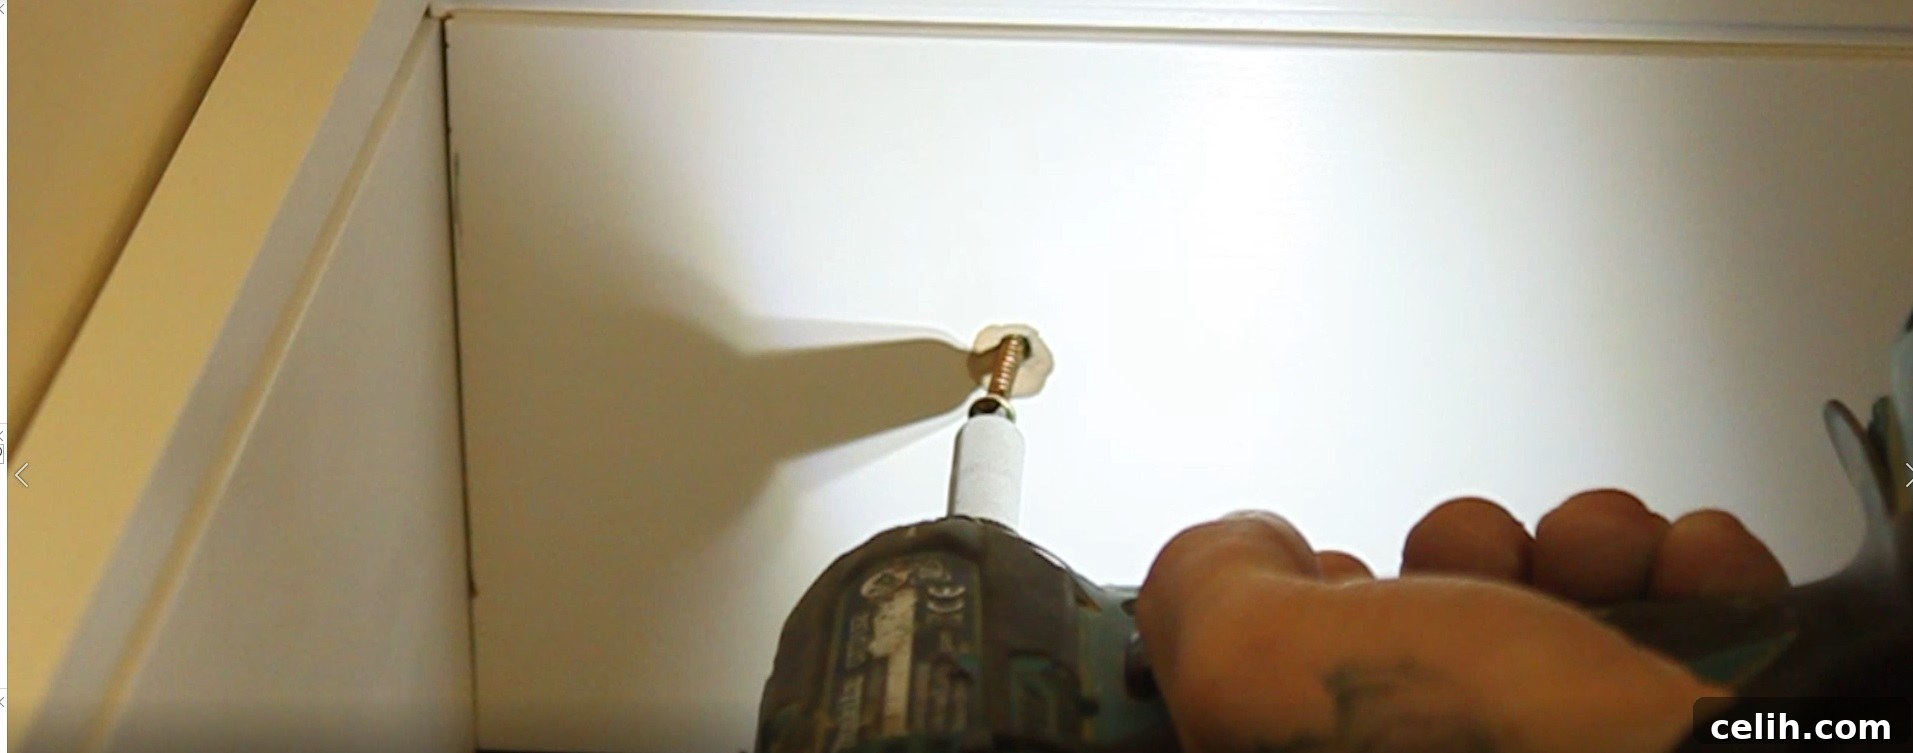
Apply fresh adhesive if the first layer has started to dry. Re-position the skirting board against the wall, aligning the pilot holes with the wall plugs. Now, using your electric drill or screwdriver, drive the screws into the wall plugs through the countersunk holes in the skirting board. Tighten them securely, but avoid over-tightening, which can strip the wall plugs or damage the board. The screw heads should sit neatly within the countersunk recesses.
Step 9: Finishing Touches: Filling and Painting
Once all screws are in place, apply wood filler or spackle to cover the countersunk screw heads, making them invisible. Also, use decorator’s caulk to fill any tiny gaps between the top edge of the skirting board and the wall, and between the skirting board and the floor. Allow these to dry thoroughly, then lightly sand the filled areas for a smooth finish. Finally, prime the skirting boards and paint them in a colour of your choice. Remember, white is a classic choice, but experimenting with other colours can create unique and stunning effects. For creative tips and tricks on decorating your skirting boards, be sure to check out our skirting board decorating post for inspiration.
How to Safely Remove Old Skirting Boards
If your current project involves replacing existing skirting boards, it’s crucial to remove the old ones carefully to avoid damaging the plasterwork behind them. Rushing this step can lead to costly repairs and additional work. Here’s a general guide for safe removal:
- Score the Paint Lines: Use a sharp utility knife to carefully score along the top edge of the skirting board where it meets the wall. This breaks the paint seal and prevents the plaster from tearing when you pry the board away.
- Locate Fastenings: If possible, identify where the old boards are nailed or screwed into the wall. Knowing this can help you target your prying efforts.
- Gentle Prying: Starting from one end, gently insert a thin, flat pry bar or sturdy chisel into the gap between the top edge of the skirting board and the wall. Place a thin piece of wood or cardboard against the wall as a buffer to protect the plaster.
- Leverage and Work Along: Apply gentle, even pressure to lever the board away from the wall. Work your way along the length of the board, gradually increasing the gap. Avoid aggressive prying in one spot, as this can crack the plaster.
- Deal with Stubborn Fasteners: If you encounter resistance from nails or screws, try to work around them. Once the board is sufficiently loose, you may be able to pull it away, leaving the fasteners in the wall, or carefully pry them out with pliers.
- Dispose Safely: Once removed, dispose of the old skirting boards responsibly.
For a detailed visual demonstration, consider watching this video to master the technique of safely removing old skirting boards:
Tips for a Flawless Skirting Board Finish
Achieving a truly professional finish goes beyond just the installation steps. Here are some invaluable tips:
- Acclimatize Your Boards: Allow your new skirting boards to sit in the room where they will be installed for at least 48 hours before fitting. This lets the wood adjust to the room’s temperature and humidity, minimizing future expansion or contraction.
- Precision Miter Cuts: Invest in or rent a good quality miter saw. Perfect 45-degree cuts for corners are essential for seamless joins. Practice on scrap pieces first.
- Use a Spirit Level Constantly: Even if your floor is uneven, try to keep the top edge of your skirting board as level as possible. Any slight discrepancies can be managed with caulk at the top.
- Fill and Sand Thoroughly: Don’t underestimate the power of wood filler for nail/screw holes and minor imperfections. Sanding until perfectly smooth is crucial before priming and painting.
- Caulk for Seamlessness: Decorator’s caulk is your best friend for achieving a gap-free finish. Apply a thin bead along the top edge where the skirting meets the wall and, if necessary, along the bottom edge where it meets the floor. Smooth it with a wet finger or a caulking tool.
- Prime Before Painting: Always apply a good quality primer to raw or pre-primed skirting boards before your topcoat of paint. This ensures better paint adhesion, a smoother finish, and durability.
- Clean as You Go: Keep your workspace tidy and clean off any excess adhesive or caulk immediately.
Conclusion: Transform Your Space with DIY Skirting Boards
Installing skirting boards might seem like a detailed project, but with these step-by-step guides, it’s a highly rewarding endeavor that empowers you to enhance your home with confidence. Whether you choose the efficiency of nails and adhesive or the robust security of screws, the satisfaction of standing back and admiring your handiwork is immense. Skirting boards not only provide vital protection to your walls and cleverly hide imperfections, but they also significantly contribute to the overall elegance and completeness of your interior design. By following these instructions and taking your time with each step, you can achieve a professional, polished finish that will transform your living space. Embrace the challenge, enjoy the process, and take pride in the beautiful results of your DIY efforts!
Top image credit: Shutterstock
(Disclosure: Collaborative post)