
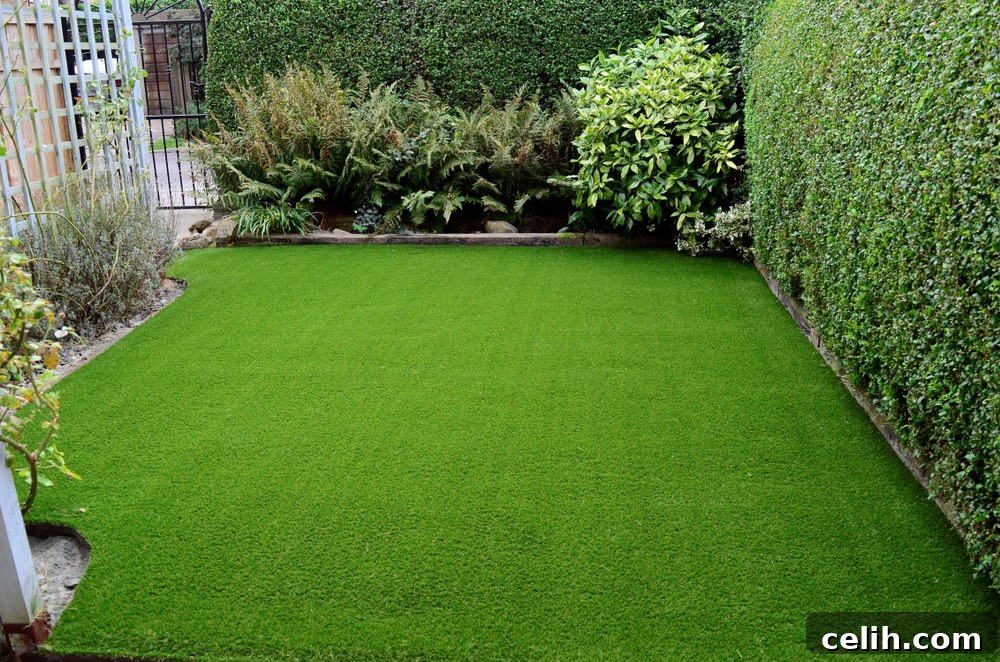
Transforming your garden with artificial grass is a decision that promises year-round vibrancy and effortless beauty. Unlike natural lawns, synthetic turf requires no mowing, watering, or fertilizing, making it an ideal choice for modern living. This comprehensive guide will walk you through the essential steps of cutting and installing artificial grass, ensuring you achieve a flawless finish that stands the test of time. From meticulous ground preparation to precision cutting techniques and vital finishing touches, we’ll cover everything you need to know to make your artificial lawn a long-term, valuable investment for your outdoor space.
The Enduring Appeal of Artificial Grass: Why Choose Synthetic Turf?
The reasons homeowners are increasingly opting for artificial grass are manifold, stemming from both practical advantages and aesthetic desires. Modern synthetic turf offers an incredibly realistic appearance, mimicking the lushness and texture of natural grass without any of the associated upkeep. Understanding these benefits can help you appreciate the value this innovative landscaping solution brings to your home.
Unmatched Durability and Minimal Upkeep
One of the primary draws of a fake lawn is its low-maintenance nature. Imagine reclaiming hours spent on weekend chores: no more wrestling with a bulky lawnmower, no more endless weeding, and no more constant battle against pests or dry patches. Artificial grass eliminates the need for expensive fertilizers, harmful pesticides, and significant water consumption, offering an eco-friendly alternative that saves both time and money. Its robust construction ensures it remains verdant and attractive regardless of the season or weather conditions, providing a consistently perfect appearance without effort.
A Sanctuary for Families and Pets
For households with children and pets, synthetic turf presents a hygienic and safe play environment. It’s inherently mud-free, preventing dirty footprints from being tracked indoors and keeping pets cleaner. Many high-quality artificial grasses are designed with excellent drainage, swiftly dispersing liquids and making cleanup a breeze. Furthermore, the absence of pollen and other common allergens makes it a fantastic option for allergy sufferers, allowing everyone to enjoy the garden comfortably.
Aesthetic Versatility and Problem-Solving
Artificial grass is a chameleon in landscape design. It excels in areas where natural grass struggles to thrive, such as shady spots under trees, highly trafficked pathways, or awkward, irregularly shaped sections of the garden. It’s also perfect for creating sleek, contemporary spaces on balconies, rooftops, or small urban courtyards. With a vast array of colours, pile heights, and textures available, you can select a synthetic lawn that perfectly complements your home’s aesthetic, creating a continuously pristine and inviting outdoor area.
The Smart Investment: Long-Term Savings and Value
While the initial outlay for artificial grass may be higher than traditional turf, it proves to be a shrewd long-term investment. The savings accumulate over the years from reduced water bills, no need for gardening equipment, and fewer expenses on fertilizers and pest control. Its extended lifespan, often backed by impressive warranties, means you won’t face recurring costs for re-seeding or re-turfing, ensuring your garden remains beautiful and hassle-free for many years to come.
For expansive areas or complex installations, engaging professional installers is often recommended. Their expertise ensures precise measurements, optimal tensioning, and the use of specialized tools, guaranteeing a robust and visually impeccable result. However, for smaller projects, the installation of artificial turf is a gratifying DIY endeavour that many homeowners can successfully undertake with careful planning and execution.
Meticulous Planning: The Foundation of a Perfect Artificial Lawn
Before any cutting or laying begins, thorough planning is paramount. This initial phase dictates the success and longevity of your synthetic turf installation. Skimping on planning can lead to costly mistakes, wasted materials, and an unsatisfactory finish. A well-thought-out strategy ensures efficiency, accuracy, and a beautiful result.
Accurate Measurement and Area Assessment
The first step is to meticulously measure the area where your artificial grass will be installed. Use a reliable tape measure to determine the length and width of the space. For irregular shapes, it’s advisable to break the area down into smaller, manageable rectangles or squares. Account for any existing features such as trees, flowerbeds, patios, or architectural elements that will require the turf to be cut around. Drawing a detailed diagram of your garden, marking all dimensions and obstacles, will serve as an invaluable blueprint throughout the project.
Calculating Materials and Minimizing Waste
Artificial grass typically comes in large rolls of varying widths, often 2 or 4 meters. Based on your measurements, carefully calculate how many rolls you will need. Always factor in a small amount of extra material, typically around 10-15%, to account for trimming, errors, and waste. It’s far better to have a little too much than not enough, as matching batches of synthetic turf later can be challenging. Confirm the thickness and overall dimensions of the rolls before purchase to ensure they meet your project requirements and budget.
Understanding Artificial Grass Types and Pile Direction
When purchasing your artificial grass, consider the various types available, often differentiated by fibre material (polyethylene, polypropylene, or nylon), pile height, and density. These factors influence both the look and feel, as well as the durability, of your new lawn. Crucially, all rolls of artificial grass have a pile direction – the way the individual blades of grass lean. For a uniform and natural appearance, it is absolutely essential that all sections of turf are laid with the pile facing in the same direction, typically towards the primary viewing point of the lawn. This consistency prevents noticeable variations in colour and texture between different pieces, ensuring a seamless finish.
Essential Ground Preparation for Optimal Results
The quality of your artificial grass installation hinges almost entirely on the thoroughness of your ground preparation. A stable, smooth, and well-drained base is critical for preventing unevenness, promoting drainage, and ensuring the longevity of your synthetic lawn. Rushing this stage will compromise the final appearance and performance of your investment.
Removing Existing Turf and Excavating the Base
If you currently have a natural lawn, it must be completely removed. It is not advisable to lay artificial grass directly over existing turf or topsoil, as this can lead to uneven settling, poor drainage, and weed growth. For small areas, a robust spade can be used to dig up the existing lawn. For larger installations, renting a turf cutter will significantly speed up and simplify the removal process. Once the existing grass is gone, excavate the area to a depth of approximately 75-100mm (3-4 inches). This depth allows for a robust sub-base and drainage layers.
Establishing a Stable Sub-Base and Edging
After excavation, the next step is to create a solid sub-base. Lay down a layer of crushed hardcore (such as MOT Type 1 or similar aggregate) to a depth of roughly 50-75mm (2-3 inches). Rake this material evenly across the entire area and then compact it thoroughly using a plate compactor or roller. Compaction is vital to create a firm, stable foundation that won’t shift or settle over time. Around the perimeter of your installation, install a timber edge (pressure-treated timber is recommended for durability) or a flexible plastic edging system. This border provides a secure anchor point for your artificial grass and helps define the lawn’s shape.
The Crucial Role of the Weed Barrier
Once the hardcore sub-base is compacted, lay down a high-quality geotextile weed membrane. This crucial layer prevents weeds from growing through your artificial grass and also helps to stabilize the sub-base. Overlap the edges of the membrane by at least 150mm (6 inches) and secure it with U-pins or landscaping staples, especially along the edges and any seams. Ensure the entire area is covered, leaving no gaps for enterprising weeds to exploit.
Laying the Levelling Sand Layer
On top of the weed membrane, spread a layer of sharp sand or grano dust (a finely crushed granite aggregate) to a depth of about 25mm (1 inch). This layer serves two primary purposes: to provide a perfectly smooth, level surface for the artificial grass, and to facilitate excellent drainage. Rake the sand evenly, and then use a long, straight edge (a timber plank or spirit level) to screed it perfectly flat, gently compacting it as you go. Any imperfections in this layer will be visible in the finished lawn, so take your time to achieve a pristine surface.
Adapting to Existing Hard Surfaces
It’s also possible to install artificial grass on existing hard surfaces like paving, concrete, or decking. In such cases, the excavation and sub-base layers are often unnecessary. Instead, focus on ensuring the existing surface is clean, level, and allows for adequate drainage. You may need to drill drainage holes into solid concrete or ensure gaps in decking are clear. For these installations, specialized outdoor adhesive or heavy-duty carpet tacks are typically used to secure the synthetic turf, ensuring a firm and durable attachment.
Precision Cutting: Shaping Your Artificial Lawn
Once your ground preparation is complete, it’s time to unroll and cut your artificial grass. This stage requires patience, precision, and the right tools. Careful cutting ensures a snug fit and a professional-looking finish, preventing visible gaps or unsightly overlaps.
Assembling Your Cutting Toolkit
Before you begin, gather all necessary tools:
- Heavy-duty utility knife: Equipped with fresh, sharp blades. Have several spare blades on hand as they dull quickly.
- Large, sharp scissors: Useful for intricate trimming and cutting pile.
- Tape measure and marker pen: For accurate marking.
- Chalk line: Essential for marking long, straight cuts.
- Straight edge: A long ruler or piece of timber to guide your knife.
- Safety gloves: To protect your hands while handling sharp tools and the turf.
For circular or curved areas, a large compass or a simple pin and string can help you mark a perfect arc.
Strategic Layout and Initial Trims
Carefully unroll your artificial grass over the prepared base, ensuring that the pile direction is consistent across all pieces and pointing towards your main viewing area. Allow the turf to settle for a few hours, or even a full day, to relax and flatten out, especially if it’s been tightly rolled. Begin by laying the longest, largest pieces first. Position the turf so it slightly overlaps the edges of your installation area and any obstructions. This initial overlap is intentional; you will trim it down precisely in subsequent steps.
Mastering Straight Cuts and Intricate Shapes
All cutting should primarily be done from the back (underside) of the artificial grass. This method prevents damage to the fibres and allows for cleaner, more accurate cuts along the backing material, where stitching lines are visible. For straight edges, use your chalk line to mark your cut, then place a strong, rigid straight edge along the line. Using your utility knife with a sharp blade, make firm, continuous cuts. Apply consistent pressure and use the tip of the blade, scoring through the backing with deliberate movements. Avoid sawing motions, which can fray the edges. When cutting around curves or irregular objects, make a series of small, gradual cuts rather than attempting one long, sweeping cut. You can create a template for complex shapes from cardboard or paper first to ensure accuracy.
The Art of Seaming: Joining Artificial Grass Sections
If your installation requires multiple rolls, precise seaming is critical for an undetectable finish. Lay the pieces of turf side-by-side, ensuring the pile runs in the identical direction. Trim the edges of both pieces of turf to create perfectly straight, flush edges, removing any selvedge or excess backing. Bring the two cut edges together, leaving a hairline gap – they should be almost touching but not overlapping. Once aligned, carefully lift the joining edges and lay a specialized artificial grass joining tape underneath. Apply a generous, even layer of outdoor-grade adhesive to the tape using a mastic gun. Then, slowly and carefully lower the turf edges onto the adhesive, pressing down firmly along the seam. Walk along the seam to ensure maximum contact and adhesion, and avoid disturbing it for at least 24 hours while the adhesive cures. The goal is an invisible seam that blends seamlessly with the rest of the lawn.
The Finishing Touches: Securing, Infilling, and Maintenance
With the cutting and seaming complete, the final steps transform your laid turf into a beautiful, functional artificial lawn. These finishing touches are crucial for its stability, realistic appearance, and long-term durability.
Anchoring the Artificial Turf
Once the turf is perfectly positioned and seamed, it needs to be securely anchored. For installations with a timber edging, you can nail or screw the perimeter of the artificial grass directly into the timber frame, ensuring the turf is taut and free of wrinkles. Alternatively, or in conjunction with nailing, U-shaped landscape pins (also known as turf staples) can be hammered through the backing of the turf around the perimeter and at intervals across the lawn, especially in high-traffic areas. When installing on hard surfaces like concrete or decking, a robust outdoor adhesive should be used around the entire perimeter and possibly in key areas across the surface to prevent lifting or shifting.
The Importance of Infill Material
Infill material is a critical, yet often overlooked, component of artificial grass installation. Typically, fine silica sand or crumb rubber is brushed into the fibres of the turf. The infill serves multiple vital functions: it helps the blades stand upright, giving the lawn a fuller, more natural appearance; it adds weight, further stabilizing the turf and preventing wrinkles; it provides a protective layer for the backing, extending the life of the grass; and for pet-friendly installations, specialized infills can help with odour control. Distribute the infill evenly across the entire surface using a broadcast spreader, then brush it deeply into the pile with a stiff broom or power brush until it disappears from sight.
Brushing for a Natural Look
After the infill has been applied, a final brushing is necessary. Use a stiff-bristled broom or a power brush (specifically designed for artificial turf) to brush against the grain of the pile. This action helps to lift the fibres, making the lawn look more voluminous and natural, replicating the look of freshly cut grass. Regular brushing, particularly after heavy use or adverse weather, will help maintain this upright, vibrant appearance.
Ongoing Care and Longevity Tips
One of the greatest advantages of artificial grass is its minimal maintenance. However, a little care goes a long way in ensuring its longevity and pristine appearance. Regularly remove leaves, debris, and pet waste using a stiff broom, leaf blower, or hose. For spills or tougher stains, mild soap and water usually suffice. For pet odours, specialized turf cleaners are available. Periodically, especially in high-traffic areas, brush the turf against the pile to help the fibres stand upright. With proper installation and occasional light maintenance, your artificial grass will remain a beautiful, functional, and hassle-free feature of your garden for many years, enhancing your outdoor living experience without the traditional demands of a natural lawn.
Featured image credit: Gerry Burrows / Shutterstock